
🎯 The core idea
A WARDOGS mortar wins games when it fires first and fires at the right things. Read the range off the map, set the sight to it, load three shells and walk them onto the enemy's mortars before anything else. Season 02 made the L81 four times as expensive to build and halved the shells you get per ammo pallet, so every salvo needs a target worth more than the shells.
- free costs nothing
- cheap small cost
- setup needs preparation
- grind pays off slowly
- skip the thing to stop doing
Why mortar superiority decides matches

The L81 mortar is the indirect-fire weapon you build at a forward base. It lets one player hit enemy structures, vehicles and builders from hundreds of metres away without ever seeing them directly. The WARDOGS wiki sums it up the same way: a static emplacement that depends on a protected base and a steady supply of ammo.
This guide is built on two long matches. RadioGLHF's full match (67 minutes, recorded on 15 September 2026, before Season 02) shows one player in a hidden mortar pit in the woods dismantling two enemy bases. He took out their mortars, anti-air, oil rigs, an APC and a spawn vehicle, and finished at the top of the scoreboard without dying. His view: if you have mortar superiority, everything else falls into place, because the enemy cannot hold mortars, anti-air or drills while shells keep landing on them. Lil PeanutArc's 50-minute match shows the other side: his squad was shelled from a tower base and had to win a mortar duel to stop it.
Both videos are from Season 01. The aiming and target choice still hold; the costs and ammo numbers do not. Every Season 02 change is named in the section where it matters and collected in a table near the end.
How to build a mortar in Season 02

setup The mortar is built like any other base structure: place it, then hammer it up with build supplies from the base's stock. Season 02 raised the L81 Mortar from 150 to 600 build supplies, so one mortar now costs what four did at launch. A fresh base with one truckload of supplies cannot cover walls, anti-air and a mortar at once any more. Plan the mortar into the supply budget from the start instead of adding it at the end.
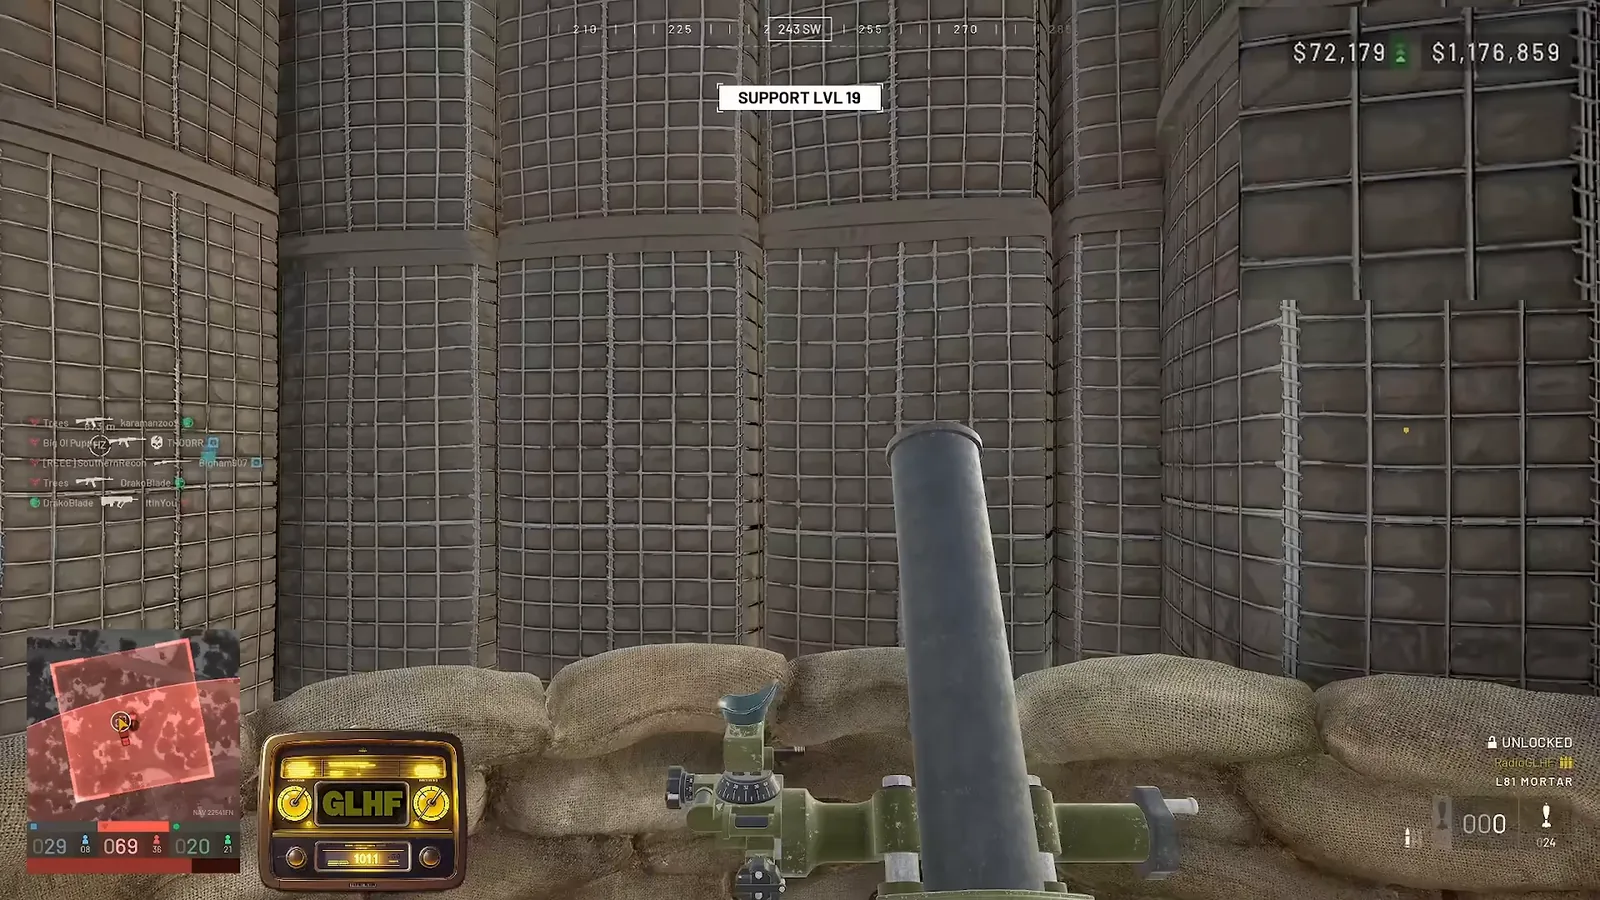
Where you put it matters more than what it costs. The layout side (a walled pit inside the base with one door, set back far enough from the wall you fire over) is covered in our guide to building a defended forward base. Two placement lessons from the videos belong here:
- skip Don't build mortars side by side. RadioGLHF called this one of his favourite things to see: one shell landing between two tubes takes out both, and the crew with them. Spread them out across the base.
- Hesco around a target works. When the enemy ringed a drill with Hesco blocks, the walls contained the blast and he had to drop shells exactly inside the ring. It slows a mortar down, but enough misses still knock the Hescos down.
Peanut's squad found their mortar already sitting in a sandbag ring on a tower base, which is the typical public-match situation: you often use a teammate's tube rather than build your own.
Reading the mortar map for range and bearing

free The WARDOGS mortar map is your rangefinder. Open the map and hover the cursor over the target: the label shows the range (RNG, here 455 m), the height above sea level (ASL 20 m) and the grid coordinates. RadioGLHF's reminder in the video is exactly this: mouse over the target on the map to get your range. The small grid squares are 100 m, which the map labels on its edge, so you can also count squares for a rough range.
The map's own controls are listed along the bottom: ping, mark coordinates, toggle zoom (N), recenter (X). Pinging the target puts a marker in the world, which makes turning the tube toward it much easier.
The ASL value is there for a reason. A target on a hill or down in a valley is not at the same height as your tube, and from his position RadioGLHF could just barely not reach an APC 551 m away. Neither video measures how much height changes the range, so treat it as a cue to adjust after the first shell rather than a number to calculate.
How to use the mortar sight

free Right-click on the mortar to look through the sight. Three things matter on it:
| Sight element | Where | What you do with it |
|---|---|---|
| Compass strip | across the top | turn until the bearing to the target is under the centre marker (234 SW in this frame) |
| RNG scale | left side | the range ticks in metres |
| MIL scale | right side | the matching elevation in mils |
The routine is: get the range and direction from the map, turn the tube until the compass shows that bearing, then raise or lower the barrel until the sight sits on the range you read. RadioGLHF noted one position as roughly "250 bearing, 250 metres" so he could come back to it later. Write down the bearings and ranges of enemy positions you hit once; bases get rebuilt in the same spot, and he wished he had simply left the sight on a drill location the enemy kept rebuilding.
This frame is from the moment an "Artillery kill, 350 XP" popped up, which is also how the game labels mortar kills.
Do you need a WARDOGS arty calc?

skip Players coming from other military shooters search for a WARDOGS arty calc, a tool that turns map distance into a sight setting. You don't need one here, and there is no official calculator. The map already gives you the range in metres, and the sight already has a range scale, so the conversion happens in the game. Range tables made for other games do not carry over, and the developers have not published the L81's ballistics.
What you do need is a first-shot habit. In Peanut's mortar duel the spotter read the distance and direction off the map ("470, southeast"), the gunner set it and fired, and the first shell landed close enough to reveal the enemy tubes for the follow-up. A rangefinder takes the guesswork out of that first call too: the Range Finder now costs $1,450 in the shop and $25,000 to unlock (up from $400 and $15,000), and the Infrared Range Finder $3,200 with a battery that lasts around 80 seconds of use.
The triple shot and the shell camera

setup RadioGLHF's main firing pattern is the triple shot:
- Press R to load shells until three are ready.
- Fire the first, press C when the shell camera opens to skip it, fire the second, skip again.
- Fire the third and follow it down on the shell camera to see what you hit.
- While that shell is in the air, keep pressing R to load the next three.
The shell camera is your spotter. It looks down on the target area from high above, which is how he found anti-air, an oil rig and a respawn vehicle he could not see from his pit. Peanut's squad used the same view to find three mortar circles on the back side of an enemy base.
Season 02 slowed this down on purpose. The patch notes add a new firing animation in which your soldier drops the shell into the tube as it fires, "to reduce the fire rate of the mortar". Expect your three shells to leave the tube noticeably slower than in either video.
Walking shells onto a target

cheap The first salvo rarely lands dead on. Watch where the third shell hits on the camera, then nudge the bearing or range and fire again. Move the aim slightly between the three shells when you want to spread them over a base rather than stack them on one point.
RadioGLHF also noticed something worth knowing: firing again at the exact same setting sometimes landed about 20 m left or right. Late in the match he concluded that you need to let the sight settle after each shot before firing the next one. The patch notes say nothing about mortar spread or wind, so treat this as one player's observation, but it costs nothing to wait a second between shells.
A bigger lesson from the same match: defenders repair. He needed all three shells on one drill because the enemy kept hammering it back up after each hit. When you see builders, keep the shells coming until the structure is gone, or the first two were wasted.
Target priority for a mortar crew

free RadioGLHF's order, which he repeated on both enemy bases:
- Enemy mortars, so they cannot return fire.
- Anti-air, which frees your team's helicopters.
- Spawn vehicles and armoured vehicles parked near the base.
- Drills and oil rigs, then everything else.
Season 02 rewrote what each target pays. Cash for a destroyed buildable now matches its build supply cost, with XP at roughly 25% of the cash:
| Target | Season 01 | Season 02 |
|---|---|---|
| L81 Mortar | $300 | $650 |
| Talon 9K-SAM | $2,000 | $650 |
| Vanguard CIWS | $3,000 | $1,200 |
| Hot Zone Magnet | $4,500 | $2,750 |
| Ural (default) | $2,500 | $1,000 |
| SPH-2 | $14,000 | $8,000 |
| Supply pallet | $1,000 | $800 |
The video's "4.5K for the drill" matches the Season 01 Hot Zone Magnet payout, so the drills he was paid for are on that line; at Season 02 rates the same hit pays $2,750. Destroying a whole enemy FOB now also pays up to $7,500 and 250 XP depending on the supplies it held. The order above still makes sense: mortars and anti-air are cheap kills now, but they are what stops your team from playing.
Ammo: shells per pallet and per Ural

grind A mortar is only as good as its ammo supply. Each restock from the base's munition supplies went from 75 to 150 in Season 02, which the patch notes say is meant "to reduce the amount of shots that can be fired per pallet drop-off". Shells per Ural are worked out from the video figure of 1,800 ammo per pallet used in our tips guide, and the wiki's two pallets per Ural:
| Season 01 | Season 02 | |
|---|---|---|
| Ammo per restock | 75 | 150 |
| Shells per ammo pallet | 24 | about 12 |
| Shells per Ural (two pallets) | 48 | about 24 |
RadioGLHF's own count backs up the old number: a two-pallet delivery left him at 48 shots. Over the match he went through 12 or 13 pallets of ammo. With Season 02 costs the same match would need twice the deliveries, which is why a mortar player now needs a dedicated runner. His friend finished fourth on the scoreboard just from delivering ammo, earning assists (about 350 XP each, by his account) when the mortar and anti-air crews he supplied got kills. Season 02 pays that runner better for staying on the job: each pallet delivered in a row adds $250 and 100 XP, up to 10 in a row. Note that the Ammo Supply Pallet is no longer unlocked by default; it now needs WARDOG level 9 and $25,000.
Count your shots. With 24 shells a truckload, the triple shot burns through a delivery in eight salvos, so save full salvos for mortars, anti-air and vehicles and fire single shells at builders.
Winning a mortar duel

setup Peanut's squad shows counter-battery fire from the receiving end. They were taking shells, guessed the enemy was firing from the red FOB at tower three because the other tower had no base, and got on a friendly mortar. The spotter read about 470 m to the southeast, the first shells landed in the enemy base, and the shell camera revealed the enemy tubes: three circles on the back side of the base. Of two shells aimed at two tubes, one scored the kill, and the enemy hit back hard enough to knock Peanut off his mortar.
What decides a duel:
- Fire first and fire at their mortars, even when other targets look juicier.
- Two tubes beat one. Peanut and a teammate fired salvos together at the same base, and soon every enemy tube they could see was destroyed.
- Recheck after you think they're done. After destroying four enemy mortars, shells kept landing; one more tube was hidden on the left of the base.
- Use the distraction. While both sides were busy with mortars, a teammate went in with C4 on the enemy base, which ended the duel faster than shells.
Staying alive as a solo mortar

setup RadioGLHF's base was not inside his team's main position. He built a small mortar pit in the woods in the north-west of the map, outside the circle behind tower four, where the enemy had no reason to patrol. He expected to make $10,000 to $20,000 before someone found him and threw grenades over the wall. Instead the enemy team ended up calling his location in all chat.
Habits that kept him alive for a full match:
- Out of the way, not in the hot zone. Nobody passes a pit hidden in trees by accident.
- A runner who knows the route. He talked his ammo driver along the back roads behind the tower, away from the fighting.
- Listen. He paused whenever he heard explosions nearby and checked behind him.
- Kill their mortars first. A mortar that can fire back is the one thing that can find you from a distance.
If you play alone, the same rules apply with less margin: with half the shells per pallet you will spend more time between deliveries, so pick the hide carefully.
Mortar or SPH-2 artillery?

grind WARDOGS artillery comes in two forms: the L81 mortar you build at a base and the SPH-2 self-propelled gun you drive. The SPH-2 moved in Season 02 from WARDOG level 90 to Driver level 31, and its unlock price dropped from $500,000 to $350,000. It is a vehicle, so it moves and needs no base, but it is a big target: destroying one now pays the enemy $8,000.
| L81 mortar | SPH-2 artillery | |
|---|---|---|
| How you get it | build at a base, 600 build supplies | unlock at Driver level 31, $350,000 |
| Moves | no | yes |
| Ammo | base munition supplies, 150 per restock | 155 mm shells carried and loaded into the gun |
| Paid to the enemy when destroyed | $650 | $8,000 |
How to aim and position the SPH-2 is covered in the artillery section of our tips guide. Mortar fire is still the cheaper way to start: anyone whose team has a base can do it, long before they reach Driver level 31.
What Season 02 changed for mortars

Both source videos predate Season 02 (Update 0.2.0, live 15 October 2026). This frame shows the Season 01 behaviour: an artillery kill paying 350 XP while the Support track is active. The Season 02 patch notes now send artillery XP to the Driver track instead of Support, and the game labels mortar kills as artillery kills, so expect mortar XP to land in Driver too. Everything else that changed:
| What | Season 01 (videos) | Season 02 |
|---|---|---|
| L81 Mortar build cost | 150 build supplies | 600 build supplies |
| Ammo per restock | 75 | 150 |
| Firing | shells fired straight away | new animation, slower rate of fire |
| Shells per Ural | 48 | about 24 |
| Artillery XP | Support track | Driver track |
| Mortar destroyed pays | $300 | $650 |
| Ammo Supply Pallet | unlocked by default | WARDOG level 9, $25,000 |
| SPH-2 | WARDOG level 90, $500,000 | Driver level 31, $350,000 |
The aim, the map, the triple-shot routine and the target order in the videos are unchanged. If you want every other change in the update, see the WARDOGS Season 2 patch notes guide.
Read next
- WARDOGS FOB guide: where the mortar pit goes inside a defended base.
- WARDOGS tips: SPH-2 artillery, rangefinders and vehicle cargo.
- WARDOGS strategy: drill rigs, towers and why they get shelled.
- WARDOGS money: what building and logistics pay after Season 02.
- WARDOGS guide for beginners: vendors, hammers and the basics.
- All guides for the game: WARDOGS hub.
- WARDOGS SAM Site Guide: How to Build Anti-Air That Works — How to build a Talon 9K-SAM anti-air site on a walled recon tower that snipers, Urals and rockets struggle to break, and how Season 2's reload and restock changes cut two ammo pallets from about 75 missiles to 18.
- WARDOGS Building Guide: Tips for Tougher Fortifications — The WARDOGS building toolbox for Season 2: which hammer builds what, current build supply costs, faster building with critical spots, and fortification tricks like murder holes, hedgehog walls and trap entrances.
How this guide was fact-checked
- Official Season 02 patch notes (14 October 2026): L81 Mortar build cost 150 to 600, mortar restock 75 to 150 and the new firing animation, buildable destroyed rewards (mortar, Talon, CIWS, Hot Zone Magnet), vehicle destroyed rewards (Ural, SPH-2), supply pallet rewards and delivery streaks, the FOB destroyed bonus, artillery XP moving to the Driver track, the SPH-2 move to Driver level 31 and $350,000, the Ammo Supply Pallet unlock at WARDOG level 9, and Range Finder and Infrared Range Finder prices.
- WARDOGS wiki (Fandom): what mortars are for and that they run on ammo supplies from the base; Ural capacity of two pallets.
- From the videos, attributed: the map hover readout, sight layout and compass, the triple-shot routine and C/R keys, target priority, the 20 m drift and the "let the sight settle" idea, mortar placement lessons, the 48-shot delivery and 12 to 13 pallets used, the ammo runner's assists, and the mortar duel from Peanut's match. The SPH-2's 155 mm shells and the 1,800 ammo per pallet figure comes from the source of our tips guide and are not official.
- Corrections made to the videos: mortar cost (600, not 150), shells per delivery (about 24, not 48), the drill payout ($2,750 now, not $4,500), artillery XP (Driver, not Support), and the slower firing in Season 02.
What this guide doesn't answer
- Exact maximum range and shell damage: neither the patch notes nor the wiki publish them, and RadioGLHF's 551 m miss shows terrain changes the answer.
- How height difference changes your sight setting: the map shows ASL, but no source measures the correction.
- Which hammer tier builds the mortar: the patch notes list hammer tiers only for the new Season 02 buildables.
- Switchblade drone launchers and the Stingray: separate emplacements with their own costs, covered elsewhere.
- Building the base around the mortar: walls, gates and anti-air layout belong to the FOB guide linked above.
Frequently asked
How do you aim the mortar in WARDOGS?
Open the map and hover over the target: the label shows the range in metres (RNG), the height (ASL) and coordinates, and small grid squares are 100 m. Then right-click on the mortar, turn until the compass strip at the top of the sight shows the target's bearing, and set the range scale to the distance you read. Watch the first shell on the shell camera and adjust.
How much does a mortar cost to build in WARDOGS Season 2?
The L81 Mortar costs 600 build supplies since Season 02 (Update 0.2.0, 15 October 2026), up from 150. Each restock from the base's munition supplies also went from 75 to 150, and a new loading animation slows the rate of fire.
How many mortar shells do you get from one Ural of ammo?
About 24 in Season 02. A Ural carries two pallets, and at the commonly quoted 1,800 ammo per pallet and the new 150 per restock that is roughly 12 shells per pallet. In Season 01 the same delivery gave 48 shells, which is what older videos show.
Is there an arty calc for WARDOGS?
There is no official WARDOGS artillery calculator, and you do not need one. The map gives the range to any point in metres, and the mortar sight has a range scale, so you set the distance directly. Calculators made for other shooters do not apply because WARDOGS has not published its mortar ballistics.
What should a mortar shoot first in WARDOGS?
Enemy mortars first so they cannot return fire, then anti-air, then spawn vehicles and armoured vehicles near the base, then drills and oil rigs. In Season 02 a destroyed mortar pays $650, a Talon $650, a CIWS $1,200 and a Hot Zone Magnet $2,750, and artillery XP now goes to the Driver track.
Read next
WARDOGS SAM Site Guide: How to Build Anti-Air That Works
How to build a Talon 9K-SAM anti-air site on a walled recon tower that snipers, Urals and rockets struggle to break, and how Season 2's reload and restock changes cut two ammo pallets from about 75 missiles to 18. Also compares the Talon with the CIWS, Verba and new Gepard.
WARDOGS Vehicle Weak Points: Where to Hit Every Vehicle
Where to hit each WARDOGS vehicle and how many rockets it takes, from a Season 01 weak point test, with the Season 02 prices, unlocks and kill rewards checked against the patch notes.
WARDOGS Helicopter Guide: Fly, Survive and Get Kills
How to fly a WARDOGS helicopter in combat and stay alive: which airframe fits which job, fast troop landings, killing CIWS and Talon operators from above, flares and ground checks, and beating enemy pilots. Checked against the Season 02 patch notes.
WARDOGS HOTAS Guide: Flight Stick Setup and First Flights
How to fly WARDOGS with a HOTAS: what joystick support the game really has, which flight stick and pedals to buy, how to mount and bind them, and the hover, pitch, turning and point-to-point drills for your first flights. Checked against the Season 02 patch notes.