
🎯 The core idea
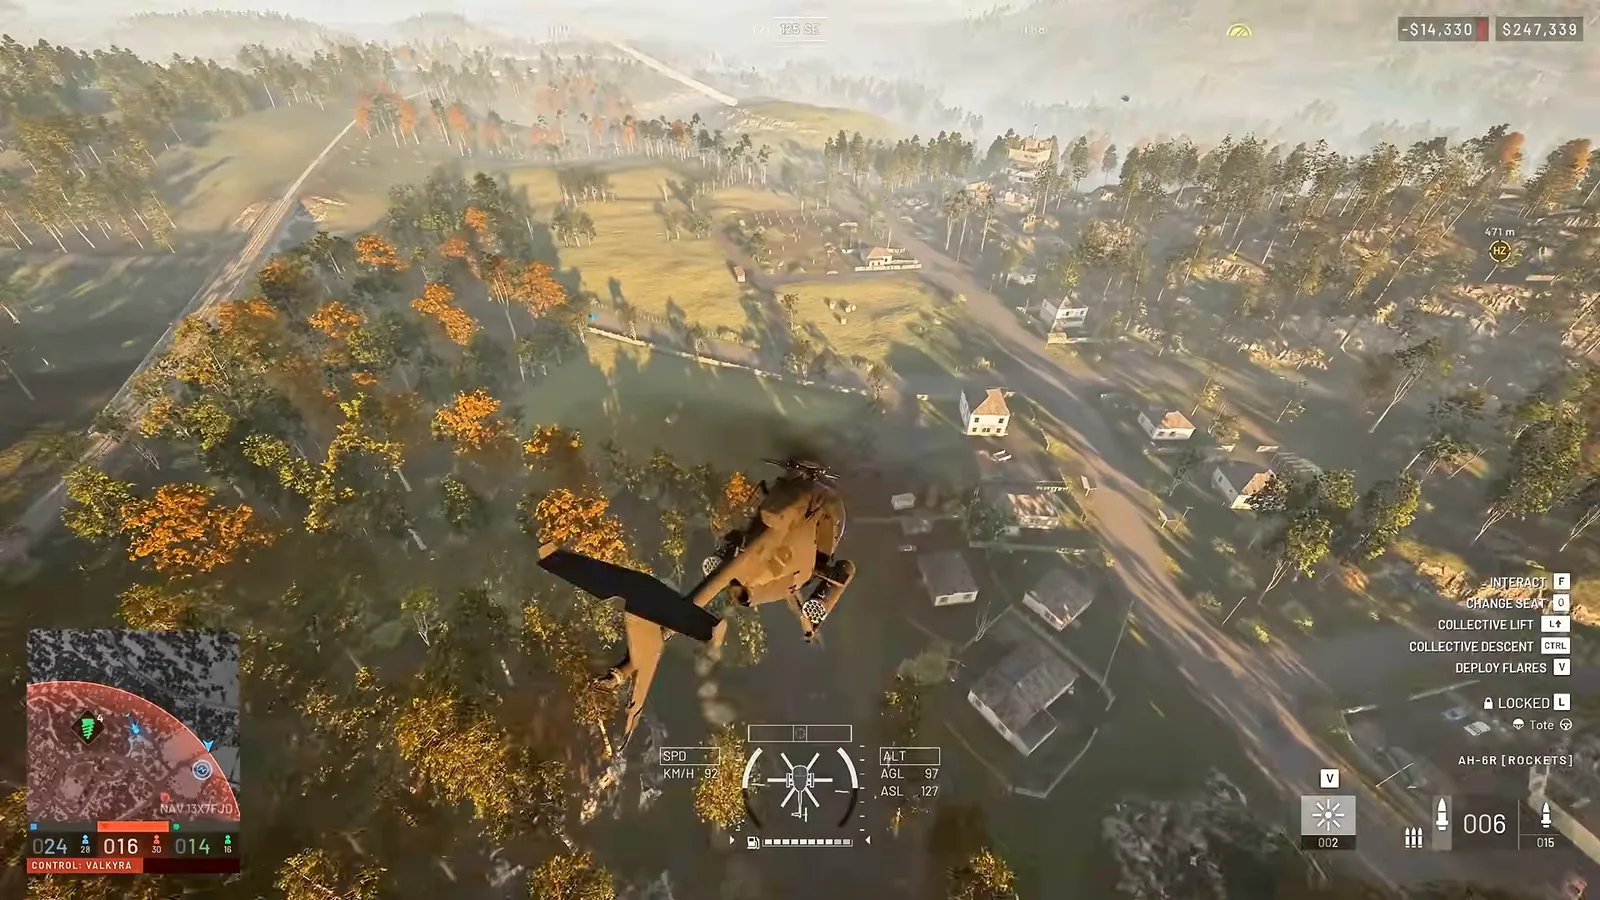
A WARDOGS helicopter dies to things it never saw: a CIWS operator, a Verba from a bush, an RPG from a rooftop. Fly low so missiles can't lock, kill air defence from the blind cone above it, flare only a second or two before impact, and shoot enemy pilots out through the right side of the cockpit. Season 02 left the flight model alone but raised helicopter prices and slowed the Talon, so plan every sortie to pay for itself.
- free costs nothing
- cheap small cost
- setup needs preparation
- grind pays off slowly
- skip the thing to stop doing
This WARDOGS helicopter guide is about combat flying: which airframe to take, how to land troops fast, how to survive anti-air, and how to win fights against other pilots. It's built on Hieb's 38-minute Little Bird masterclass (recorded in Season 01, uploaded 15 September 2026), with a full commented sortie from Tote Torres' 30-minute AH-6R video, and every price and balance number checked against the official Season 02 patch notes. Keybinds, flight assists and mouse settings are not repeated here: they live in the WARDOGS helicopter controls guide. If you still need to learn how to fly a helicopter at all, start there and come back. More guides for the game are on the WARDOGS hub.
Which helicopter for which job

WARDOGS helicopters fall into three roles: transport, the Little Bird gunships, and the Havoc attack helicopter. All of them sit on the Pilot progression track. Speed and health below come from the WARDOGS wiki's vehicle table; prices are the Season 02 vendor prices from the patch notes, because the wiki still lists Season 01 prices.
| Helicopter | Role | Top speed (wiki) | Health (wiki) | Season 02 price | Notes |
|---|---|---|---|---|---|
| MH-6 | Light transport | 350 | 400 | $6,250 per wiki (not in the S2 notes) | 6 seats per the wiki |
| Little Bird AH-6M [Miniguns] | Gunship | 350 | 400 | $12,000 | Pilot level 8, $125k unlock |
| Little Bird AH-6R [Rockets] | Anti-vehicle | 350 | 400 | $18,800 | Rockets delete cars |
| Z20 Lakota | Heavy transport | 445 | 600 | $7,400 per wiki (not in the S2 notes) | 13 seats, carries 1 pallet |
| Z20 Lakota [Miniguns] | Armed transport | 445 | 600 | $15,000 | $85k unlock |
| Havoc | Attack helicopter | 400 | 800 | $28,000 | $650k unlock |
The Little Bird is what most pilots fly, and it's what both videos use. The minigun version is the all-rounder against infantry and other helicopters; the rocket version is the specialist for trucks, cars and buildables. The Havoc is the big-ticket end of the Pilot track: per our WARDOGS XP guide's progression screens it sits at Pilot level 35, and it now costs $28,000 every time you pull one, up from $18,000.
Transport pilots fly the MH-6 and the Lakota. Your job is getting squads into the fight alive, which means the landing techniques in the next section matter more than any gun. The launch changelog gave the Z20 Lakota a balance pass and a fix for its sluggish pitch, so older complaints about it handling like a bus are out of date.
Combat landings: the J-hook and the barrel roll

You arrive at a landing zone fast, so the real skill is bleeding off speed without climbing into every missile on the map. Hieb's key point: lowering the collective alone doesn't slow you enough. Pitching the nose up is the input with the most authority over your speed, because the rotor disc acts like a wing you pull against the air.
free The J-hook. Approach the landing zone from slightly behind or beside it, then turn in while you hold the collective down and pull pitch. The bank angle is the whole trick: too little bank and you balloon upward, too much and you fly into the ground. Find the angle where you neither climb nor sink, and you finish the curve slow and low, in full control, with your path drawing a J on the map. It's the smoothest landing and keeps you low and out of sight.
setup The barrel-roll landing. This is the fastest way to put a helicopter down, and Hieb likes it because it gives the same result every time from the same start. His numbers: about 200 to 250 km/h or more, 30 to 50 m of altitude, nose level with the horizon, collective at neutral. Then press pitch, roll and yaw together on your favourite side; you come out of the roll in a low, slow final approach, feather the collective and touch down. He started it about 100 m out from a tower. Practise it in the firing range before trying it with a full squad on board.
When you park, pin it. Once you're on the ground, hold collective down for a second or two before you get out or open your inventory. In the video, a helicopter left without doing this lifts off on its own the next time the pilot climbs in, and Hieb warns it will one day kill you while you're buying flares. For takeoff and touchdown basics, see the controls guide linked above.
Pilot kit and resupplying in the air

What you wear matters because enemies will try to shoot you out of the seat. Hieb's loadout logic:
- Best armour and helmet you have. No tactical vest.
- Biggest useful backpack. He picks the Ruck backpack, because the two bigger ones (Gunner and Arsenal) add sling slots, not storage. Season 02 cut the Ruck to $1,600.
- IFAK over bandages if you have it unlocked: it heals you to full in the same time a bandage takes.
- A drill for repairs (he uses the light drill, which comes with a battery).
- Spare flares and ammo. He withdraws the helicopter's flares into his backpack, buys two more so he carries four, and fills the rest with minigun ammo. His rule is to buy two flares, never one.
cheap Season 02 note on helmets: Level 3 and Level 4 armour and helmets now reduce damage by 50% and 60% (down from 55% and 65%), and the Level 4 helmet now muffles audio and narrows your field of view. Pilots fly by ear, so check that you can still hear the lock-on tone clearly before you commit $4,500 to that helmet.
To resupply from your backpack, open the interact menu and scroll to the inventory. Your backpack is on the right; the helicopter's storage is on the left. Right-click items to move them into the helicopter. Transfers queue up, so you can click everything at once, but you have to stay on that screen until they finish. Only do it when you're sure you won't hit anything for the next two seconds.
Repairs: fix the engine, ignore the rest

free Land somewhere safe, step out and use your drill. Hieb's rule is that the engine is your real health bar. Rotor, fuel and other components showing minor damage are extra failure points, not health, so unless you're actually missing a rotor, repair the engine back to full and get going. In the video, the helicopter shows fully white again with the rotor still slightly yellow, and it flies fine.
Two things to know while you're outside. The helicopter starts to power down about 5 to 10 seconds after you leave it; jump back in and add collective to spin the engine back up. And since Season 02, repair XP goes into the Pilot track when you repair a helicopter, instead of a flat Support reward.
Low-level flying keeps missiles off you

grind Infrared-seeking missiles can't lock a helicopter that is very close to the ground. Hieb shows that even a modest climb above the treetops is enough to be locked, while hugging the terrain protects you from Talons and shoulder-launched missiles. Whenever there's a threat nearby, this is where you should be.
His habits for flying there without crashing:
- Think three seconds ahead. Look at where you'll be, not where you are: the bridge arch you'll fly under, the gap between two trees.
- Always have an escape. When the tree line or road you're following runs out, you need a way to pull up into safety.
- Use pings to navigate. There are few landmarks at low level. Placing a danger ping on the map shows you exactly where to go, and Hieb notes it lasts longer than a normal marker.
There's no shortcut: low-level flying only gets better with practice.
CIWS and Talon: kill the operator, not the gun

The two ground threats that kill most pilots are the Vanguard CIWS and the Talon 9K-SAM. A Talon at least gives you a lock-on warning. A CIWS that sees you first, while you're slow or out of cover, usually kills you before you can react. The official hotfix on 2 October set the CIWS to destroy a Havoc in around 6 seconds, so even the heaviest helicopter can't tank one.
free The fix is to kill the person running it. The CIWS is operated from a laptop next to the gun; the Talon has its operator sitting inside it. As soon as you spot a CIWS, note which way its laptop faces, then plan your attack from behind cover on that side so you can shoot whoever sits down at it. Approach from an angle the defenders can't see, using hills and tree lines, then pop up close.
cheap Hieb's other tip: an unfinished buildable has far less health than a finished one. In his test a CIWS built to 99% went down almost instantly, while he reckons a completed one soaks around 300 to 400 minigun rounds. Since Season 02, destroying a buildable pays according to how far it was built, so a half-built CIWS pays less than the full $1,200, but it's still a quick and safe kill.
Watch out for third parties. When you're working over one team's air defence, a Talon from the third team is often watching you from across the map.
The safe cone above air defence

Neither the CIWS nor the Talon can aim straight up. Hieb shows the CIWS at its maximum elevation: steep, but not 90 degrees, which leaves a cone above each emplacement where it can't hit you. He says the Talon's limit is about the same. The Talon also needs you above the radar line and loses its lock quickly if you fly past or over it, and the CIWS turns slowly.
So the plan is: approach low and unseen, come in fast, pop up and fly over the emplacement, then orbit inside that cone and shoot the operator off the laptop. Anyone who climbs back on never gets to aim at you. The weak point is a second CIWS nearby, or a Talon farther away, which can cover the cone; then you have nowhere to hide and you should leave.
How to circle strafe a ground target

The circle strafe is the technique Hieb gets the most questions about, and it's what makes the safe cone usable. If you hover above a target and point at it, you drift straight over it. Instead:
- Add a little roll to start flying in a circle around the target.
- Use yaw to keep the helicopter's nose (and your reticle) on the target while the circle carries you around it.
- Use pitch to move closer to or further from the target, and add collective as the circle tightens.
The tighter the circle, the more yaw, pitch-down and power you need. If it falls apart, ease off into a wider circle and rebuild it. Hieb practises by flying a circle around a single tree, first just staying on track, then keeping the trunk in the centre of his screen. Smooth roll control is what makes this work, so set your sensitivity up for it in the controls guide.
Verba trucks: hunt the vehicle behind the shooter

Hieb calls the 9K333 Verba shoulder launcher one of the deadliest threats to pilots. Unlike a CIWS or Talon, which have to be built and are stuck in place, a Verba user can hide in a bush and hold a lock on you for as long as they like. You hear the lock tone but can't see where it comes from. The launcher is single-use and won't fit in a backpack, which is exactly why it's dangerous: players carry them in vehicles. In the video, a Jeep-style car holds 12 Verbas, so one driver can shoot, move and shoot again.
free When you're being locked by shoulder launchers, look for the car or truck nearby, because someone is carrying the missiles for them, and where there's one launcher there are usually more. Hieb's demo shows a single AH-6R rocket destroying that car and everyone close to it, while a soldier on foot took about three rockets. That makes the rocket Little Bird the natural counter to Verba cars. The minigun takes noticeably longer on the same car.
Tote Torres, in his sortie, makes the same call: the player driving around with a truck full of MANPADS was his biggest threat, and he went back for that truck. Since Season 02 the Verba unlocks earlier (Support level 14, down from 16), so expect to see it more.
Flares and ground checking

Flares are a one-time chance to break a missile that's already tracking you. They only work if the missile arrives during the short window right after you flare. Flare one or two seconds before impact. Flare too early and the missile still hits; flare before anything is launched and a patient enemy simply waits for your flares to go on cooldown, then fires.
Hieb uses three methods:
- Visual acquisition. Stop what you're doing, find the missile, and flare as it closes. This is the reliable one.
- Blind flare. If looking around would crash you or lose you a fight, flare on a guess and dive below the radar line straight after. He puts the odds at roughly 50/50, which beats not flaring. Don't make it a habit, or the enemy will learn your pattern.
- Ground check. When you hear a lock warning, drop below the radar line. If the warning stops, nothing was fired and you can carry on. If it keeps going, a missile is already in the air: flare now. This works because launchers can only lock you above that line, but a missile fired before you dropped still tracks you.
One lock source is usually survivable with flares; two coordinated launchers firing one after the other can kill you. Hieb compared the flare cooldown to a Talon's reload, which was 2 seconds then. Season 02 raised the Talon reload to 5 seconds and made Talon ammo cost 200 munitions per restock instead of 50, so a lone Talon now gives you more breathing room after a flare and runs dry sooner. Tote Torres also shows how fast flares go: he burns both of his by accident in one fight and has to fly back to base, which is why carrying spares matters.
Helicopter vs helicopter: shoot the pilot

Hieb ranks the airborne threats to a Little Bird: another minigun Little Bird (the most common), the rocket Little Bird (deadly but hard to aim), the minigun Lakota (shoot its door gunners first) and the Havoc.
free Shoot the pilot. WARDOGS pilots sit on the right side of the helicopter, so attacking from the right and the front gives you the best chance to kill them. The front is also a damage-multiplier hit zone, so it's the fastest way to bring a helicopter down, although the enemy can shoot back from there. Air-to-air duels are about energy: close the distance, then make them turn while they're slow and you're fast, or get above them. Any shot they can't return is a good one.
skip Long chases. Two helicopters accelerate at the same rate, so you can't point your nose at someone who runs for home without falling behind. Helicopter-on-helicopter fights are slow to kill, so if you're losing on health, ammo or confidence, run back to your base. Hieb also reports that shooting pilots out of fast-moving helicopters often doesn't register, which he couldn't explain; treat it as an observation, not an official bug.
The Havoc. Hieb says you can't out-damage a Havoc from a Little Bird, even with rockets, while a handful of its rounds kill you. His advice is to run and build a CIWS, which the official 6-second figure above backs up. Update 0.1.2 (30 September) also fixed a Havoc bug that made it take extra damage from 20mm and 30mm cannon fire, so it's slightly sturdier now than early footage shows. A destroyed Havoc pays $14,000 in Season 02, a minigun Little Bird $6,000 and a rocket Little Bird $9,400.
Season 02 also cut the base damage of several rifle calibres by 16% to 25%, and the patch notes say this applies to the Little Bird AH-6M minigun and the Z20 Lakota minigun too, so expect your time-to-kill to be a little longer than it is in either video.
RPGs and how to avoid them

The last hard counter is the RPG-7: one infantryman, no lock-on warning, and in Hieb's experience one hit kills a Little Bird from any angle. He says a player can carry three to five rockets, and he thinks it's currently too easy to hit helicopters with it. The RPG-7 is also cheaper in Season 02 at $1,800.
free His rules: stay fast, don't fly too low over infantry, don't linger near the same threat, and look for soldiers who are watching you without shooting. Those are the ones aiming a rocket. Kill them first if you can. This is the trade-off with low flying: down low you're safe from lock-on missiles but in range of RPGs, so drop low when you hear a lock tone and keep moving over infantry.
A full sortie: scout, pick targets, return to rearm

Tote Torres narrates a whole AH-6R session, and his routine is a good template for any pilot:
- Scout before you shoot. He first checks what the server looks like: the kill feed for artillery, then the spots where teams like to build (the towers, the stadium), noting every CIWS, Talon and FOB he sees.
- Prioritise targets that pay and hurt. Trucks, mortars, supply caches and logistics vehicles. He goes after a mortar position because they're his favourite targets, and a logistics transport heading back to base, which paid him about $4,000 (a Season 01 payout).
- Track the dangerous players. The truck carrying MANPADS stays at the top of his list all match.
- Return to rearm before you're empty. A rocket Little Bird runs dry fast, so he flies back for rockets instead of hanging around with six left.
- Don't get greedy. He dies by chasing a Humvee while forgetting a second CIWS he'd already seen.
His spending figures (about $20,000 to get started, then a profit) are from Season 01. With the Season 02 price rises, an AH-6R sortie now starts at $18,800 for the helicopter alone, so the WARDOGS money side of flying is tighter. Air supply drops still give XP (150 for a small crate, 300 for a large one since Season 02), so transport flights earn too.
What Season 02 changed for pilots

Both videos are from Season 01. The Season 02 patch notes (14 October 2026) did not change the flight model, so every technique above still applies. What changed around it:
| Change | Season 01 | Season 02 |
|---|---|---|
| Little Bird AH-6M [Miniguns] price / unlock | $7,000, Pilot 4, $50k | $12,000, Pilot 8, $125k |
| Little Bird AH-6R [Rockets] price | $12,500 | $18,800 |
| Z20 Lakota [Miniguns] price / unlock | $8,000, $75k | $15,000, $85k |
| Havoc price / unlock | $18,000, $500k | $28,000, $650k |
| Talon reload / restock per supply | 2 s / 50 | 5 s / 200 |
| Talon / CIWS build cost (supplies) | 1,000 / 1,500 | 650 / 1,200 |
| Basic Parachute | $100 | $500, won't open below about 10 m |
| Minigun damage | full | reduced with the calibre cuts |
Other pilot-relevant changes:
- New anti-air vehicle: the Flakpanzer Gepard (Driver level 25, $300k unlock, $14,000 to buy). Expect mobile AA, not just fixed emplacements.
- Cockpit glass now works both ways: shooting out through it damages your own helicopter just like incoming fire.
- Passengers: the MGL-40 now has extra sway, slower aiming and a reload penalty from the Little Bird bench, and explosives and placeables can't be used from enclosed vehicle seats.
- Parachutes: they take longer to open, and if you open below roughly 50 m while falling fast you'll take fall damage. Transport pilots should drop squads with height to spare or land.
- Vehicle storage of a purchased helicopter is now private to you and your squad by default.
- Rain now reduces spotting range, and late joiners now see your flares and smoke (bug fix).
Every other change in the update is in the Season 02 breakdown listed below.
Read next
- WARDOGS helicopter controls: keybinds, mouse settings and flight assists to set up first.
- WARDOGS season 2: every change in Update 0.2.0.
- WARDOGS money: how to afford a $12,000 to $28,000 helicopter every life.
- WARDOGS FOB: how the bases you'll attack from the air are built and defended.
- WARDOGS strategy: where helicopters fit in winning the control zone.
- WARDOGS HOTAS Guide: Flight Stick Setup and First Flights — How to fly WARDOGS with a HOTAS: what joystick support the game really has, which flight stick and pedals to buy, how to mount and bind them, and the hover, pitch, turning and point-to-point drills for your first flights.
- WARDOGS SAM Site Guide: How to Build Anti-Air That Works — How to build a Talon 9K-SAM anti-air site on a walled recon tower that snipers, Urals and rockets struggle to break, and how Season 2's reload and restock changes cut two ammo pallets from about 75 missiles to 18.
How this guide was fact-checked
- Official Season 02 patch notes (14 October 2026): all Season 02 prices, unlock levels, Talon reload and restock, build costs, calibre cuts on the miniguns, helmet and armour changes, Gepard, cockpit glass, parachute, MGL-40, vehicle storage, repair XP, air supply XP and vehicle kill rewards.
- Official hotfixes: CIWS kills a Havoc in about 6 seconds (2 October hotfix); Havoc cannon-damage bug fixed (Update 0.1.2, 30 September); Z20 Lakota pitch fix (launch changelog).
- WARDOGS wiki (Fandom) vehicle table: top speed, health and seat counts. Its prices are Season 01 values, so the table above uses Season 02 prices instead; the MH-6 and plain Lakota prices aren't in the Season 02 notes, so the wiki figures are given and labelled.
- Hieb's video: landing techniques, kit, resupply, repairs, low-level flying, the CIWS/Talon safe cone, circle strafing, Verba cars, flares and ground checking, air combat and RPGs, shown on screen. Numbers that come only from him are labelled as his: barrel-roll speed and height, CIWS rounds to kill, 12 Verbas in one car, one rocket per car, three to five RPG rounds.
- Corrections to the videos: Little Bird and Havoc prices and unlocks are higher in Season 02; the "flare cooldown about equals Talon reload" comparison used the old 2-second reload, now 5 seconds; minigun damage is lower after the calibre cuts; the Havoc was taking extra cannon damage in early footage; Tote Torres' money figures are Season 01 payouts.
- Tote Torres' video: the sortie routine, his priorities and his mistakes, shown on screen.
What this guide doesn't answer
- Keybinds, mouse sensitivity and flight assists. That's the controls guide's job, linked at the top.
- Exact flare cooldown and missile lock times. Neither the patch notes nor the wiki publish them, and the videos only show them roughly.
- Gepard tactics. The Season 02 AA vehicle arrived after both videos, and there's no reliable footage of how it performs against helicopters yet.
- Havoc weapon handling in detail. Neither source flies the Havoc; it's covered here only as a threat and a purchase.
- Building your own anti-air. Placing CIWS and Talons belongs with base building, not flying.
Frequently asked
What is the best helicopter in WARDOGS?
For most pilots it's the Little Bird AH-6M [Miniguns]: $12,000 per pull in Season 02, unlocked at Pilot level 8 for $125k, and good against infantry and other helicopters. The AH-6R [Rockets] ($18,800) is better against cars and trucks, since one rocket destroyed a car in testing. The Havoc is the strongest but costs $28,000 each time and dies to a CIWS in about 6 seconds.
How do you avoid getting locked by missiles in a WARDOGS helicopter?
Fly very low. Infrared-seeking launchers like the Talon and Verba can only lock you above a radar line close to the ground, so hugging trees and terrain keeps them from locking you. If you hear a lock tone, drop below that line: if the tone stops, nothing was fired; if it continues, a missile is already in the air and you should flare.
When should you use flares in WARDOGS?
Only when a missile is about to hit, roughly one to two seconds before impact. Flares create a short window in which the missile misses. Flaring early wastes them, and a patient enemy will wait for your cooldown before firing. Carry two spare flares in your backpack, because one lock source is survivable but two coordinated launchers can kill you.
How do you kill a CIWS with a helicopter in WARDOGS?
Kill the operator, not the gun. The Vanguard CIWS is run from a laptop beside it, and it can't aim straight up, so there is a blind cone above it. Approach low from cover, pop up over it, and circle strafe inside that cone while shooting whoever sits at the laptop. An unfinished CIWS has far less health and goes down quickly.
Did Season 2 change helicopters in WARDOGS?
Not the flight model, so the flying techniques are the same. Season 02 raised prices (Little Bird minigun $12,000, rockets $18,800, Lakota minigun $15,000, Havoc $28,000), cut minigun damage with the calibre changes, made the Talon reload in 5 seconds instead of 2, added the Flakpanzer Gepard anti-air vehicle, and made cockpit glass work both ways: shooting out through the glass now damages your own helicopter.
Read next
WARDOGS Vehicle Weak Points: Where to Hit Every Vehicle
Where to hit each WARDOGS vehicle and how many rockets it takes, from a Season 01 weak point test, with the Season 02 prices, unlocks and kill rewards checked against the patch notes.
WARDOGS Helicopter Controls: Best Mouse and Controller Setup
How to set up WARDOGS helicopter controls on mouse and keyboard or a controller: the default rotary keybinds, Rotary Vehicle Mouse Control settings, which flight assists to start with, and takeoff and landing habits. Checked against the launch and Season 02 patch notes.
WARDOGS HOTAS Guide: Flight Stick Setup and First Flights
How to fly WARDOGS with a HOTAS: what joystick support the game really has, which flight stick and pedals to buy, how to mount and bind them, and the hover, pitch, turning and point-to-point drills for your first flights. Checked against the Season 02 patch notes.
WARDOGS SAM Site Guide: How to Build Anti-Air That Works
How to build a Talon 9K-SAM anti-air site on a walled recon tower that snipers, Urals and rockets struggle to break, and how Season 2's reload and restock changes cut two ammo pallets from about 75 missiles to 18. Also compares the Talon with the CIWS, Verba and new Gepard.