
🎯 The core idea
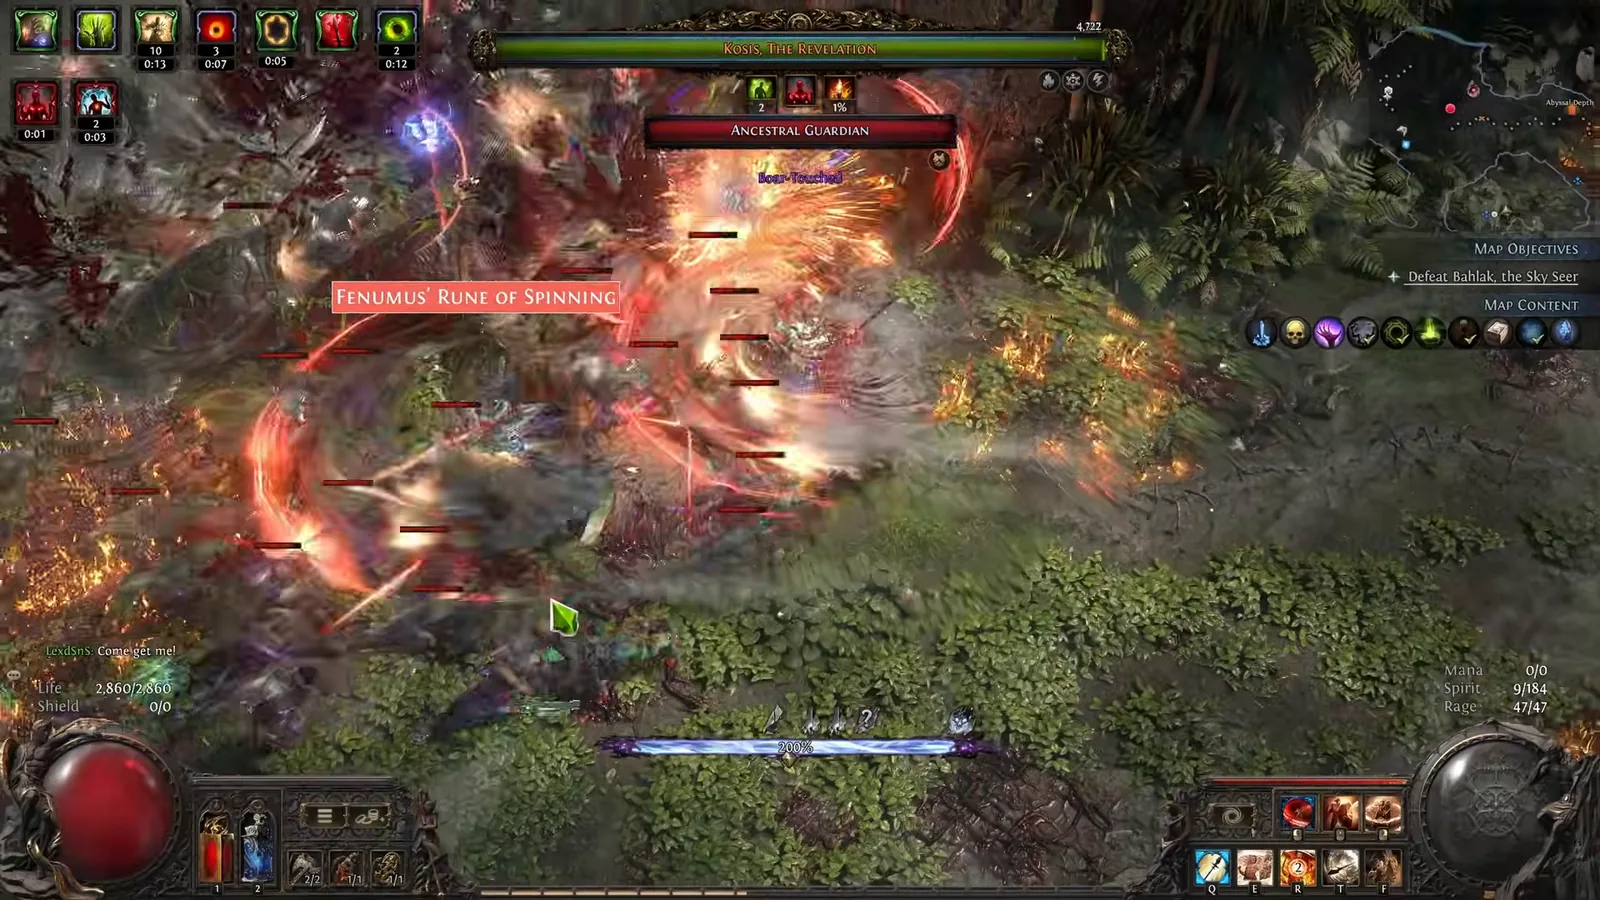
This PoE2 Titan build is a Warrior who clears with a spear and kills bosses with a shield. Rake dashes into packs and Herald of Blood chains bleed explosions through them; on bosses, Resonating Shield breaks armour and one crit Shield Wall, detonated by Fortifying Cry, deletes most map bosses. Huge armour from The Brass Dome makes it tanky enough to stand in melee range.
- free costs nothing
- cheap small cost
- setup needs preparation
- grind pays off slowly
- skip the thing to stop doing
Version note: Written for 0.5.x, reviewed 2026-11-17. This is LexD's Spear & Shield Bleed Titan as pitched for the 0.5.5 Forbidden Rites event; his character was built in Runes of Aldur. The 1.0 full release on December 11, 2026 is announced to bring new Warrior skills, massively rebalanced support gems, a passive tree makeover with all jewel sockets moved into clusters, and reworked uniques. Expect the gem setup, tree and some uniques below to change; this guide will be updated after the 1.0 patch notes.
PoE2 Titan build at a glance

The build splits its job across two weapon sets. Weapon set 1 is a spear and a shield, and it does everything except bosses: Rake dashes to the edge of a pack, Resonating Shield breaks armour and builds rage, and Herald of Blood turns the bleeds into chain explosions. Weapon set 2 swaps the spear for Nebuloch, a unique one-handed mace that makes attacks consume an Endurance Charge to crit, and that set exists only for Shield Wall. LexD calls it one of his strongest characters, saying it may be stronger than his Smith of Kitava, and in the video most map bosses die to a single Shield Wall.
It suits players who like melee, don't mind a two-button boss combo, and are happy to read the Herald of Blood chain reactions instead of hitting every monster. It is not a lazy build: you alternate two clear skills, swap weapon sets for bosses and watch your rage.
| Rating (our judgement from the video) | 1–5 | Why |
|---|---|---|
| Beginner-friendly | 3 | Clear is simple, but the boss combo, weapon swap and armour-break stacking take practice |
| Budget | 2 | Works on a 1.5k-armour shield early, but the endgame gloves and Brass Dome setup get expensive |
| Mapping | 4 | Bleed chains clear big packs; Rake dashes fail when walls or crowds block them |
| Bossing | 5 | Shown one-shotting most map bosses and ending pinnacles after phase one |
Pros: very high armour, pinnacle bosses can't heal between phases, fast single target with little setup since the anoint provides Endurance Charges. Cons: Rake's dash takes practice, the shield and gloves are expensive at the top end, and the build is built around Nebuloch and The Brass Dome.
How the clear works with Rake and Herald of Blood

Rake is both your clear and your travel skill. Aim it at monsters on the edge of a crowd, not the middle: LexD found the dash gets interrupted by walls or a solid wall of enemies, and edge targets trigger it far more often. Ancestral Call II adds extra spectral copies that also swipe, so one Rake covers much more ground.
After each Rake, tap Resonating Shield once or twice. It breaks armour, builds rage, and because you are blocking while it channels it doubles as a defensive tool while you line up the next dash. Two lineage supports on Resonating Shield also buff your other skills for a short while, which is why you alternate the two rather than spamming one. You don't need a strict one-for-one rhythm; just use them close together.
The kill chain itself comes from Herald of Blood: enemies you kill while they are bleeding explode for a share of the bleed damage they had taken. On its own that explosion can't inflict bleeding, so it doesn't chain. LexD's fix is to socket Herald of Blood with Bursting Plague (poisoned enemies burst on death) and Bleed III: the burst can then inflict bleeding, so each explosion can start the next one. This interaction comes from his video and footage; the wiki doesn't document it. That's why Rake runs Deep Cuts II: less hit damage, much stronger bleeds, and therefore bigger chains. Early in maps, when monsters survive the hit, swapping Deep Cuts for a straight damage support like Heft or Momentum can work better, because more hit damage also means a bigger bleed.
Leveling the Titan through the campaign

LexD levels with spear skills and a buckler, and he admits this used to be the weakest part of the build. Disengage and Explosive Spear carry most of the earliest clearing, and Rake should be your first level 3 skill gem. Once you have a decent spear, the loop is:
- Rake into a pack, then raise the buckler since you are right next to the monsters you dashed to.
- Parry, then Disengage, which consumes the parry debuff for two Frenzy Charges.
- Spend those charges on two strong Explosive Spears, now or on the next pack.
Herald of Blood should be your first Spirit gem, though the real chain clear only arrives later in the campaign when you have the level 3 supports. Before that, Spear Stab is your default boss attack. When you get Rapid Assault, it takes over: embed up to five spears in the boss, then parry, Disengage and throw Explosive Spears to detonate them for a big bleed.
LexD moved to Shield Wall as his single-target skill around the middle of Act 3, once he found a high-armour shield. That switch feels awkward until you have the right supports, so you can also stay on spear skills and respec towards the Interludes. His Mobalytics write-up (linked below) covers the leveling supports in more detail. If you're new to sockets and Uncut gems, read our PoE2 skill gems guide first.
Titan ascendancy order

The Titan's choice here is obvious: Hulking Form gives 50% increased effect of Small Passive Skills, which makes every small node on your tree count for more. The path to it is two Strength nodes and Colossal Capacity, a chest that adds 20 inventory slots. Hulking Form takes your first four ascendancy points, so you get it from your first two Trials.
| Ascendancy points | Node | Why |
|---|---|---|
| 1–4 | Hulking Form (and the strength nodes on the way) | 50% increased effect of small passives |
| 5–6 | Stone Skin | 50% more armour from equipped body armour, which makes The Brass Dome even better early in maps |
| 7–8 | Mysterious Lineage | 15% more maximum life |
LexD takes Stone Skin before Mysterious Lineage because he wanted armour earlier in his mapping. The order of the last two is a preference, not a rule. Our PoE2 ascendancy trial guide explains how to earn each pair of points.
Passive tree and keystones

The tree pulls from the Warrior's armour and one-handed clusters, with weapon-set-specific points used heavily. Weapon set 1 points (spear and shield) go into one-handed damage, attack speed, armour break and movement speed, since you spend almost all your time there. Weapon set 2 points (Nebuloch) go into critical damage bonus. Ailment magnitude and duration nodes are taken as normal points because both sets want them.
Key picks, roughly in the order LexD takes them:
- Relentless and Sturdy Metal first, for armour, life regeneration, strength and a big boost to body armour, which is where The Brass Dome's armour comes from.
- Punctured Lung: enemies with fully broken armour can't regenerate life. On pinnacle bosses this stops the heal between phases.
- Blood Magic: skills cost life instead of mana, which works with the build's regeneration and leech.
- Ignore Pain and the maximum rage nodes: you gain rage when hit and every rage grants 2% increased stun threshold, which LexD says solves almost all stun problems once you are capped on rage.
- Thrill of Battle and the other "surrounded" notables, which only work because of Constricting Command (see gear).
- Crimson Assault keystone: your bleeds are Aggravated and have 50% more magnitude, but their base duration drops to 1 second. The short duration barely matters because bosses die so fast and Rake reapplies bleeds constantly.
- Greatest Defence (4% increased attack damage per 75 armour and evasion on your shield), allocated through a Megalomaniac. LexD estimates it is worth about 90% increased attack damage on its own for a shield build using a high-armour shield.
LexD warns against one popular ailment branch far out on the tree: he went in too early, felt too squishy and respecced. Only take it in the early-to-mid 90s; before then, spend those points on defence. His full tree, with the order he takes points, is on his Mobalytics build page, and the character itself is on poe.ninja. For how weapon-set points and respecs work in general, see the PoE2 passive tree guide.
Anoint and jewels

The amulet is anointed with Thaumaturgic Generator, a notable you can only get by anointing. It grants Thaumaturgical Dynamism: a random Endurance, Frenzy or Power Charge every 5 seconds, weighted by the Strength, Dexterity and Intelligence requirements of your socketed skill gems. LexD describes it as "most of your supports are strength"; the wiki wording is about the total attribute requirements, but the result is the same on this strength-heavy setup. He says he sits at three Endurance Charges almost all the time, and Shield Wall combos rarely need more than two. That removes all the old setup (Magma Barrier and Armour Break III) that used to generate charges for Nebuloch crits.
| Jewel | What to look for |
|---|---|
| Heart of the Well (diamond) | damaging ailments deal damage faster (max roll), gain damage as extra chaos, recover life on killing a poisoned enemy; LexD says the last one can replace Cannibalism |
| Timeless jewel near the Warrior armour cluster | 7% ailment magnitude per notable in radius first, then increased attack damage on small passives |
| Megalomaniac | must allocate Greatest Defence |
| From Nothing (diamond) | allocates around Vaal Pact so you get the movement speed nodes there (Momentum) without walking to them |
| Rare ruby | increased magnitude of bleeding first; the rest is up to you |
| Rare emerald | critical damage bonus for attacks, attack damage, ailment magnitude |
Weapons and shield: what to buy

setup The shield is your boss damage, because Shield Wall scales with the shield's armour. You want the highest armour prefixes you can afford, then suffixes with "armour also applies to elemental damage" and additional physical damage reduction. LexD's shield shows 1,860 armour; he says a shield around 1,500 armour is fine early in maps, and the fully rolled versions get pricey.
The spear needs strong prefixes: around 200% or more increased physical damage across the prefix rolls plus flat physical damage. Suffixes are flexible. LexD crafted "+2 to level of all attack skills" with a Perfect Essence of Battle; his ideal spear has a natural +4 to melee skills. For the socket, use a Soul Core of Opiloti: patch 0.5.5 changed its weapon stat to 40% increased magnitude of bleeding (it used to give a chance to bleed). LexD recorded before the patch and wasn't sure of the name, but the 0.5.5 wiki notes confirm the change, so it beats an Iron Rune here.
Nebuloch in weapon set 2 is mostly there for its effect: attacks consume an Endurance Charge to critically hit. His copy is a corrupted Execratus Hammer with 8% increased skill speed and 50% increased attack damage against rare or unique enemies, and it also deals you 100 chaos damage per second per Endurance Charge, which your life regeneration has to cover.
| Stage | Shield | Spear | Other |
|---|---|---|---|
| League start / early maps | any high-armour shield, ~1.5k armour | best physical damage spear you find | Nebuloch once you can afford it |
| Mid budget | higher armour, armour-to-elemental suffix | ~200%+ physical prefixes, flat physical, crafted +2 attack skills | Constricting Command, Brass Dome |
| Endgame | top armour tiers, armour-to-elemental and physical damage reduction suffixes | +4 melee skills suffix, extra crafted mod | corrupted sockets, crafted gloves |
Armour, jewellery and the expensive gloves

The Brass Dome provides most of the build's armour, and you take no extra damage from critical hits. The cost is a penalty to maximum elemental resistances: the wiki gives a range of −1% to −5% to all, and his copy shows −2%. Pick one with a high increased armour roll, the smallest resistance penalty you can find, and socket perfect iron runes.
Constricting Command is a unique helmet, and it turns on all the "surrounded" nodes. Normally you need five enemies within 3 metres to count as surrounded; the helmet rolls "require 2 to 4 fewer enemies to be Surrounded", and only the top roll of 4 gets you down to a single monster, so buy a max-roll copy. LexD put a bear idol in its socket for area of effect.
| Slot | What to look for |
|---|---|
| Amulet | Spirit (you run two heralds, Scavenged Plating and Berserk), increased armour, +level of melee skills, % maximum life, damage taken recouped as life |
| Rings | flat physical damage, life, resistances, life leech |
| Gloves (budget) | +2 melee skills and some defence, a socket for a rune like Courtesan Mannan's Rune of Cruelty |
| Gloves (endgame) | +2 melee skills plus bleed and ailment magnitude prefixes, unlocked by socketing Katla's Gloom |
| Belt | resistances, armour |
| Boots | movement speed, armour, armour applies to elemental damage, resistances |
skip Don't chase the crafted gloves early. LexD's pair shows +2 to melee skills, 40% increased magnitude of bleeding and 23% increased ailment magnitude, but making them means fracturing the +2 melee mod, socketing an item that can't be removed, and possibly expensive omens. He calls them a late-endgame upgrade after everything else is good. If PoE2 crafting is new to you, the PoE2 currency guide covers essences, omens and fracturing.
Skill gems and supports

All skills sit on weapon set 1 except Shield Wall, which is on weapon set 2; spear skills are set to both sets. LexD's setup (support names as shown in the video):
| Skill | Supports | Role |
|---|---|---|
| Rake | Ancestral Call II, Poison III, Close Combat II, Deep Cuts II, one more damage support | main clear and movement |
| Resonating Shield | Rage III, Bleed III, Uruk's Smelting, Styrn's Ferocity, Styrn's Mountain | armour break, rage, buffs |
| Shield Wall (weapon set 2) | Bleed III, Poison III, Heft, Supercritical, Close Combat II | boss and rare killer |
| Fortifying Cry | Close Combat II, Heft, Raging Cry, Enraged Warcry II, Armour Break III | detonates Shield Wall, keeps armour broken |
| Infernal Cry | Raging Cry, Tireless, Enraged Warcry II, Fire Mastery, Corrupting Cry | extra fire damage before Shield Wall, rage |
| Spear Stab | Poison III, Rapid Attacks, Bleed III, Close Combat, Ancestral Call II | clean-up, starts chains |
| Spear Throw | Poison III, Heft, Bleed III, Deep Cuts II, Rapid Attacks | ranged hits with Frenzy Charges |
| Mace Strike | Exploit Weakness (stored here) | holds the support for the pinnacle swap |
Uruk's Smelting is the key boss support: supported skills break 70% more armour, and fully breaking a target's armour makes it take 5% increased physical damage permanently, up to 20%. The two Styrn's lineage supports on Resonating Shield buff everything else: Styrn's Ferocity Crushes targets for 8 seconds (Crushed enemies have 15% less physical damage reduction, which can go negative), and Styrn's Mountain makes melee skills that don't raise a shield deal 20% more damage if you blocked with Resonating Shield recently. That's why Rake and Resonating Shield are alternated.
Spirit, heralds and charms

Spirit goes to three reservations plus Berserk:
| Spirit gem | Supports | Why |
|---|---|---|
| Herald of Blood | Bursting Plague, Bleed III, Poison III, Escalating Poison, Magnified Area II | the chain-explosion clear |
| Herald of Plague | none needed | spreads poison; a level 12 gem is fine if you need to save dexterity |
| Scavenged Plating | Cannibalism I, Prolonged Duration II | more armour from breaking armour |
| Berserk | Vitality II | more value from rage; Vitality offsets the life drain |
LexD says the build wants both Cannibalism and Vitality somewhere among the Spirit gems. Herald of Plague only scales area and hinder chance with level, so it's a cheap place to save attributes.
Charms are personal choice. He uses The Fall of the Axe (Onslaught when you are slowed, and your speed is unaffected by slows), Beira's Anguish for strong ignites, and Rite of Passage for a poison buff. LexD says Beira's Anguish absorbs ignites; the wiki says it triggers when you are ignited and creates Ignited Ground that ignites enemies, so treat it as revenge damage rather than protection. Rite of Passage possesses you with a random Azmeri spirit when you kill a rare or unique; his roll is the Spirit of the Serpent, which buffs poison. Yours may differ. cheap He points out that a Thawing Charm (freeze prevention) instead of Rite of Passage will save your life more often; he plays the riskier option.
Map boss combo

free For normal map bosses, even on heavily juiced maps, the combo is short:
- Fully break the boss's armour with Resonating Shield.
- Make sure you are at maximum rage.
- Infernal Cry, swap to weapon set 2 and drop a Shield Wall.
- Detonate it with Fortifying Cry.
LexD says most bosses die to one Shield Wall, sometimes two. Shield Wall's attack time is quick enough that you can also drop one on a tanky rare, an abyss rare or a rogue exile while mapping. Close Combat II rewards standing within a metre or so of the boss, and the build has the armour to do it.
Pinnacle bosses and what kills this build

setup On pinnacles, stack Uruk's Smelting first. Swap Exploit Weakness from Mace Strike into Spear Stab; Exploit Weakness consumes fully broken armour. Break the boss's armour fully with one or two Resonating Shield taps, remove it with Spear Stab, repeat, and on the fourth full break the boss is taking the maximum 20% extra physical damage. Then run the usual Infernal Cry, Shield Wall and Fortifying Cry combo. Armour Break III on Fortifying Cry keeps the boss fully broken while you hit it, so Punctured Lung stops it healing during its phase change. Hit it as soon as the transition animation ends. In the video, the Uber Arbiter of Ash dies to a Spear Throw right after phase one.
What kills it, according to the video and the gear:
- Freeze, if you skip the freeze charm.
- Low elemental resistances, since The Brass Dome lowers your maximum resistances.
- Squishy tree pathing: taking the far ailment branch before the 90s.
- Rake dashes into walls, which leave you standing still in a pack.
For how armour, block and resistances work in general, see the PoE2 defence guide.
Read next
- PoE2 best builds for endgame: the 0.5.5 tier list and where melee sits in it
- PoE2 best class for beginners: how the Warrior and Titan compare to the other classes
- PoE2 skill gems: supports, Spirit and Uncut gems explained
- PoE2 gemling build: another strong attack build, the Grenade Gemling Legionnaire
- PoE2 endgame guide: Waystones, the Atlas and pinnacle bosses
- All our Path of Exile 2 guides
How this guide was fact-checked
The build, gem links, tree choices, gear priorities and boss combos come from LexD's video Spear & Shield Bleed Titan is a STRONG 0.5.5 Leagustarter (uploaded 3 September 2026, 37 minutes), including what his item and gem tooltips show on screen (Nebuloch, The Brass Dome, the shield, gloves, The Fall of the Axe, Uruk's Smelting, Bursting Plague, Hulking Form, Crimson Assault). The ratings table is our own judgement from that footage. Planner links are the ones in the video description.
Checked against poe2wiki.net and PoE2DB: Hulking Form, Stone Skin and Mysterious Lineage wording and costs; Crimson Assault, Punctured Lung, Ignore Pain, Thrill of Battle, Sturdy Metal, Relentless, Blood Magic and Greatest Defence; Nebuloch, The Brass Dome, Constricting Command, Katla's Gloom and the charms; Uruk's Smelting and the two Styrn's supports; and the 0.5.5 Soul Core of Opiloti change. Corrections to the video:
- Thaumaturgic Generator gives a random charge every 5 seconds weighted by your socketed gems' attribute requirements, not specifically by "strength supports" as the video puts it.
- Constricting Command is a helmet whose "fewer enemies" roll is 2 to 4; only a max roll gets you to one enemy.
- Beira's Anguish creates Ignited Ground when you are ignited; the wiki doesn't describe it absorbing ignites.
- Rite of Passage grants a random Azmeri spirit, not always the Serpent.
- Soul Core of Opiloti (the "Opel" core in the video) was confirmed as changed in 0.5.5 to 40% increased magnitude of bleeding on weapons.
- Auto-caption names fixed: Uruk's Smelting, Styrn's Ferocity and Mountain, Katla's Gloom, Courtesan Mannan's Rune of Cruelty, Vaal Pact, Raging Cry, Supercritical.
- The Herald of Blood plus Bursting Plague chain isn't documented on the wiki; it is shown working in the video and credited to LexD.
The 1.0 changes in the version note come from Grinding Gear Games' Steam announcement of the December 11 full release. Damage numbers are only what the video shows.
What this guide doesn't answer
- The exact leveling gem order act by act. LexD keeps that in his Mobalytics write-up; we only summarise the skills he names.
- Prices in divines. The economy of a league that ends at 1.0 isn't worth pinning down.
- A 1.0 version of the build. New Warrior skills, swords and rebalanced supports may change it completely; we'll update after the patch notes.
- Piggman's Resonating Shield variant. LexD credits it as a more defensive alternative that clears with Resonating Shield; it isn't covered here.
Frequently asked
Is the Spear and Shield Bleed Titan a good league starter in PoE2?
Yes, LexD pitches it as a strong 0.5.5 league starter. It levels with spear skills (Rake, Disengage, Explosive Spear, Rapid Assault) and works early in maps with a shield of about 1,500 armour. The expensive pieces, such as crafted bleed gloves and top-tier shields, are late-endgame upgrades, not requirements.
What is the boss combo for the PoE2 Titan Shield Wall build?
Fully break the boss's armour with Resonating Shield, make sure you are at maximum rage, use Infernal Cry, swap to weapon set 2 (Nebuloch) and drop a Shield Wall, then detonate it with Fortifying Cry. In the video most map bosses die to one Shield Wall, occasionally two.
Which ascendancy nodes does the Spear and Shield Titan take, and in what order?
Hulking Form first with the first four points, because it gives 50% increased effect of small passive skills. Then Stone Skin with points five and six for more armour early in maps, and Mysterious Lineage with the last two for more maximum life. LexD says the order of the last two is a preference.
How does Herald of Blood chain bleed explosions in PoE2?
Herald of Blood makes bleeding enemies explode when you kill them, but that explosion can't inflict bleeding on its own, so it doesn't chain. LexD sockets Herald of Blood with Bursting Plague and Bleed III so the plague burst from dying enemies can bleed, and each explosion starts the next. Deep Cuts II on Rake shifts damage into bleeds, which makes the explosions bigger.
Will the PoE2 Titan bleed build still work in 1.0?
Nobody knows yet. The 1.0 full release on December 11, 2026 adds new Warrior skills and swords, massively rebalances support gems and reworks the passive tree and many uniques. Treat this as a 0.5.5 build; we will update the guide after the 1.0 patch notes.
Read next
PoE2 Infernalist Build Guide: Catha's Brilliance (0.5.5)
A budget Witch build for PoE2 0.5.5 where one tamed beast with Catha's Brilliance burns everything near it and wyvern Oil Barrage spreads the fire. Covers Skeletal Sniper leveling, ascendancy order, tree, gear stages, the full gem setup and boss rotation, checked against the wiki.
PoE2 Gemling Build: Grenade Legionnaire Guide (0.5.5)
A Grenade Gemling Legionnaire build for the PoE2 Mercenary in 0.5.5: Explosive Shot for clear, Explosive Grenade and Mirage Archer for bosses. Covers leveling, ascendancy order, the passive tree, gear by budget and the full gem setup.
PoE2 Invoker Build Guide: Flicker Strike Crit Monk (0.5.5)
An endgame Monk build for PoE2 0.5.5 where near 100% crit chance generates power charges for Charged Staff, Whirling Assault, Falling Thunder and Flicker Strike. Covers the full gem and Spirit setup, ascendancy order, tree, gear stages and how to play, checked against the wiki.
PoE2 Pathfinder Build Guide (0.5.5): Poison Ranger
A crit poison Pathfinder for PoE2 0.5.5 that clears with Poisonburst Arrow and two Heralds and deletes bosses with Gas Arrow into Toxic Growth. Covers leveling, ascendancy, tree, jewels, gems, Spirit and gear at three budgets.