
🎯 The core idea
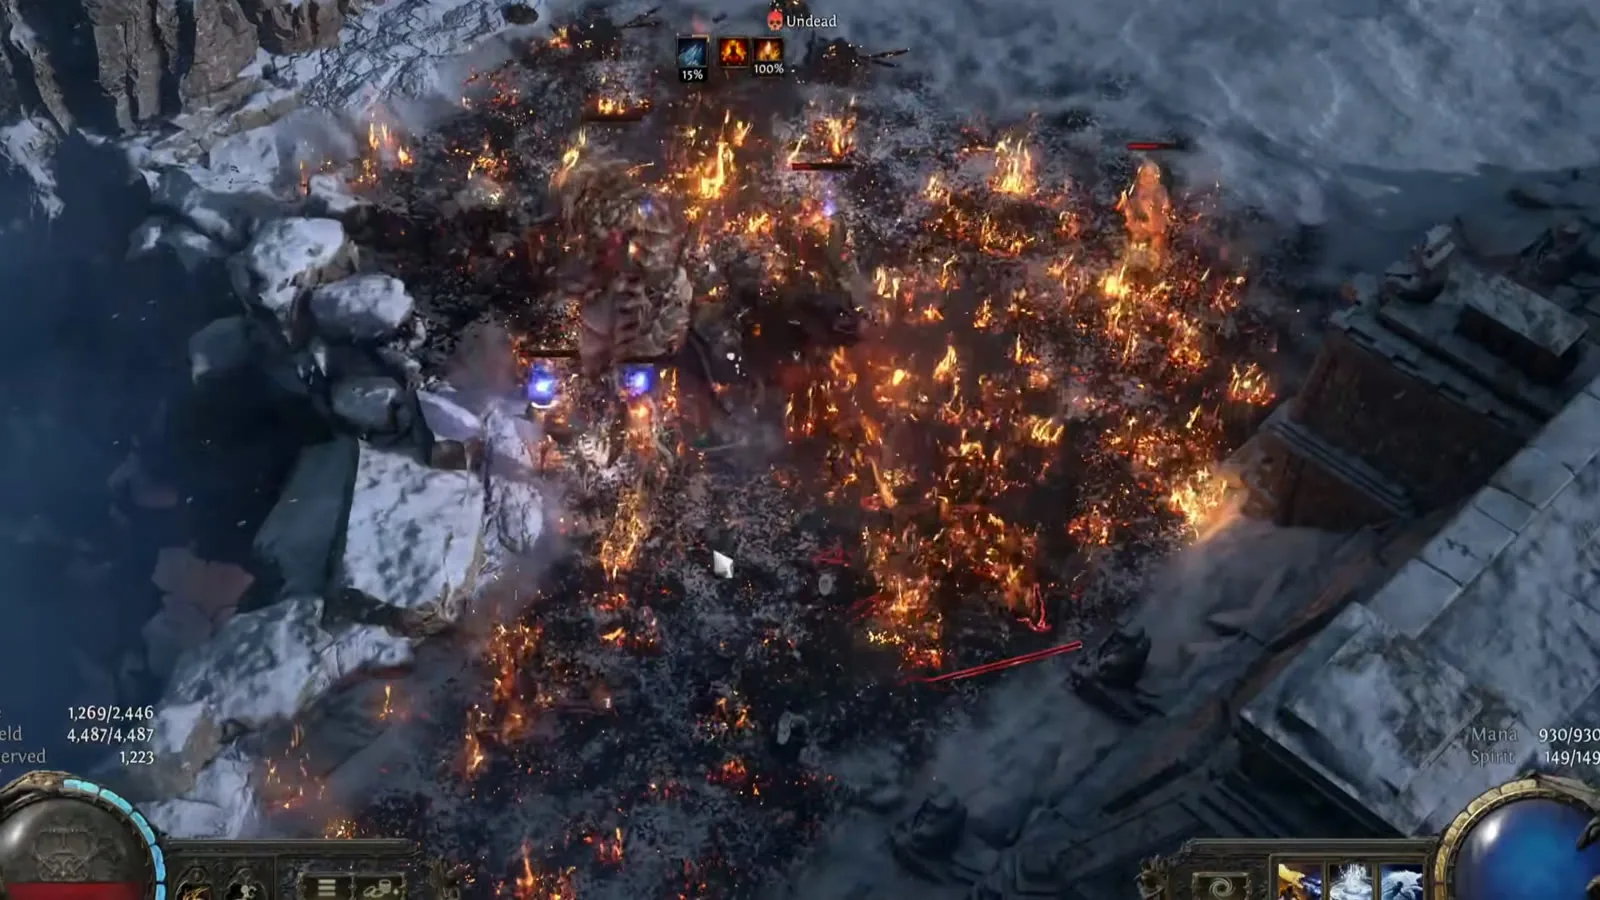
This PoE2 Infernalist build puts all of your damage on one tamed beast. A Catha's Brilliance support makes it burn every enemy near it, and the burn scales with the beast's life. You shapeshift into a wyvern and spit oil across the screen so the fire spreads further than the beast could reach on its own. Armour, energy shield and constant regeneration keep you alive. It levels with Skeletal Snipers and needs no expensive uniques.
- free costs nothing
- cheap small cost
- setup needs preparation
- grind pays off slowly
- skip the thing to stop doing
Version note: Written for 0.5.x, reviewed 2026-11-17. This is a 0.5.5 (Forbidden Rites event) build. Path of Exile 2 1.0 launches on 11 December 2026, and Grinding Gear Games has announced an Infernalist rework: a new demonic minion that can cast any spell it is given, up to three Infernal Hounds and new Covenant skills. 1.0 also "massively" rebalances support gems, gives the passive tree a major makeover (all jewel sockets move into clusters) and revamps more than 70 uniques. Expect the ascendancy order, the support gem names and the passive tree route below to change. We will update this guide after the 1.0 patch notes.
This guide is built on Otter Jones' 39-minute video "Catha's Brilliance Infernalist Build Guide POE 2 0.5.5" (September 2026) and the creator's own written version of the build on PoE Vault. Item, gem and keystone tooltips were checked against the community wiki (poe2wiki.net). If you are new to the game, the Path of Exile 2 game hub has the beginner guides that this build assumes you have read.
Infernal Legion beast build at a glance

The build is one minion and a lot of support for it. You catch a rare beast with Tame Beast, and it keeps up to four of its rare monster modifiers as your Companion. The wiki confirms the "up to four" limit. Catha's Brilliance, a lineage version of the Infernal Legion support, makes that companion ignite every enemy within 2 metres. The ignite works as if it dealt base fire damage equal to 10% of the minion's maximum life. So more minion life means more damage, and that is cheap to scale. The video pitches it as a low-budget build that new players can use to beat the whole game. Otter Jones says it clears high-tier, high-delirium ritual maps and is especially strong in hardcore. The written guide adds that it works in Solo Self-Found and as a Witch league starter. That makes it a good candidate if you are looking for the best Witch build in PoE2 for a careful, cheap start.
| Rating (our judgement from the video) | Score (1–5) | Why |
|---|---|---|
| Beginner-friendly | 3 | Easy to play once set up, but the swap from Snipers to the beast takes a full respec and new gear |
| Budget | 5 | No mandatory expensive uniques. Saitha's Spear and The Mutable Star are cheap |
| Mapping | 4 | Oil Barrage plus Pounce clears the screen, but it needs attack speed to feel smooth |
| Bossing | 4 | The beast does the damage while you stack debuffs and dodge |
Pros: your damage comes from the beast, so you can move freely and dodge. A better beast is an upgrade that costs time, not currency. You get very high damage reduction against small hits, and your life and energy shield refill during combat.
Cons: the leveling swap is not foolproof (the creator's words). Hunting a beast with good modifiers takes luck. Lord of the Wilds halves your Spirit. Without Catha's Brilliance you have to spend many passives on keeping the beast alive.
Leveling the Infernalist with Skeletal Snipers

setup Otter Jones changed the leveling plan for 0.5. Tame beasts got stronger as they gain levels, but they are weaker early on. So you level with Skeletal Snipers instead of jumping to a beast in Act 3 as older versions did. Snipers are a ranged minion. Their main damage is the command skill: they fire an arrow that leaves a poisonous gas cloud, and when anything ignites it, the cloud explodes for fire damage. The wiki confirms that a burning effect on an enemy inside the gas detonates it. The creator says the Infernalist is the easiest class to start minions with, because she can take almost pure minion damage through Act 1 from her starting area.
| Stage | What to use | Why |
|---|---|---|
| Act 1 | Skeletal Snipers with Fire Attunement, then Flame Wall | Fire Attunement lets their normal arrows build ignite. Flame Wall under or in front of enemies sets the gas off |
| Act 1–2 | Frost Bomb, then Elemental Weakness on bosses | More fire damage from each gas explosion |
| First ascendancy (Act 2) | Loyal Hellhound | The hound's burning aura ignites enemies, so the gas goes off almost at once |
| Rest of campaign | More Snipers, more supports, more minion levels | Every Spirit upgrade goes into another Sniper, not an aura |
| Interludes or early Atlas | Swap to the tamed beast | Only when you have strong gear. Otherwise wait until the Atlas |
The written guide's Act 1 support order for Snipers is Multishot, Muster and Feeding Frenzy. It also says to save your first Perfect Jeweller's Orb for the beast. Minion levels on your sceptre, helmet and amulet are the stat to look for at every vendor check. The creator warns that skeletons die easily to boss slams. Carrying a shield and standing between the Snipers and the enemy keeps them alive longer. If they are all wiped out, kite until they come back.
The swap takes a lot of work. You drop every Sniper and command passive, respec from Hellhound to Bringer of Flame, and need a talisman, a sceptre and plenty of Dexterity for a high-level beast. Collect spare gems, Jeweller's Orbs and gold for the respec before you start. Our tip: do the swap in the Atlas hideout, not in the middle of an Interlude, so a weak first beast cannot leave you stuck. For a full route through the acts, see our PoE2 campaign guide.
Infernalist ascendancy order: Bringer of Flame and Beidat

Use this order. It combines the video with the written guide, which spells it out:
| Order | Notable | What it does for this build |
|---|---|---|
| 1st (Act 2) | Loyal Hellhound | Grants Summon Infernal Hound, a burning minion. The wiki puts its ignite radius at 2.5 metres since 0.3.0. Refund it when you get the beast |
| 2nd | Altered Flesh | Takes 20% of physical damage as chaos, and 20% of cold and lightning as fire. Smaller hits make armour much stronger |
| 3rd | Beidat's Will | +1 Spirit per 25 maximum life, reserves 25% of life. Offsets the Spirit penalty of Lord of the Wilds |
| 4th | Beidat's Hand | +1 maximum energy shield per 8 maximum life, reserves 25% of life |
| On the swap | Bringer of Flame (replaces Hellhound) | All damage from you and allies in your Presence counts towards ignite magnitude |
Bringer of Flame is why this ascendancy fits beast hunting so well. Without it, only the "extra fire damage" rare modifier feeds the burn. With it, extra cold, lightning and chaos count too, so finding a good beast becomes about four times easier. The written guide values each extra damage modifier at about 40% more burn, and says three of them make the best case. That figure is the creator's, not a tooltip. The two Beidat nodes reserve half of your life together. That is why the build invests in maximum life on every piece of gear. More life means more energy shield, more Spirit and more regeneration. For how to earn the points themselves, see the PoE2 ascendancy trial guide.
Zealot's Oath defence: regeneration instead of recharge

free The defence uses two layers: armour to shrink every hit, and energy shield to absorb what gets through. The video points out that energy shield recharge was heavily nerfed in 0.5, so this build does not use it. Instead it takes Zealot's Oath. The wiki text is "Excess Life Recovery from Regeneration is applied to Energy Shield" and "Energy Shield does not Recharge". Your life is usually full behind the energy shield, so almost all of your life regeneration flows into energy shield, even while you are being hit.
This only works with a real life pool, so it is a bad fit for Chaos Inoculation. It suits the Infernalist because the Beidat nodes already push you to stack life. According to the creator, regeneration is calculated from maximum life, even though half of it is reserved. The build has four sources of regeneration:
- Consecrated Ground from Holy Descent on Pounce and Devour, plus the bleed-immunity charm. The wiki puts it at 5% of maximum life regenerated per second while you stand on it.
- Devour, a wyvern skill that eats corpses or cullable enemies and regenerates life for each one.
- A Vaal Embalmed Bearer spectre, whose banner aura heals you. The creator credits the tip to another content creator. The written guide says you can bind it in The Molten Vault in Act 3.
- The Mutable Star's own life regeneration (see the gear section).
Armour gets help as well. Altered Flesh splits hits into smaller pieces, and armour applies to elemental damage from the tree, the boots and other gear. A Panther Idol in the body armour adds some armour against chaos damage. For the theory behind armour, evasion and energy shield, see our PoE2 defense guide.
Passive tree: Lord of the Wilds and minion nodes

The endgame tree goes north to the top edge for minion nodes and exposure. It then turns right for a jewel socket and some energy shield, and goes down into the Druid area for the two keystones. The middle of the tree is mostly attributes, minion life and a few strong notables such as Stripped Defences, plus hybrid armour and energy shield nodes. The written guide warns that the build is hungry for attributes.
setup Lord of the Wilds is what pulls the build to this area. The wiki text: you can equip a non-unique sceptre while wielding a talisman, at the cost of 50% less Spirit and 50% less reservation efficiency for non-minion skills. You need a talisman to shapeshift. A sceptre gives the beast minion levels, minion life and ailment magnitude, and the creator says that nearly doubles its damage. With the keystone you hold both at once, so you clear at full power.
The weapon swap sets use their own points. On the shapeshift set the written guide takes Rallying Form (Onslaught for the companion), Hide of the Bear and Primal Growth (more area for Oil Barrage). On the spear set it takes Stripped Defences and Howling Beast. Howling Beast lets your warcries inflict Critical Weakness, and that is how the beast's ignite gets a chance to crit.
Without Catha's Brilliance: Infernal Legion II burns your own minion for 10% of its maximum life per second, according to the wiki. Catha's Brilliance has no self-burn line. So until you own it, you need minion fire resistance and regeneration nodes such as Vile Mending, Crystalline Flesh and Living Death, as the written guide says. Catha's Brilliance requires level 65 and drops from The Bodach, the Ritual pinnacle boss. The video says it should be easy to farm during the ritual event. The video description links no Path of Building or planner, only the written guide above, which has the full tree. For how to plan and respec, see our PoE2 passive tree guide.
Gear by budget: league start, mid budget, endgame

cheap Otter Jones calls most of the gear in the video "modest" and not best in slot, which makes it a useful reference for a normal budget.
| Stage | Priorities |
|---|---|
| League start / campaign | +minion skill levels on sceptre, helmet and amulet. Movement speed on boots. Strength and hybrid armour/energy shield pieces. In Act 2 (around level 16), buy a few Familial Talismans for later |
| Mid budget (early Atlas) | Shrine Sceptre with minion levels, minion life, allies' damage and "increased magnitude of damaging ailments" for minions. Talisman with minion damage and attack speed, filled with Greater Runes of Alacrity. Saitha's Spear on the swap set. The Mutable Star. Capped resistances |
| Endgame | +2 or more minion levels on helmet and amulet. Fang Talisman with desecrated companion damage. Twice-corrupted Saitha's Spear. Emerald jewels with companion life and damage. Optional Prism of Belief (+3 companion skill levels) |
Talisman: start from a base with a minion damage implicit, roll or essence-craft attack speed, then try to desecrate the companion damage modifier. The written guide recommends a Greater Essence of Haste for the attack speed roll. Three or four rune sockets for speed runes make Oil Barrage much smoother.
Shrine Sceptre is required. Its Purity aura lets you socket supports on persistent buffs without paying their Spirit, and with Lord of the Wilds you could not afford those supports any other way. Any of the three elements works.
Armour pieces: Strength/Intelligence hybrid bases with maximum life, resistances, attributes and "% of armour also applies to elemental damage" where it fits. The creator's boots have a 35% movement speed roll plus a 5% movement speed rune. He stresses that movement speed is also defence, because it lets you walk out of slams.
Key uniques: Saitha's Spear and The Mutable Star

Saitha's Spear is the single biggest damage boost. The wiki tooltip: "Aggravating any Bleeding with this Weapon also Aggravates all Ignites on the target", plus a 25–40% chance to aggravate bleeding on hit. An aggravated ignite deals 100% extra damage for its whole duration, so this doubles the beast's burn on bosses. You never hit with the spear for damage. You throw Spearfield to apply bleeds, aggravate them, and let the spear's line do the rest. The wiki lists it at level 33. Later, the creator buys a twice-corrupted copy that keeps the aggravate lines and swaps the fire damage line for culling strike against bleeding enemies.
The Mutable Star is a cheap Cleric Vestments unique: "Defend against Hits as though you had 1% more Armour per 1% current Energy Shield". On full energy shield, which Zealot's Oath keeps you on most of the time, that is double armour. It also has 25–35 life regeneration per second and less ignite and bleed duration on you. Correction: the video says you can wear it at level 44, and the written guide gives both 45 and 50. The wiki tooltip says level 45, 41 Strength and 41 Intelligence. On trade, look for three or four augment sockets.
Skill gems, supports and Spirit setup

setup This is the gem setup from the video's endgame character. Where the video and the written guide offer alternatives, both are listed.
| Skill | Supports | Notes |
|---|---|---|
| Companion (your tamed beast) | Catha's Brilliance (or Infernal Legion II), Dialla's Desire (or Minion Mastery), Scouring Flame (or Searing Flame II), Feeding Frenzy II, Hulking Minions | All of the damage. The video says Scouring and Searing do about the same damage |
| Oil Barrage | Encroaching Ground, Nova Projectiles I, Rapid Attacks III, Persistent Ground, flex (Pierce III, or try Salvo or Magnified Area II) | The most important skill after the beast |
| Pounce | Holy Descent, Sniper's Mark with Charged Mark, Stormfire, Rapid Attacks III | Mobility, consecrated ground and the shock setup |
| Spearfield (spear set) | Bleed III, Inexorable Critical, Rapid Attacks III, optional Rage III or Rearm II | Applies bleeds for Saitha's Spear and crits to trigger the mark |
| Devour | Holy Descent, Rapid Attacks III, Gorge, Corpse Conservation | Regeneration, flask charges, culling |
| Frost Bomb | Spell Echo, Overabundance, Cooldown Recovery, Cold Mastery, Potent Exposure | Exposure lowers the boss's fire resistance |
| Elemental Weakness | Heightened Curse, Cold Mastery, Ritualistic Curse, Cursed Ground (or Doedre's Undoing) | Pre-placed curse zones |
| Infernal Cry | Echoing Cry, Second Wind, Prolonged Duration, Astral Projection | Only for Critical Weakness through Howling Beast |
| Vaal Embalmed Bearer spectre | Brutus' Brain (or Meat Shield), Magnified Area II | A healing aura that cannot die |
| Purity of Lightning (from the Shrine Sceptre) | Upwelling II and other persistent buffs | Purity lets you socket these without paying their Spirit |
Spirit: Lord of the Wilds halves it, and Beidat's Will gets some of it back. Spend it on the companion first, then the spectre. Everything else rides on the Shrine Sceptre's Purity. Brutus' Brain makes the spectre unable to deal or take damage, which is ideal for a heal-bot. Upwelling II only gives minion damage while you are not on full mana, so keep using skills.
Flasks and charms: a life flask with instant recovery and charges per second. Lavianga's Spirits as the mana flask, so you never have to press it. A charm against freeze, a bleed-immunity charm (bleeding goes straight to life because you are not on Chaos Inoculation), and a Stone Charm against stuns.
For how supports, Spirit and lineage gems work in general, see our PoE2 skill gems guide.
Picking a beast to tame

grind The best beast is a mix of base type and modifiers. Bigger, slower beasts have more life, and more life means more burn. Very big beasts can feel clunky, though. The creator usually recommends a wasp. The written guide names the Plague Harvester, an oversized wasp you can catch efficiently in the Interludes. It flies over terrain, attacks aggressively and has a dive-bomb that spreads fire. In the video he uses a runic-infused Osteodon, because ritual circles keep you in one place and its haste aura helps clearing.
For modifiers, look first for extra damage (fire, cold, lightning or chaos, all of which count thanks to Bringer of Flame). Then pick utility such as shocks or a haste aura, or survival such as life regeneration or resistances. The written guide says to avoid modifiers that create explosions. Hulking Minions makes the beast Gigantic: 20% more maximum life, 20% more damage and 20% increased size, as the tooltip on screen shows. Keep Tame Beast in a spare slot if you can, so you can catch a good rare before your own beast burns it to death.
Oil Barrage mapping: spreading the burn

free The beast only burns enemies within 2 metres, so you spread oil for it. Oil Barrage turns you into a wyvern and spits oil that creates Oil Ground. Once the beast ignites an enemy standing in it, the whole patch burns, and so does any oil touching it. The wiki confirms that the skill "Cannot Ignite" on its own, which saves a support slot. The video says it has no cooldown, so cooldown reduction is not needed, unlike the oil grenades in older versions.
Two quirks matter in practice:
- Projectiles stack on one spot. By default it fires three projectiles one after another at the same point. Nova Projectiles I fires them all at once, one where you aim and the rest spread around you.
- Power charges ruin it. Devour gives power charges. Oil Barrage spends them on an electrified version that makes no Oil Ground (wiki). After lots of Devour inside a ritual, tap Barrage once or twice to burn the charges off before you lay the oil you actually need.
Tap Barrage, don't hold it, even though it is a channelling skill. Between packs, Pounce turns you into a wolf. The written guide says that gives +30% movement speed while running on all fours. Your beast follows you and keeps the fire going. In stationary fights such as rituals, keep the oil topped up, pre-place Elemental Weakness zones and fill the area with Spearfield spikes.
Bossing rotation and what kills this build

setup You can just let the beast burn the boss while you dodge. The full rotation, which the written guide estimates at about four times the damage, looks like this:
- Before the boss spawns, place Elemental Weakness and throw several Spearfields where it will stand.
- When it appears, cast Frost Bomb (exposure) and Infernal Cry (Critical Weakness stacks).
- Pounce on it to apply Sniper's Mark. With Charged Mark, the next crit drops Shocked Ground, and Stormfire makes shocked enemies take 20% of ignite damage as lightning as well (wiki).
- Keep throwing Spearfield until the mark is used and the bleeds are aggravated. Recast the warcry when Echoing Cry runs out.
- Finish with Devour when the boss is cullable.
What kills this build:
- Bleeding. You are not on Chaos Inoculation, so bleeds hit your life. Keep the bleed-immunity charm up.
- Losing the beast. Before Catha's Brilliance, Infernal Legion II can burn your own beast to death. That means downtime while it revives.
- Skeletons wiped during leveling. Boss slams kill Snipers in one hit, and you have no damage of your own.
- Big single hits. Armour is weak against large hits. Altered Flesh splits them up, but dodge slams anyway.
- skip Holding Oil Barrage down or firing it with power charges. You lose oil coverage exactly when the ritual gets busy.
Read next
- PoE2 best builds for endgame (meta): how this build compares with the strongest options this event.
- PoE2 best class for beginners: if you are not sure the Witch is for you.
- PoE2 skill gems, support gems and Spirit: the gem system this setup relies on.
- PoE2 blood mage build: the other Witch ascendancy, built on a spear and curses.
- PoE2 endgame guide: Atlas, waystones and pinnacle bosses such as The Bodach.
How this guide was fact-checked
- From the video (Otter Jones, 20 September 2026, patch 0.5.5): the build concept, ascendancy choices, gear shown on screen, gem links, leveling plan and all playstyle advice. Ratings in the at-a-glance table are our own judgement from the footage.
- From the creator's written guide (PoE Vault, updated 20 September 2026): the exact ascendancy order, the support gem names the video garbles, the beast advice (Plague Harvester, modifiers to avoid), the Molten Vault spectre location and the 40%-per-modifier figure.
- From poe2wiki.net: the tooltips of Catha's Brilliance (2 m ignite at 10% of minion life, level 65, drops from The Bodach), Infernal Legion II (10% self-burn), Tame Beast (up to four modifiers), all Infernalist notables, Zealot's Oath, Lord of the Wilds, Oil Barrage, Saitha's Spear, The Mutable Star, Consecrated Ground (5% life per second), Stormfire (20%), Brutus' Brain, Upwelling II and Skeletal Sniper gas.
- From Grinding Gear Games' Steam announcement (7 November 2026): the 1.0 date and the announced Infernalist rework in the version note.
- Corrections: The Mutable Star requires level 45 (wiki), not 44 as said in the video. The written guide also gives both 45 and 50. The video's auto-captions garble several names. We used the official names (Catha's Brilliance, Zealot's Oath, Beidat's Hand and Will, Encroaching Ground, Vaal Embalmed Bearer, Lord of the Wilds, Saitha's Spear). The creator's "the BOD" means The Bodach, the Ritual pinnacle boss. The spectre's regeneration amount is not stated: the creator says he is unsure of the number, so we left it out.
What this guide doesn't answer
- Beast-by-beast and modifier-by-modifier rankings: the creator covers them in a separate video. We only give the selection rules.
- A version without Catha's Brilliance in detail: the written guide has a separate tree for it, and we only list the key defensive nodes.
- Exact DPS and prices: they depend on your beast's modifiers and the event economy, and the video shows no reliable figures.
- Instilling, Megalomaniac and other high-budget jewel options: expensive extras outside a league-start guide.
- The 1.0 version of the build: the Infernalist rework could change everything here. We will update the guide after the 1.0 patch notes.
Frequently asked
Is the Infernalist a good Witch league starter in PoE2 0.5.5?
Yes. The Catha's Brilliance beast build needs no expensive uniques: Saitha's Spear and The Mutable Star are cheap, and the creator, Otter Jones, says it clears high-tier ritual and delirium maps and suits SSF and hardcore. The hard part is the swap from Skeletal Sniper leveling to the tamed beast, which needs a respec, a talisman and a Shrine Sceptre.
Where does Catha's Brilliance drop in PoE2?
Catha's Brilliance is a lineage support gem that requires level 65 and drops from The Bodach, the Ritual pinnacle boss in Caer Tarth. Until you have it, use Infernal Legion II, which burns your own minion for 10% of its maximum life per second, so you also need minion fire resistance and regeneration nodes on the tree.
What ascendancy order should an Infernal Legion Infernalist take?
Loyal Hellhound first for the leveling phase, then Altered Flesh, Beidat's Will and Beidat's Hand. When you switch to the tamed beast, refund Loyal Hellhound for Bringer of Flame, which lets extra cold, lightning and chaos damage modifiers on your beast add to its ignite, not just extra fire.
How do you level the Infernalist before taming a beast?
Use Skeletal Snipers from the start. Their command arrow leaves a flammable gas cloud, and Fire Attunement, Flame Wall and later the Infernal Hound from Loyal Hellhound ignite it for big fire explosions. Stack minion levels on sceptre, helmet and amulet, and switch to the tamed beast in the Interludes only with strong gear, otherwise in the early Atlas.
Why does this Infernalist build use Zealot's Oath and Lord of the Wilds?
Zealot's Oath turns excess life regeneration into energy shield, so with Consecrated Ground, Devour and a healing spectre your energy shield refills mid-fight even though it can no longer recharge. Lord of the Wilds lets you hold a non-unique sceptre alongside the talisman you need for Oil Barrage, nearly doubling your beast's damage while you clear, at the cost of 50% less Spirit.
Read next
PoE2 Invoker Build Guide: Flicker Strike Crit Monk (0.5.5)
An endgame Monk build for PoE2 0.5.5 where near 100% crit chance generates power charges for Charged Staff, Whirling Assault, Falling Thunder and Flicker Strike. Covers the full gem and Spirit setup, ascendancy order, tree, gear stages and how to play, checked against the wiki.
PoE2 Pathfinder Build Guide (0.5.5): Poison Ranger
A crit poison Pathfinder for PoE2 0.5.5 that clears with Poisonburst Arrow and two Heralds and deletes bosses with Gas Arrow into Toxic Growth. Covers leveling, ascendancy, tree, jewels, gems, Spirit and gear at three budgets.
PoE2 Druid Build Guide (0.5.5): Cold Spark Oracle/Shaman
A Cold Spark Druid for PoE2 0.5.5 that levels with Orb of Storms and Spark, using Elemental Equilibrium to turn the orbs' infusions cold. Covers gems act by act, Oracle or Shaman picks, the tree path, gear and boss play.
PoE2 Spirit Walker Build: Tecrod Monkey Companions (0.5.5)
A fact-checked PoE2 Spirit Walker companion build for 0.5.5 where a tamed Zekoa monkey with Tecrod's Revenge does the damage. Covers ascendancy order, passive tree, gear from about five divines, every gem link, the wolf revive trick and how to play maps and bosses.