
🎯 The core idea
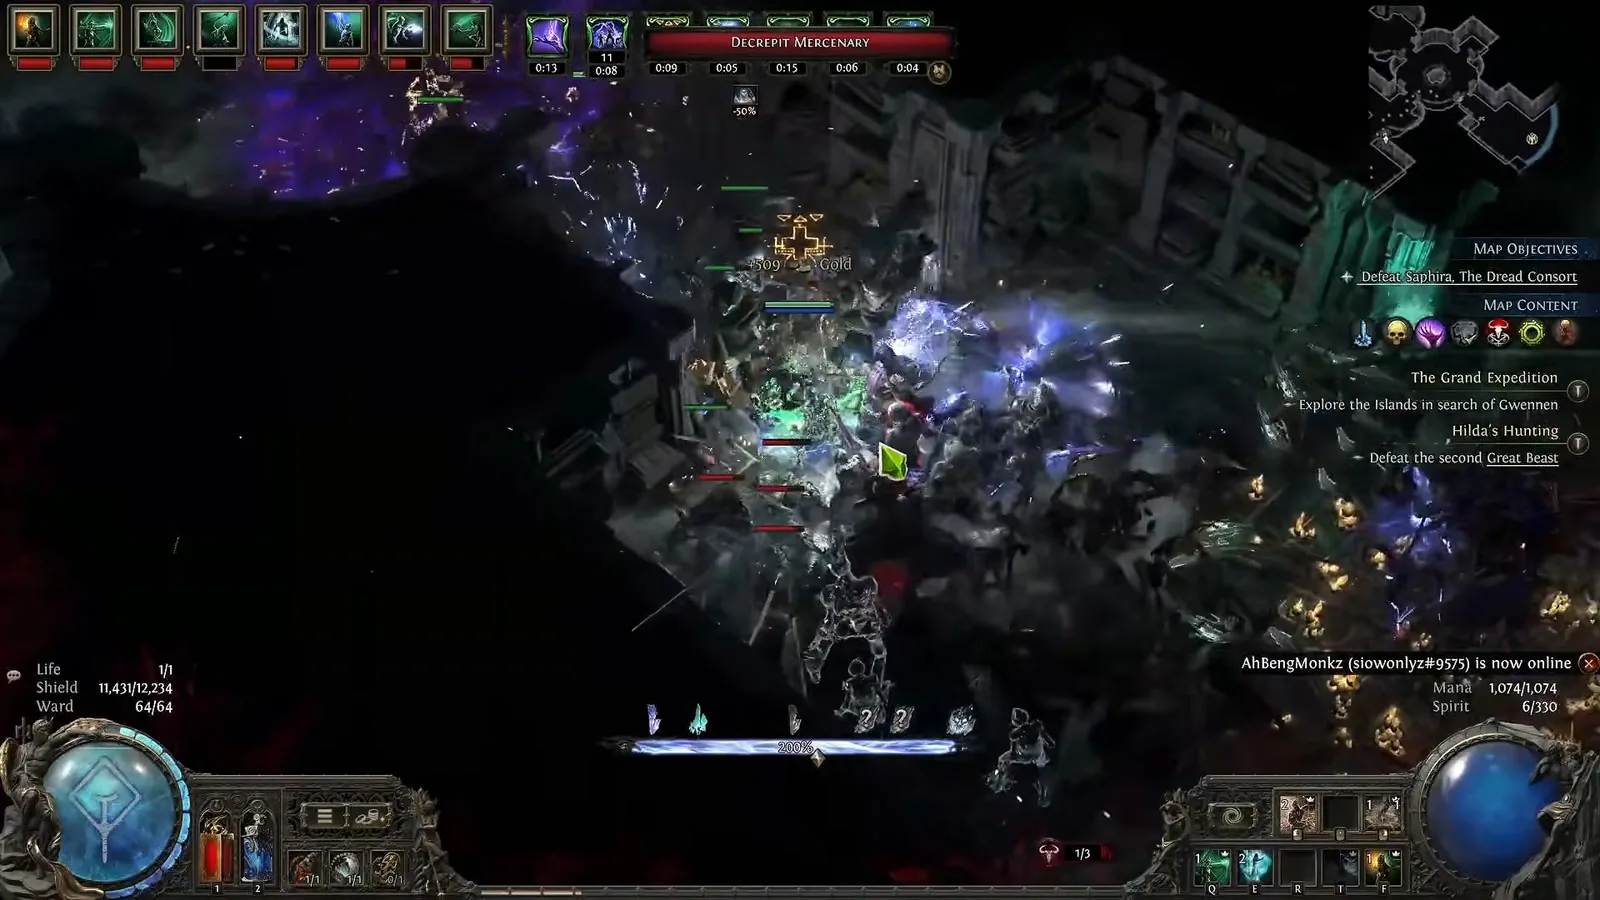
This PoE2 Disciple of Varashta build plays like a spellcaster: you command djinns instead of casting. Kelari's Deception freezes packs, Frost Nexus turns the frozen enemies into Chilled Ground, and Navira's Fracturing blows that ground up across the screen. Getting Kelari to deal cold damage through Unholy Might, Embitter and Evergrasping Rings means you don't need Ice Nova or a tamed beast. You need a decent budget for it to freeze reliably.
- free costs nothing
- cheap small cost
- setup needs preparation
- grind pays off slowly
- skip the thing to stop doing
Version note: Written for 0.5.x, reviewed 2026-11-17. This guide covers patch 0.5.5 (the Forbidden Rites event). Path of Exile 2 leaves Early Access on 11 December 2026, and Grinding Gear Games has announced "sweeping balance changes" for 1.0. The djinn command skills, Kurgal's Leash, Archon of Undeath, the Dominion anoint and the Time-Lost jewel crafts below may all change. We will update this guide after the 1.0 patch notes are out.
Disciple of Varashta build at a glance

This is the endgame version of MisoxShiru's Navira's Fracturing Disciple of Varashta, as shown in his 47-minute guide for patch 0.5.5. The Disciple of Varashta is the Sorceress ascendancy that summons three invulnerable djinns: Ruzhan (fire), Navira (water) and Kelari (sand). They stay put until you use one of their Command skills. This build uses Kelari and Navira. The other minions in the setup deal no meaningful damage. They are there for the Muster bonus, Armour Break and Wither.
The author sees it as one of the smoothest options for a poe2 sorceress league starter. He says he reached tier 15 maps on day one in campaign gear. The "no Ice Nova or Beast" version in this guide comes later, once you have the budget. The character in the video is level 97, with 12,234 energy shield, 330 Spirit and 75% elemental resistances.
| Rating (our judgement from the video) | Score (1–5) |
|---|---|
| Beginner-friendly | 3 |
| Budget (this endgame version) | 2 |
| Mapping | 4 |
| Bossing | 3 |
Pros: very smooth campaign once Kelari is unlocked, and the author calls it "insanely tanky" on energy shield. The screen-wide frost explosions clear maps well up to 200% Delirium, as shown in the video. You mostly press two buttons: Kelari's Deception, then Navira's Fracturing.
Cons: this version only works once Kelari's Deception hits hard enough to freeze. The damage ceiling flattens out because you scale mostly through minion levels. The Kurgal's Leash rotation has an annoying extra button, and the best jewels and amulet are expensive crafts.
How Kelari's Deception makes Chilled Ground

Navira's Fracturing only works on Chilled Ground. PoE2DB describes it as commanding Navira "to fracture all nearby areas of Chilled Ground that have enemies standing on them", with a 5-second cooldown. Most Varashta builds create that ground with Ice Nova and a Cold Infusion, or with a tamed beast that leaves ice trails. This version makes it with Kelari instead.
How it works:
- Kurgal's Leash on Kelari gives you and Kelari Unholy Might for 15 seconds when you command him. Unholy Might grants 30% of damage as extra Chaos damage (poe2wiki).
- Two Evergrasping Rings each give allies in your Presence 15–25% of damage as extra Chaos damage. Kelari counts as an ally, and the wiki notes that two copies on one character do stack.
- Embitter turns all of that "damage gained" into extra Cold damage instead. Kelari's Deception, normally a Physical skill, now deals a big chunk of Cold damage. The tooltip in the video shows 31,149–46,723 Cold next to the Physical part.
- Frost Nexus makes the skill create Chilled Ground for 8 seconds whenever it Freezes an enemy. Enemies Kelari kills leave frost behind, and Navira's Fracturing spreads it from pack to pack.
setup The Evergrasping bonus only works in your Presence. If you throw Deception far away, Kelari's clone leaves your Presence and loses the extra Chaos damage. Cast it close to you.
The damage you need before switching

You can't start with this version. MisoxShiru's rule of thumb: with Unholy Might active, the Kelari's Deception tooltip should show at least about 40,000–70,000 damage. Below that, Kelari doesn't freeze packs consistently and you get no ground to fracture. That number comes from the video, not from an official source.
skip If your tooltip is well below that, don't force it. Keep Ice Nova (or the beast) in the loop and buy upgrades first. If you have the damage but freezes still feel unreliable, the author's fix is a belt with "Minions have increased Immobilisation buildup". His belt shows 46% of it.
The step up from Kurgal's Leash is Uul-Netol's Embrace. The video says it gives 40% "of all damage" as extra Chaos. PoE2DB's text is narrower: 40% of Physical damage as extra Chaos, plus Armour Break from Chaos damage. That still works here because Kelari's Deception is a Physical skill. The real advantage is that you don't need the Brutality refresh at all, which removes a button. It is a level 65 lineage support and very expensive in 0.5.5.
Leveling the Varashta Sorceress

The source video skips the campaign, so this part comes from the same author's short 0.5.5 league-start video and the Act 1–2 planner exported from his Mobalytics guide.
- Acts 1–2 (before ascending): play any spell that feels good. The author mentions Spark or Ember Fusillade, and minions are fine too. His Act 1–2 planner uses chaos spells (Contagion, Essence Drain), Bonestorm and Ravenous Swarm with an Ashen Staff.
- First ascendancy (Act 2): take Kelari. From here, Kelari's Deception and Kelari's Brutality carry the rest of the campaign on their own. The author called it the smoothest campaign he has played. Deception stores three charges and deals 50% more damage for each use in a row.
- Early maps: Kelari becomes your single-target skill and Navira's Fracturing takes over clear. Until you have a tamed beast or this Kelari version, loop Ice Nova (with a Cold Infusion it leaves Chilled Ground) and Navira's Fracturing. Frost Nexus and Encroaching Ground spread and grow the ice.
- Funded endgame: once your Deception tooltip reaches the threshold above, drop Ice Nova and use the setup in this guide.
cheap Level-one minion gems keep Spirit costs low. Muster needs different minion types, not strong ones.
Disciple of Varashta ascendancy order

The video doesn't give an order. This is the order implied by the author's two videos and the skills panel on screen:
| Ascendancy | Notables | Why |
|---|---|---|
| 1st (Act 2) | Barya of Kelari → Kelari's Deception | Kelari's Brutality and Deception carry the campaign |
| 2nd | Barya of Navira → Navira's Fracturing | Your map clear, and a third djinn type for Muster |
| 3rd | Baryanic Leylines | Non-unique Time-Lost Jewels get 40% increased radius |
| 4th | Defensive notable (The Fourth Teaching or Sacred Rituals) | Energy shield recharge or Armour from energy shield. Not shown in the video, so it's our suggestion |
Baryanic Leylines is what makes the tree work. In the video it sounds like "Arianic timelines", but the notable is Baryanic Leylines. Combined with jewels that "upgrade radius to very large", each Time-Lost Sapphire covers a huge part of the tree. Ruzhan, the fire djinn, isn't used. The author says the fire version deals slightly more top-end damage, but this ice version clears noticeably better. For a refresher on unlocking each step, see our PoE2 ascendancy trial guide.
Varashta passive tree and Time-Lost jewels

setup The tree looks odd in planners because they don't draw the huge jewel radii. Many notables don't seem to do much, but they're taken to power the two Time-Lost Sapphires, which add minion critical stats to every notable in radius. The author says removing both jewels cuts his damage roughly in half.
Key pieces, by stage:
- Early: minion and Command damage, Spirit, energy shield, and Archon of Undeath. That notable gives a 15% chance to gain the Archon of Undeath buff when you use a Command skill: more minion damage and more cooldown recovery for Command skills.
- Mid: the two Time-Lost jewel sockets inside the Baryanic Leylines radius, then every notable you can reach in those circles.
- Late: a From Nothing jewel lets you allocate passives near a keystone without connecting to them. The author's budget choice is Mind Over Matter's area: about one divine, and 10 notables by his count. His best-in-slot is Conduit's area (13 notables).
The character sheet shows 1 maximum life, which means Chaos Inoculation (maximum life is 1, immune to chaos damage and bleeding). Defence is energy shield only. For how the tree and jewel sockets work in general, see our PoE2 passive tree guide.
Gear by budget stage

| Slot | League start | Mid budget | Endgame (as shown) |
|---|---|---|---|
| Weapon | Any sceptre with Spirit and + minion levels | Shrine Sceptre with Spirit, +4 minion levels | Shrine Sceptre: 180 Spirit, +4 minion levels, mana regen, +5 Puppet Master stacks |
| Augment | none | Xipocado's Soul Core of Dominion | same (40% increased minion Command skill damage) |
| Helmet / focus | energy shield, resistances | + minion levels | energy shield, +2 minion levels, Gigantic Following planned |
| Body / gloves / boots | energy shield, resistances, movement speed on boots | add Spirit if short | survivability; Spirit only if needed |
| Belt | anything with resistances | rare belt with Command damage | Immobilisation buildup, Command damage, minion area |
| Rings | resistance rares | one Evergrasping Ring | two Evergrasping Rings, later rare rings with cooldown recovery and minion crit |
| Amulet | + minion levels, Spirit | anointed with Dominion | crafted: +3/+4 minion levels, Spirit, Wolf Pack |
Notes on the key items:
- Shrine Sceptre: the author prefers this base because of the Purity skill it grants. Get the most Spirit you can, then +minion levels and Puppet Master stacks. Puppet Master raises your Command skill speed, reduces the movement penalty while commanding, and increases minion Command damage.
- Dominion anoint: the author calls it required. It removes the recovery period after Archon ends, so you can refresh it right away. The video leaves out the downside, which PoE2DB lists: Dominion also gives 50% reduced effect of Archon buffs on you.
- Mana: commanding costs a lot of mana. The author runs Lavianga's Spirits, a unique mana flask that is always active. Switch to a normal mana flask if you run dry.
Prices and divine values change all the time, so check trade first. Our PoE2 currency guide explains the orbs used in the crafts below.
Crafting the Time-Lost Sapphire and amulet

grind These are the two best-in-slot crafts from the video. Both use fracturing, so a failed fracture means starting again.
Time-Lost Sapphire (summary): buy a base with a maximum-rolled minion Critical Hit chance or Critical damage line. Augment and Regal it, Desecrate it, then Fracture until the minion crit line is fractured. Annul down to one line and Chaos spam for the other crit line. Exalt two prefixes, then use an Ancient Potent Liquid of Contempt. The author puts the chance it hits a prefix and adds an extra suffix slot at 66%. Desecrate again for "increased effect of notable passive skills in radius". Then fix the prefixes with Divine Orbs, an Omen of Sinistral Annulment and Chaos Orbs. Good prefixes are energy shield recharge or minion damage on small passives. He says that in game, Chaos Orbs at this stage only reroll the prefixes. That's his observation, not documented anywhere.
Amulet (summary): start from a clean base that grants Wolf Pack (60 Spirit per PoE2DB, and it adds another minion type for Muster). Chaos spam for tier-1 Spirit or +3 minion levels, fracture it, then add the other one. Use an Omen of Sinistral Exaltation on the side with the fracture, then an Essence to remove the weaker mod on that side. Add quality with catalysts: defence quality before an exalt aimed at energy shield, then necrotic (minion) quality to 34%, which puts the minion mod at +4. Finish with a Desecration for minion cooldown recovery. The amulet in the video is anointed with Dominion and has +4 minion levels and +50 Spirit.
skip The author himself would stop before the last 50/50 annul steps. They cost a lot for a small gain.
Skills, Spirit and support gems

The gem list shown in the video comes from the written guide. A few slots in the author's live character differ, as noted below.
| Skill | Supports |
|---|---|
| Kelari, the Tainted Sands (Brutality + Deception) | Bidding II, Muster, Kurgal's Leash (Uul-Netol's Embrace at the top end), Embitter, Frost Nexus |
| Navira, the Last Mirage (Fracturing) | Muster, Bidding II, Frost Nexus, Rakiata's Flow, Encroaching Ground |
| Purity (sceptre skill) | Upwelling II, Clarity II, Seraph's Heart, Her Declaration |
| Skeletal Sniper | Last Gasp, Armour Break III, Armour Demolisher II, Corrosion, Muster |
| Wolf Pack | Romira's Requital, Last Gasp, Infernal Legion I, Amanamu's Tithe, Minion Instability |
| Skeletal Cleric | Last Gasp, Meat Shield II, Elemental Army |
| Convalescence | Cooldown Recovery II, Prolonged Duration II, Second Wind III |
| Skeletal Reaver / Frost Mage / Storm Mage | Last Gasp or Meat Shield II, Chaos Attunement, Withering Touch, Muster |
| Skeletal Arsonist (Explosive Demise) | Brutus' Brain or Meat Shield II, Efficiency II, Bidding III |
| Skeletal Brute | Armour Break III, Armour Demolisher II, Muster, Last Gasp |
| Pain Offering | Danse Macabre, Sacrificial Offering, Magnified Area II, Minion Mastery, Prolonged Duration II |
How it fits together:
- Muster: supported minions deal 7% more damage for each different type of Reviving Minion you have. That's why there are so many cheap minions. The gem list shows Purity of Ice. The author's sceptre grants Purity of Lightning instead, so use whichever Purity your sceptre gives.
- Utility minions: the Sniper's Command shoots a gas arrow. With Corrosion and the Armour Break supports, it breaks a boss's armour almost instantly. The Chaos Attunement and Withering Touch minions stack Wither for Kelari's chaos damage.
- Spirit: the author has 330 and says that covers everything. He uses a Spectre (29 Spirit by his figure) instead of Pain Offering, for one more Muster type and one less button. For the best single-target damage, he says the Offering is better.
New to gem slots and Spirit? Our PoE2 skill gems guide covers the system.
How to play the build in maps and bossing

Rotation in maps:
- Kelari's Brutality to start Unholy Might. In the video, Deception doesn't trigger Kurgal's Leash and only Brutality does. The author thinks that's a bug, so test it yourself.
- Kelari's Deception into a pack. Frozen kills leave Chilled Ground.
- Navira's Fracturing, then keep pressing it as you move. Every freeze makes more ground to fracture.
- Explosive Demise when Archon of Undeath is down. It's a Command skill on a cheap, low-level Skeletal Arsonist, and each Command has a 15% chance to trigger Archon. Brutus' Brain makes the Arsonist impossible to damage, so it never dies. Bidding III gets the cooldown back if you accidentally blow up a minion.
So it's two buttons most of the time and four when the buffs drop. Archon matters most because of its Command cooldown recovery. Without it, Fracturing and Deception come back too slowly and your damage collapses.
Bosses: fire the Sniper's gas arrow on the boss first to break its armour, then cast three Deceptions in a row (50% more damage each) close to you so Kelari stays in your Presence. Fracture when the boss stands on Chilled Ground.
What kills it: low damage, not low defence. If you can't freeze, you get no ground and no clear. The rest is mana: commanding is expensive, so keep mana regeneration on the sceptre or jewels. The author says the build gets harder to push in deep endgame because minion levels get expensive. For the defence side of an energy shield character, see our PoE2 defense guide.
Read next
- PoE2 best builds for endgame: how the Varashta compares to the rest of the 0.5.5 meta.
- PoE2 best class for beginners: if you're still choosing between Sorceress and the other classes.
- PoE2 skill gems: supports, Spirit and lineage gems explained.
- PoE2 Stormweaver build: the other Sorceress build on GuideForge, a budget Adonia's Ego spellcaster.
- PoE2 endgame guide: what to do once your Varashta is mapping.
- Path of Exile 2 hub: every PoE2 guide on GuideForge.
How this guide was fact-checked
- Main source video: MisoxShiru, "NO ICE NOVA OR BEAST! Navira's Fracturing Disciple of Varashta Build Guide | PoE 2 Patch 0.5.5" (17 September 2026, 47 minutes). The build choices, the 40,000–70,000 tooltip target, the character stats (level 97, 12,234 energy shield, 330 Spirit), the gear shown, the crafting steps and the Spectre's Spirit cost all come from it. The ratings table is our own judgement.
- Second source: the same author's short league-start video, "The Smoothest League Starter EVER" (3 September 2026), and the Act 1–2 planner exported from his Mobalytics guide, for the leveling section. The Mobalytics page itself blocked our requests, so we didn't use its full text.
- poe2wiki.net: the Disciple of Varashta notables (including Baryanic Leylines at 40% radius), Kurgal's Leash (15 s Unholy Might), Unholy Might (30% as extra Chaos), Evergrasping Ring (15–25%, stacks with two copies), Embitter, Frost Nexus (8 s Chilled Ground), Kelari's Deception (three charges, 50% more per consecutive use).
- PoE2DB: Navira's Fracturing and Kelari's Brutality text and cooldowns, Archon of Undeath (15% on Command), Dominion, Uul-Netol's Embrace, Muster (7%), Puppet Master, Explosive Demise, Brutus' Brain, Xipocado's Soul Core (40%), From Nothing, Chaos Inoculation, Wolf Pack (60 Spirit), Lavianga's Spirits, Encroaching Ground.
- Official Steam announcements: the 1.0 release on 11 December 2026 and its announced balance changes.
- Corrections to the video: "Olal's Embrace" is Uul-Netol's Embrace, and it gains 40% of Physical damage as Chaos, not 40% of all damage. "Arianic timelines" is Baryanic Leylines. The Dominion anoint also halves the effect of Archon buffs, which the video doesn't mention. The gem overlay shows Purity of Ice and Uul-Netol's Embrace, while the live character runs Purity of Lightning and Kurgal's Leash. The table lists both where they differ. The Kurgal's Leash and Deception bug and the Chaos Orb behaviour on the jewel craft are the author's observations. We couldn't confirm either in official sources.
What this guide doesn't answer
- A full act-by-act leveling route. The source video only covers the endgame. Use the author's written guide for the campaign.
- The exact passive tree. No planner link in the video description shows the jewel radii properly, so we listed key notables instead of a point-by-point path.
- The Ruzhan fire variant and the Ice Nova or tamed-beast versions. They're mentioned for comparison but not covered.
- Pinnacle boss results. The video shows maps up to 200% Delirium, not uber bosses.
- 1.0 changes. Nothing about the Disciple of Varashta in 1.0 has been confirmed yet. This guide will be updated after the patch notes.
Frequently asked
Is Disciple of Varashta a good league starter in PoE2 0.5.5?
Yes. The Navira's Fracturing version is one of the smoothest Sorceress league starters in 0.5.5. Once you take Kelari at the first ascendancy in Act 2, Kelari's Deception and Kelari's Brutality carry the campaign, and MisoxShiru reached tier 15 maps on day one in campaign gear. The no-Ice-Nova version in this guide is the funded endgame form. Start with Ice Nova plus Navira's Fracturing.
How do you make Chilled Ground without Ice Nova on Disciple of Varashta?
Make Kelari's Deception deal cold damage and add Frost Nexus. Kurgal's Leash gives Unholy Might (30% of damage as extra Chaos), two Evergrasping Rings give Kelari more extra Chaos damage, and Embitter turns all of that gained damage into Cold. When Deception freezes an enemy, Frost Nexus leaves Chilled Ground for 8 seconds, and Navira's Fracturing shatters it.
How much damage does Kelari's Deception need before dropping Ice Nova?
The video's rule of thumb is a Kelari's Deception tooltip of about 40,000 to 70,000 damage with Unholy Might active. Below that, freezes aren't reliable and you get no Chilled Ground to fracture. If you already have that number and freezes still feel unreliable, add a belt with minion Immobilisation buildup.
What ascendancy order should Disciple of Varashta take for Navira's Fracturing?
First Barya of Kelari and Kelari's Deception for the campaign, then Barya of Navira and Navira's Fracturing for map clear. Third is Baryanic Leylines, which gives non-unique Time-Lost Jewels 40% increased radius. Finish with a defensive notable such as The Fourth Teaching or Sacred Rituals.
Why does the Varashta build need the Dominion anoint?
Dominion removes the recovery period after an Archon buff ends, so Archon of Undeath can come back right away. Archon gives more minion damage and more Command skill cooldown recovery, which keeps Fracturing and Deception available. The trade-off, per PoE2DB, is 50% reduced effect of Archon buffs on you.
Read next
PoE2 Druid Build Guide (0.5.5): Cold Spark Oracle/Shaman
A Cold Spark Druid for PoE2 0.5.5 that levels with Orb of Storms and Spark, using Elemental Equilibrium to turn the orbs' infusions cold. Covers gems act by act, Oracle or Shaman picks, the tree path, gear and boss play.
PoE2 Stormweaver Build Guide (0.5.5): Budget Adonia's Ego
A budget Adonia's Ego Stormweaver for PoE2 0.5.5 that banks Power Charges on weapon set two and triggers Arc and Comet off Spark. Covers the swap loop, ascendancy, tree, gems, Spirit budget and gear upgrades.
PoE2 Blood Mage Build: Atziri's Contempt Bleed (0.5.5)
A fact-checked PoE2 Blood Mage bleed build for 0.5.5 that stacks Bloodstone Lances with Spearfield and detonates them with Atziri's Contempt. Covers the two-spear setup, ascendancy order, gear by budget, every gem link and how to play bosses.
PoE2 Invoker Build Guide: Flicker Strike Crit Monk (0.5.5)
An endgame Monk build for PoE2 0.5.5 where near 100% crit chance generates power charges for Charged Staff, Whirling Assault, Falling Thunder and Flicker Strike. Covers the full gem and Spirit setup, ascendancy order, tree, gear stages and how to play, checked against the wiki.