
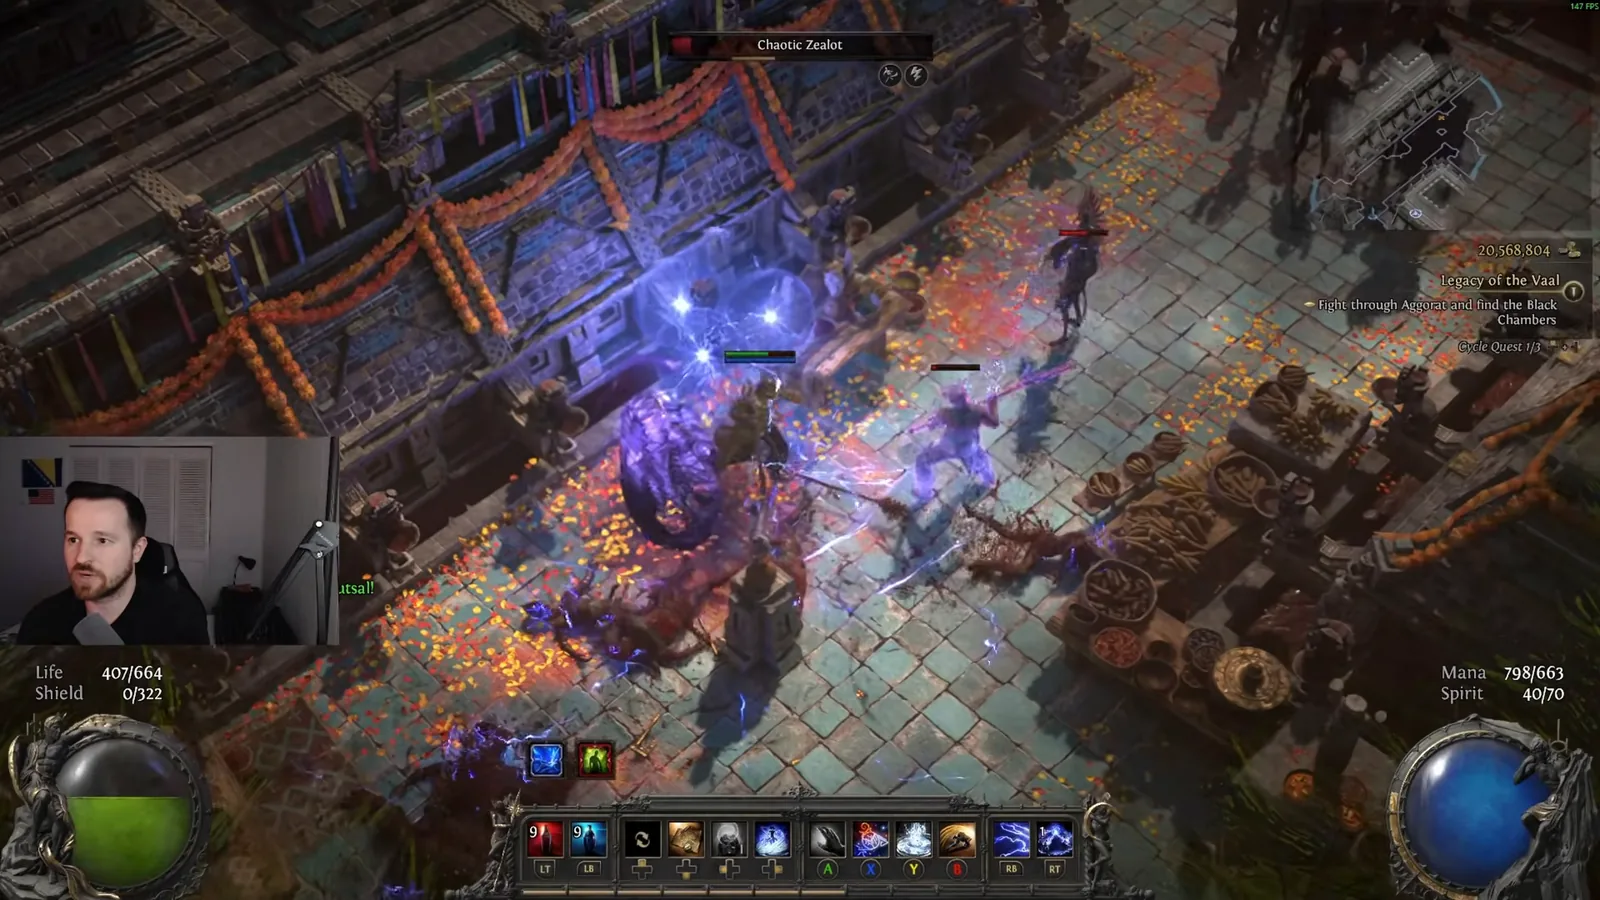
🎯 The core idea
This PoE2 Druid build skips plants and shapeshifting and levels with spells instead. Orb of Storms and Spark carry the campaign. The Elemental Equilibrium keystone turns the orb's Lightning Infusions into Cold Infusions, so every few casts Spark fires a ring of icy projectiles that chill and freeze. You can ascend into either Oracle or Shaman, and the gear is plain energy shield from start to finish.
- free costs nothing
- cheap small cost
- setup needs preparation
- grind pays off slowly
- skip the thing to stop doing
Version note: Written for 0.5.x, reviewed 2026-11-17. This guide covers patch 0.5.5 (Forbidden Rites event). Path of Exile 2 leaves Early Access on 11 December 2026. Grinding Gear Games has announced sweeping balance changes for 1.0, a "massive" support gem rebalance and a passive tree makeover that moves every jewel socket into the clusters. Support tiers, the tree path and the Elemental Equilibrium route below may all change. We will update this guide after the 1.0 patch notes are out.
Cold Spark Druid at a glance

This guide follows LugoHQ's campaign video for patch 0.5.5 (uploaded 2 September 2026, 38 minutes). It runs from the Act 1 boss to the end of the Interludes, with a gem, gear and tree recap after every act. Most Druid players level with plants or shapeshifting. LugoHQ plays the class as a plain spellcaster, and it works because Spark and Orb of Storms are open to every class. From the Druid start it is a short walk up to the spell and elemental clusters near the Sorceress and Witch area.
It suits players who want a ranged, low-risk way to level a Druid and who like a short rotation: drop orbs, spam Spark, curse the boss. It also makes a sensible PoE2 Druid league starter: nothing in the campaign setup needs trade, only gems and whatever weapon drops. If you came to the Druid for bears or wolves, this isn't your build. For a different spell setup on the same class, see our Grim Pillars spell totem Oracle.
| Rating (our judgement from the video) | Score (1–5) |
|---|---|
| Beginner-friendly | 4 |
| Budget | 5 |
| Mapping | 4 |
| Bossing | 3 |
| Pros | Cons |
|---|---|
| Works with whatever staff or wand drops; no uniques needed | Energy shield character that the creator himself calls squishy |
| Two ascendancies work, so you aren't locked in at the first trial | Bosses take several buttons: Frost Bomb, a curse, orbs, Spark |
| Lightning penetration makes normal packs melt | The video stops at the end of the campaign; the endgame lives on a planner page |
| Cold-infused Spark adds chill and freeze for free | Mana gets tight once your weapon adds skill levels |
How the cold infusion loop works

Three skills and one keystone make this a "cold" Spark build.
Orb of Storms creates a stationary orb that fires chaining lightning bolts on its own and again each time you cast a spell near it. When the orb expires it leaves a Lightning Infusion remnant on the ground. The Elemental Equilibrium keystone changes which infusion you create: Lightning becomes Cold, Fire becomes Lightning and Cold becomes Fire (poe2wiki lists all three swaps). So with the keystone, your orbs drop Cold Infusions instead.
Spark is the payoff. Its tooltip says it consumes a Cold Infusion if one is available. When it does, it fires 12–16 sparks in a full circle and adds cold damage on top of its lightning, at the cost of half a second of extra cast time. LugoHQ points out that this version also chills and freezes, which you can see in his Act 2 boss fight.
setup One side effect the video doesn't mention: Elemental Equilibrium also turns the Cold Infusion that Frost Bomb leaves behind into a Fire Infusion. That doesn't hurt the build, since Frost Bomb is there for its exposure, not its remnant. It just means the orbs, not the bomb, feed your cold Sparks.
If you'd rather not take the keystone, LugoHQ's alternative is to spend those points to the right instead and head straight up for more maximum lightning damage. You keep plain lightning Spark and lose the freeze.
Act 1: Spark, Orb of Storms and Contagion

free Everything in Act 1 comes from uncut gems and quest rewards. This is the setup LugoHQ has at the Act 1 boss:
| Skill | Supports | Job |
|---|---|---|
| Spark | Unleash, Controlled Destruction | Main clear |
| Orb of Storms | Overabundance I, Unleash | Extra lightning damage, later the Cold Infusions |
| Ember Fusillade | Compressed Duration, Controlled Destruction | Single target |
| Frost Bomb | Rapid Casting I | Elemental Exposure on bosses |
| Contagion | Unleash | Spreads through early packs; dropped after Act 1 |
| Mana Remnants (Spirit) | none yet | Mana sustain for the whole campaign |
Two of these supports interact in a way worth understanding. Overabundance raises the orb limit by one, at the cost of 50% less duration. Unleash gives the orb seals that repeat the cast. Together, one press puts down two orbs. Controlled Destruction adds 25% more hit damage but stops critical hits, which costs you nothing this early.
Ember Fusillade is optional. LugoHQ finds it strong on Act 1 bosses, but you can stay on the Spark plus Orb of Storms combo. On the tree, head up from the Druid start for intelligence, then into the cast speed and elemental damage nodes near the Sorceress and Witch area. Aim for the jewel socket and the orb limit notable as early as you can. He also carries a Sapphire Charm for the Act 1 boss: per the wiki it fires when a hit deals cold damage to you and gives +25% cold resistance for four seconds.
Acts 2 and 3: Oracle, infusions and penetration

By the Act 2 boss, Spark has swapped Unleash for Rapid Casting I and keeps Controlled Destruction. Frost Bomb gets Potent Exposure, which makes its exposure 20% stronger. The big Act 2 changes are on the tree: the Secrets of the Orb notable (orb skills +1 to limit), which takes you to three orbs per cast, and Elemental Equilibrium. Three orbs means three Cold Infusions each time they expire.
In Act 3 the build leans into clearing speed:
- Spark: Rapid Casting I, Considered Casting (35% more damage, 15% less cast speed) and Lightning Penetration (30%).
- Orb of Storms: Lightning Penetration added next to Unleash and Overabundance.
- Elemental Weakness: the first curse, for bosses. Focused Curse or Heightened Curse go on it once you have them.
- Mana Tempest: an optional burst button. It drains mana for as long as you stand in it, so you need a mana flask ready.
- Arctic Armour: an optional Spirit gem if you keep getting swarmed. LugoHQ leaves his Spirit free instead.
skip Drop Controlled Destruction from Spark once you take Forced Outcome in Act 3 (see the ascendancy section). The two directly contradict each other: one says your hits cannot crit, the other makes every hit crit. LugoHQ's Act 3 setup already has it removed.
Act 4 and the Interludes: higher-tier supports

Higher-tier support gems arrive in Act 4, and the build swaps penetration for scaling:
| Skill | Act 4 supports | End of Interludes |
|---|---|---|
| Spark | Rapid Casting II, Considered Casting, Projectile Acceleration II | + Lightning Mastery (or Unleash if you have no Tier 5 gem) |
| Orb of Storms | Overabundance I or II, Unleash, Deliberation, Considered Casting | Same |
| Frost Bomb | Rapid Casting I or II, Potent Exposure | Same |
| Elemental Weakness | Focused Curse, Heightened Curse | Same |
| Mana Remnants | none | Clarity I |
| Convalescence | none | Same |
Projectile Acceleration II gives Spark 40% more projectile speed and a 40% chance to pierce. LugoHQ notes that the faster sparks reach their target and can come back around to hit it again before they expire. Deliberation's 20% more damage costs extra movement penalty only while you use the supported skill. Since you just drop orbs and walk away, he calls it a free damage boost.
LugoHQ put his first Greater Jeweller's Orb into Orb of Storms for the extra support socket. He found only two Tier 5 supports in the whole campaign, so Lightning Mastery (+1 level to lightning skills) on Spark is a nice extra, not a requirement.
Oracle or Shaman ascendancy

LugoHQ picks the Oracle but says the Shaman works too.
His Oracle order:
- The Lesser Harm (first trial, Act 2): damage of enemies hitting you is unlucky, and so is their critical hit chance against you. It's a cheap defensive layer for a squishy energy shield character.
- Forced Outcome (Trial of Chaos, Act 3): Inevitable Critical Hits, so your hits always crit. The wiki explains the catch the video only hints at: the game keeps re-rolling crit chance until it succeeds, and each re-roll gives the hit 30% less critical damage bonus. Spark's base crit chance is only 9%, so crit chance on your tree and gear still matters. Every point means fewer re-rolls.
The video doesn't cover the third and fourth ascendancy points. Our suggestion, not the creator's: look at Fateful Vision (its route gives spell damage) or Harmony Within if your mana pool ends up larger than your life. Forced Outcome also fits Mana Remnants well. Mana Remnants spawns a remnant when you crit a target that has an elemental ailment, so guaranteed crits plus shock and chill mean you'll see more of them.
If you go Shaman (our reading of the wiki, not shown in the video): Turning of the Seasons gives enemies in your presence Exposure and adds 10% of damage as extra damage of a random element, which suits an elemental spell build. Sacred Flow grants 40 Spirit for each empty charm slot. Our ascendancy trials guide explains how to get each pair of points.
Passive tree route through the campaign

In order, the tree path the video shows:
| Stage | Key nodes | Why |
|---|---|---|
| Act 1 | Intelligence, cast speed, elemental damage, jewel socket | Reach the spell cluster fast |
| Act 2 | Secrets of the Orb, Elemental Equilibrium | Three orbs per cast, Cold Infusions |
| Act 3 | Maximum lightning damage, lightning penetration, energy shield, helmet energy shield | Clear speed, then defence |
| Act 4 | Pure Power (10% more maximum lightning damage), 50% increased maximum energy shield, life-cost spell damage nodes | Damage and an energy shield pool |
| Interludes | Penetration, attack and cast speed, Breaking Point, lightning skill speed, mana regeneration | Stronger shocks, faster Spark, mana sustain |
A few of these need a note. The energy shield notable LugoHQ takes in Act 4 also gives 20% slower start of energy shield recharge, and he relies on Convalescence to make up for it. The spell damage nodes in that part of the tree turn part of your spell mana cost into life cost and give 40% increased damage with spells that cost life. His last mana regeneration notable gives 50% more mana regeneration while moving. We couldn't confirm its name on the wiki, so it's described here by effect.
The video description links LugoHQ's Mobalytics planner for this build. He says it holds every act recap plus an early mapping and endgame tree. New to the tree? Read our PoE2 passive tree guide first.
Lightning penetration and why packs melt

cheap By the end of Act 3 Spark's advanced tooltip shows 60% lightning resistance penetration: 30% from the Lightning Penetration support plus penetration from the tree. LugoHQ's point is that normal monsters then have, in effect, no lightning resistance left, so packs die to one or two casts.
On bosses, Elemental Weakness and Frost Bomb already lower resistances. On paper that makes the support overkill, which is why he swaps it out for Projectile Acceleration II in Act 4 once better supports drop. Here's the logic in short: use penetration while support tiers are low, and replace it when you have better options. Frost Bomb applies 20% Elemental Exposure straight away and 2% more per pulse, up to 50% (wiki numbers at gem level). That's why LugoHQ keeps reminding you to keep it up on bosses.
Gear from campaign to maps

League start / campaign (from the video). Your weapon is your damage. LugoHQ carried a level-15 staff into Act 2 and a level-30 staff into Act 4, upgrading them with Iron Runes. On a wand or staff, an Iron Rune gives 25% increased spell damage (wiki). His final campaign staff has cast speed and +2 to the level of all lightning spells, and he calls that a clear damage jump. A wand plus focus works if that's what drops. Other gear priorities:
- Energy shield on armour pieces. Life regeneration and armour are fine early.
- Resistances on rings and amulet, topped up with runes. Don't let them sit near zero.
- Movement speed on boots.
- Mana regeneration and cast speed wherever they appear.
- A life flask and a mana flask, plus a charm for the boss you're about to fight.
Mid budget (our suggestion). Look for a staff or wand with + levels to lightning or all spells and cast speed. Add critical hit chance for spells, because of Forced Outcome. Get energy shield armour pieces with a resistance on each, and cap resistances at 75% before you go deep into maps. Our PoE2 defences guide explains why.
Endgame (our suggestion). The video stops before maps, so follow the Mobalytics template for the exact setup. One unique worth knowing about: Idol of Uldurn (a Crimson Amulet) has "Skills have +1 to Limit" on the wiki, which would mean one more Orb of Storms. It isn't shown in the video, so treat it as an idea to test, not part of the creator's build.
Skills, Spirit and flasks

The full end-of-campaign setup:
| Skill | Supports | Spirit |
|---|---|---|
| Spark | Rapid Casting II, Considered Casting, Projectile Acceleration II, Lightning Mastery | — |
| Orb of Storms | Overabundance, Unleash, Deliberation, Considered Casting | — |
| Frost Bomb | Rapid Casting, Potent Exposure | — |
| Elemental Weakness | Focused Curse, Heightened Curse | — |
| Mana Remnants | Clarity I | 30 + 10 |
| Convalescence | — | 30 |
| Mana Tempest (optional) | — | — |
Spirit costs are from the wiki: Mana Remnants and Convalescence reserve 30 each, and Clarity I adds 10. Clarity I gives 30% increased mana regeneration while the supported buff is active. Convalescence is the panic button. While it's active you get a skill that starts your energy shield recharging immediately and stops the recharge from being interrupted until you're full. LugoHQ says its cooldown is 30 seconds. It must be active in both weapon sets.
cheap For flasks, LugoHQ uses a plain life flask that recovers a lot of life and a mana flask. Mana is the resource you'll run short of, especially once your weapon adds skill levels, so don't skip the mana flask. Charms are boss-specific: the Sapphire Charm against cold damage in Act 1 is his example. For how to read and upgrade any of these gems, see our PoE2 skill gems guide.
How to play it on bosses

Mapping and campaign zones: drop Orb of Storms as you walk into a pack, cast Spark, and walk over the Cold Infusions the orbs leave behind. The next Spark then fires in a full circle. Keep moving; the build doesn't need to stand still.
Bosses: in this order:
- Drop Frost Bomb at the boss for Elemental Exposure.
- Cast Elemental Weakness.
- Place your orbs close to where you'll stand.
- Spam Spark, or Ember Fusillade early in Act 1.
- Recast Frost Bomb every time its cooldown is up.
Pop Mana Tempest only in safe windows, since it drains mana fast.
What kills it: big slams and lasers while you're mid-cast. LugoHQ warns about the Act 3 boss's laser, which can crit, and the Act 4 boss's leap slam in its third phase. He calls the build "pretty squishy". In the Interludes, one boss's bleed hits hard, so dodge rather than tank it. Energy shield with a slower recharge start means you must react early. Press Convalescence before you're empty, not after.
Read next
- Best PoE2 builds for the endgame meta: where this Druid sits against the strongest 0.5.5 builds.
- PoE2 best class for beginners: if you're still deciding between Druid and another class.
- PoE2 skill gems explained: uncut gems, support tiers and Spirit.
- Grim Pillars spell totem Oracle: another Druid Oracle build, played with totems.
- All Path of Exile 2 guides.
How this guide was fact-checked
- From the video (LugoHQ, 0.5.5, 2 September 2026): the act-by-act gem setups, the passive tree path, the gear notes, the Oracle picks, the 60% penetration figure read off the in-game tooltip, and the boss warnings. Ratings in the at-a-glance table are our judgement.
- From poe2wiki.net: Spark consuming Cold Infusions (12–16 projectiles in a circle, +0.5 s cast time); Orb of Storms leaving a Lightning Infusion; Elemental Equilibrium's three infusion swaps; Frost Bomb's exposure numbers; every support gem effect quoted (Controlled Destruction, Unleash, Overabundance, Considered Casting, Lightning Penetration, Projectile Acceleration II, Deliberation, Lightning Mastery, Potent Exposure, Focused and Heightened Curse, Clarity); Mana Remnants, Convalescence and Arctic Armour Spirit costs; the Oracle and Shaman notables; Pure Power; Secrets of the Orb; Iron Rune and Sapphire Charm stats; Idol of Uldurn.
- Official: patch 0.5.5 date and the 1.0 release announcement (11 December 2026, support gem and passive tree changes) from Grinding Gear Games' Steam announcements.
- Corrections and additions: the video doesn't mention that Elemental Equilibrium also turns Frost Bomb's Cold Infusion into Fire, or how Forced Outcome's crit damage penalty works. Both come from the wiki and are added above. Controlled Destruction contradicts Forced Outcome, which is why it leaves Spark in Act 3. The video calls one Interlude notable "Storm Charge" and one mana notable "Ether Flow". We couldn't confirm either name on the wiki, so they are described by effect. The third and fourth ascendancy picks, the Shaman notables and the mid and endgame gear are our suggestions and labelled as such.
What this guide doesn't answer
- Exact endgame passive tree and gear: the video ends with the campaign; use the creator's Mobalytics planner.
- DPS numbers for mapping or pinnacle bosses: the video shows no endgame boss kills, so we don't quote any.
- A full Shaman version: LugoHQ plays Oracle only, so the Shaman picks above are a starting point, not a tested route.
- How the build changes in 1.0: support gems and the tree are being rebalanced; this guide will be updated after the patch notes.
- Shapeshifting or plant Druid builds: a different playstyle; see the best builds overview above.
Frequently asked
What is a good PoE2 Druid build for leveling in 0.5.5?
A Cold Spark Druid is a strong spell-based option. You level with Spark for clear and Orb of Storms for extra damage, add Frost Bomb and Elemental Weakness for bosses, and wear plain energy shield gear. It needs no uniques and no trade, so it also works as a league starter.
How do you make Spark cold on a Druid in PoE2?
Take the Elemental Equilibrium keystone. It makes you create Cold Infusion remnants instead of Lightning ones, so the Lightning Infusion that Orb of Storms leaves when it expires becomes a Cold Infusion. Spark consumes it to fire 12 to 16 sparks in a circle with added cold damage, at half a second of extra cast time, and can chill and freeze.
Should a Spark Druid pick Oracle or Shaman?
Both work. The video build takes Oracle: The Lesser Harm at the first trial for unlucky enemy damage, then Forced Outcome in the Trial of Chaos for guaranteed critical hits. Shaman's Turning of the Seasons (exposure on nearby enemies and extra elemental damage) is a natural fit too, but the video does not test it.
What supports should Spark use on a Druid?
Early on, Unleash or Rapid Casting I with Controlled Destruction. From Act 3, Rapid Casting, Considered Casting and Lightning Penetration. From Act 4, Rapid Casting II, Considered Casting and Projectile Acceleration II, plus Lightning Mastery if you find it. Remove Controlled Destruction once you take Forced Outcome, because it stops critical hits.
How do you fix mana problems on a Spark Druid?
Run the Mana Remnants Spirit gem (30 Spirit) from Act 1, add Clarity I to it later for 30% increased mana regeneration, keep a mana flask in your flask slots and take mana regeneration nodes late in the campaign. Mana costs climb once your staff or wand adds levels to lightning spells, so plan for it before upgrading.
Read next
PoE2 Disciple of Varashta Build: Navira's Fracturing (0.5.5)
An endgame Navira's Fracturing Disciple of Varashta for PoE2 0.5.5 that makes Chilled Ground with Kelari's Deception instead of Ice Nova or a tamed beast. Covers leveling, ascendancy order, Time-Lost jewels, gear, the full gem setup and the rotation.
PoE2 Stormweaver Build Guide (0.5.5): Budget Adonia's Ego
A budget Adonia's Ego Stormweaver for PoE2 0.5.5 that banks Power Charges on weapon set two and triggers Arc and Comet off Spark. Covers the swap loop, ascendancy, tree, gems, Spirit budget and gear upgrades.
PoE2 Blood Mage Build: Atziri's Contempt Bleed (0.5.5)
A fact-checked PoE2 Blood Mage bleed build for 0.5.5 that stacks Bloodstone Lances with Spearfield and detonates them with Atziri's Contempt. Covers the two-spear setup, ascendancy order, gear by budget, every gem link and how to play bosses.
PoE2 Invoker Build Guide: Flicker Strike Crit Monk (0.5.5)
An endgame Monk build for PoE2 0.5.5 where near 100% crit chance generates power charges for Charged Staff, Whirling Assault, Falling Thunder and Flicker Strike. Covers the full gem and Spirit setup, ascendancy order, tree, gear stages and how to play, checked against the wiki.