
🎯 The core idea
The Dimensional Depot is a shared, unlimited-range storage network you unlock through the MAM — upload items to it from anywhere, build directly from its contents, and pull items back out into your inventory while exploring, all without walking back to base.
- free costs nothing
- cheap small cost
- setup needs preparation
- grind pays off slowly
- skip the thing to stop doing
What the Dimensional Depot actually does

Every Dimensional Depot Uploader you place feeds one shared storage pool. Drop items on a belt into an Uploader and, provided there's free space, they leave your factory and land in that pool instantly — accessible from any other Uploader, from the Build Gun, and from Crafting Benches anywhere on the map. The reverse works too: open a Depot Uploader's inventory panel and you can pull items out manually, which is exactly what saves a trip home after looting a crashed drop pod like the one above — grab what you need from storage instead of carrying it back on foot.
In multiplayer the depot pool is shared across every player, so it doubles as free-form central storage for a whole team.
Unlocking and placing your first Uploader

Upload speed, capacity and what it costs to upgrade
A single Uploader starts at 15 items/min and that rate doubles with each of four speed research tiers: 15 → 30 → 60 → 120 → 240 items/min. Storage capacity upgrades separately, adding one extra stack per tier (1 stack at first, up to 5 stacks fully upgraded). Both research lines are priced in Mercer Spheres and SAM Fluctuators:
| Upgrade tier | Speed result | Capacity result | Mercer Spheres | SAM Fluctuators |
|---|---|---|---|---|
| 1 | 30/min | 2 stacks | 3 | 47 |
| 2 | 60/min | 3 stacks | 7 | 103 |
| 3 | 120/min | 4 stacks | 13 | 151 |
| 4 | 240/min | 5 stacks | 23 | 199 |
| Total per tree | 46 | 500 |
Maxing out both the speed and capacity trees costs 92 Mercer Spheres between them, which lines up with the video's estimate. Add the Manual Uploader feature (below) and the full Dimensional Depot tech tree costs roughly 97 Mercer Spheres in total — against a hard world cap of 298 Spheres, so there's comfortable room to max everything and still have spares for other alien tech.
The video says a single Uploader can move at most 240 items/min once fully upgraded — if you need more throughput than that for one item, place a second dedicated Uploader for it rather than waiting on a fifth speed tier that doesn't exist.
The Manual Uploader: taking storage with you

The Manual Uploader lets you drag items from your inventory straight into the Depot, and pull them back out, from a small five-slot buffer — no belt required. It's what makes exploring practical: sink loot from a crashed pod on the spot, or grab spare Modular Frames from storage before a building run, all from the field.
You'll need at least one Dimensional Depot Uploader already built and fed before the Manual Uploader interface unlocks — it isn't available from a bare MAM unlock alone.
What's actually worth storing
Store anything you need repeatedly for crafting or building — not raw materials that are just passing through on their way to becoming something else. The video's rule of thumb: skip ores, empty canisters and DNA Capsules (they're transitional or sink-only), skip Space Elevator parts once that line is hooked up directly, and never park stacks of radioactive material in the Depot unless you're geared for it.

A dedicated outpost feed like this is the cleanest use case: instead of hauling ore home, upload it straight into the shared pool from wherever you're mining. Realistic budgets from the video: about 50 dedicated Uploaders for finished parts and fuels (accounting for tier upgrades like Packaged Fuel → Packaged Turbofuel → Packaged Ionized Fuel replacing each other over a save), another 12 or so for ammunition types, and 2-4x that for cheap, fast-consumed items like Concrete, Iron Plates, Rods and Screws — roughly 100 Uploaders and 100 Mercer Spheres in practice, leaving the other ~200 Spheres for everything else.
Building and crafting straight from the Depot

Depot contents are usable directly at the Build Gun and at Crafting Benches — you don't have to move anything into your personal inventory first. The video calls out that build-menu resources pulled from the Depot render in a distinct light-purple tint so you can tell at a glance whether you're spending Depot stock or carrying it yourself; treat that as a video-only visual cue since the wiki page for the Uploader building doesn't document HUD colors. You can also toggle whether building draws from your inventory first or the Depot first — the video recommends leaving inventory-first on, so a full inventory doesn't force you to trash items when you pick up a resource node you didn't need.
Where to actually place your Uploaders


How this guide was fact-checked
Upload speed (15/min base, doubling to 240/min across four tiers), the five-stack capacity ceiling, the 298-Mercer-Sphere world total, and the roughly 97-Sphere total tree cost were all cross-checked against the Dimensional Depot Uploader page on satisfactory.wiki.gg (fetched 2026-08-22) and matched the video within rounding. One number did not match: the video states the Manual Uploader costs 29 SAM Fluctuators, while the wiki's cost table implies 47 for that tier — both are reported above rather than silently picking one. The claim that Depot-sourced build resources render in a distinct purple tint could not be checked against the wiki, since that page documents the Uploader building rather than UI/HUD behavior, so it's flagged as video-only.
What this guide doesn't answer
The source video doesn't cover where to actually find Mercer Spheres in the world — it treats their collection as a prerequisite already handled. If you need Mercer Sphere farming routes and locations, that's a separate topic (the Notion research notes point to a companion video by Jack Blade covering exactly that). This guide also doesn't cover whether the Dimensional Depot Uploader itself draws power, since neither the video nor the wiki page states a power requirement.
Frequently asked
How many items per minute does a Dimensional Depot Uploader move?
A single Uploader starts at 15 items/min and doubles with each of four speed research tiers, topping out at 240 items/min once fully upgraded. If you need more throughput on one item, add a second dedicated Uploader rather than waiting for a fifth tier that does not exist.
How many Mercer Spheres does it take to fully upgrade the Dimensional Depot?
The full tech tree costs roughly 97 Mercer Spheres: 46 for the four speed tiers, 46 for the four capacity tiers, and a few more for the Manual Uploader. There are 298 Mercer Spheres total in the world, so maxing the Depot leaves plenty spare for other alien research.
What does the Manual Uploader do and how much does it cost?
The Manual Uploader lets you drag items directly from your inventory into the Depot (and back out) through a five-slot buffer, without needing a belt. It costs 3 Mercer Spheres and 17 Computers, though sources disagree on the SAM Fluctuator cost (29 per the video, 47 per the wiki's cost table) - bring extra to be safe. It only unlocks after you already have a working Depot Uploader.
What should I store in the Dimensional Depot?
Store anything you need repeatedly for crafting or building, not transitional resources. Skip raw ores, empty canisters and DNA Capsules, skip Space Elevator parts once that line is hooked up directly, and avoid stockpiling radioactive items unless you are geared for it.
Where is the best place to put Dimensional Depot Uploaders?
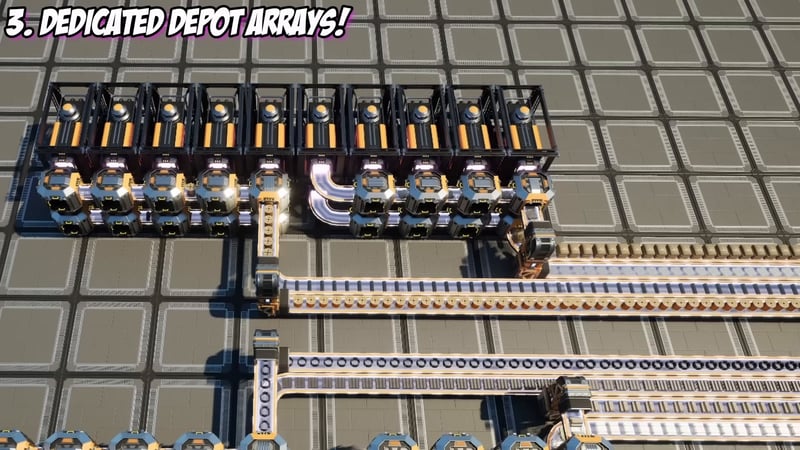
Stack one on every existing storage container for instant access, route factory overflow through a Depot before the AWESOME Sink so surplus gets banked instead of wasted, and build dedicated five-Uploader arrays for your highest-throughput items. Tapping a sushi belt with Smart Splitters works too, but only delivers about half the belt's rate to storage.
Read next
Satisfactory Central Storage Guide: Sorted Storage + Dimensional Depot
Satisfactory Drone Transport & Logistics Network Guide
Satisfactory Manifold vs Load Balancer: Which Should You Use?
A full comparison of manifolds and load balancers in Satisfactory: how each works, why manifolds take time to reach 100% efficiency, and when to actually reach for a load balancer instead.
Satisfactory Train Guide: Tracks, Signals and Circuits
Everything needed to set up your first Satisfactory train line: track placement, station timetables, push-pull circuits for dead ends, and signal blocks for running multiple trains safely.