
🎯 The core idea
Exploration in Satisfactory is entirely optional — the Advanced Game Settings let you skip it and unlock everything through progression alone — but for anyone who wants to venture out, four categories of collectibles reward the trip: Power Slugs for overclocking, Mercer Spheres for remote inventory storage, Somersloops for production doubling and power boosts, and crash sites holding Hard Drives for alternate recipes. This guide covers what equipment to bring and what to look for, including which caves and underground pockets tend to hide SAM ore. Combat mechanics against specific creatures get only brief coverage here by design, since a separate Creatures & Combat guide covers that ground in more depth.
- free costs nothing
- cheap small cost
- setup needs preparation
- grind pays off slowly
- skip the thing to stop doing
The object scanner: your most important early unlock

Before anything else, unlock Field Research in the HUB tab to get the map and the object scanner. The scanner doesn't place icons on the map — it gives a short-range directional beep that gets more frequent as you approach a detectable item, then points you to the next-closest one once you've collected the first. It's a genuinely large time-saver for chasing down berries, ore chunks and other scannable resources without wandering blind, and it's one of the first things worth unlocking before any serious exploration trip.
Building an exploration loadout

A minimal early loadout is the Xeno Zapper (your starting melee stun weapon), the Rebar Gun once unlocked in the MAM's Alien Organisms tree (a huge upgrade — it one-shots small Stingers and two-shots small Hogs), and Blade Runners from the Quartz tree, which increase movement speed and jump height while reducing fall damage. Later, once you've made a Space Elevator shipment or two, add the Nobelisk Detonator for thrown, remotely-detonated explosives, the gas mask for immunity to poison clouds (not radiation — that needs separate Tier 7/8 upgrades), and a parachute or Jetpack for fall protection so you can climb and explore vertically without fear of fall damage. Carrying a second, backup set of this gear in a chest at base means a death — which drops your entire inventory on the ground — doesn't strand you without tools to go recover your own corpse run.
The three healing plants worth stockpiling

Three edible plants are worth picking up on every trip: Barrel Nuts, Paleberries and Bacon Agaric. Eating any of them directly restores health in the field, and stockpiling all three is what lets you craft Medicinal Inhalers later, which heal you to full instantly. None of the three respawn on a fixed timer you should rely on, so treat every patch you pass as free healing to bank rather than something to farm deliberately.
Power Slugs: the most common overclocking currency

Power Slugs come in three colors of increasing rarity — confirmed on the current Satisfactory Wiki: Blue Power Slugs produce 1 Power Shard, Yellow produce 2, and Purple produce 5. Power Shards are what let you overclock individual machines beyond 100%, so slugs are worth picking up on every trip even when you're not specifically hunting for them, since the object scanner will flag nearby ones automatically once you've unlocked scanning for them.
SAM ore: the resource you can't scan for yet

SAM (Sentient Alien Matter) ore is different from every other collectible on this list: you can't scan for it until you've already unlocked it in the MAM, which means your first encounters with it are pure exploration luck rather than directed searching. A practical workaround is dropping a miner, a container and a Biomass Burner on any SAM node you stumble across, letting it passively fill up a buffer, and manually hauling the contents back to base later rather than routing it with belts from day one.
Crash sites and Hard Drives: the alternate recipe engine

Crash sites are usually guarded but rarely a serious threat if you use elevation to your advantage, and each one holds a drop pod requiring a specific material or power cost to open — the game tells you exactly what it needs before you commit. Inside is a Hard Drive, and scanning one at the MAM takes 10 minutes and offers a choice between two alternate recipes, with a one-time reroll if neither appeals. These alternate recipes are the main way to make a given production chain use less rare material for more output — well worth the detour even if you clear a crash site's guards rather than sneak past them. There's no dedicated way to farm Hard Drives on demand beyond finding more crash sites; each one holds exactly one, so a farming run for alternate recipes is really just an exploration run with crash sites as the priority target.
Mercer Spheres and Somersloops: the two rarest finds

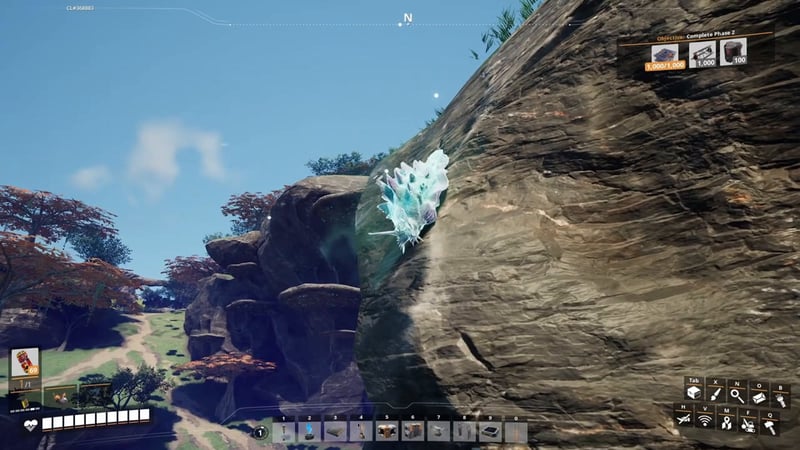
Mercer Spheres are used to unlock and build the Dimensional Depot Uploader, which lets you upload collected resources directly into remote storage from your inventory while still out exploring — a huge quality-of-life upgrade once several Uploaders are running at 30, 60, 120 or 240 items per minute each after MAM upgrades. There are 298 Mercer Spheres total on the map as of Patch 1.0, confirmed on the current Satisfactory Wiki — more than the roughly 400 this guide's source video estimates from memory, so treat the wiki's number as the reliable one if you're trying to track completion. Somersloops are rarer and harder to spot than crash sites since they lack an obvious surrounding structure; there are 106 total on the map, also wiki-confirmed, close to the source video's own "about 100" estimate. Somersloops build Alien Power Augmenters (500 MW plus a 10% power grid boost each by default, stacking multiplicatively rather than additively — feeding one 5 Alien Power Matrices per minute raises its own boost to 30%) or double a machine's output when slotted directly into it, though a Constructor needs only 1 Somersloop for amplification while an Assembler or higher needs 2, which is worth factoring in given the limited supply.
Putting it together: the Dimensional Depot payoff

Once the Dimensional Depot chain is unlocked, the practical payoff is real: anything you collect while out exploring goes straight into remote storage from your inventory without a trip back to base, and each Uploader can be upgraded through four MAM tiers. Given how much of this collectible hunting rewards patience over speed, treating a session as a loop — scan, collect, upload, repeat — rather than a single long round trip is generally the more sustainable way to chip away at a large map's worth of Power Slugs, Mercer Spheres and Somersloops. There's no single best exploration route that works for every save, since it depends entirely on which biomes and crash sites are still unclaimed near your base — the object scanner and the Dimensional Depot together are what make any route efficient, not a fixed path.
How this guide was fact-checked
The Power Slug shard yields (Blue = 1, Yellow = 2, Purple = 5), the 298 total Mercer Spheres and 106 total Somersloops as of Patch 1.0, the Dimensional Depot Uploader's 30/60/120/240 items-per-minute upgrade progression, and the Alien Power Augmenter's 500 MW plus 10% (or 30% with 5 Alien Power Matrices per minute) power boost are all confirmed on the current Satisfactory Wiki. One real correction: the source video estimates roughly 400 Mercer Spheres from memory, where the wiki's confirmed count is 298 — the wiki's number is used here since it's a stated, sourced fact rather than an on-camera guess. The Somersloop count (about 100 per the video, 106 per the wiki) is close enough to count as agreement rather than a conflict. The gear progression, the three healing plants, the object scanner's directional-beep behavior, the SAM ore scanning limitation and the crash-site/Hard-Drive workflow all come directly from the source video's own demonstration.
What this guide doesn't answer
This guide deliberately gives only light coverage of fighting Hogs, Spitters, Stingers and Hatchers — the source video includes a full combat chapter, but a separate Creatures & Combat guide on this Content Plan covers those mechanics in proper depth, and duplicating that material here would just be two guides answering the same question. It also doesn't give exact map coordinates for any specific Power Slug, Mercer Sphere, Somersloop or crash site — the source video demonstrates the search process rather than a checklist of known locations, and a location-by-location map would need its own dedicated reference to stay accurate as the community continues cataloguing them. Finally, it doesn't cover the deeper mechanics of production amplification with Somersloops (exact clock-speed math, per-machine costs beyond the Constructor/Assembler split, or whether amplification or Alien Power Augmenters is the better use of a limited Somersloop supply) — that's the specific focus of this Content Plan's dedicated Somersloops guide.