
🎯 The core idea
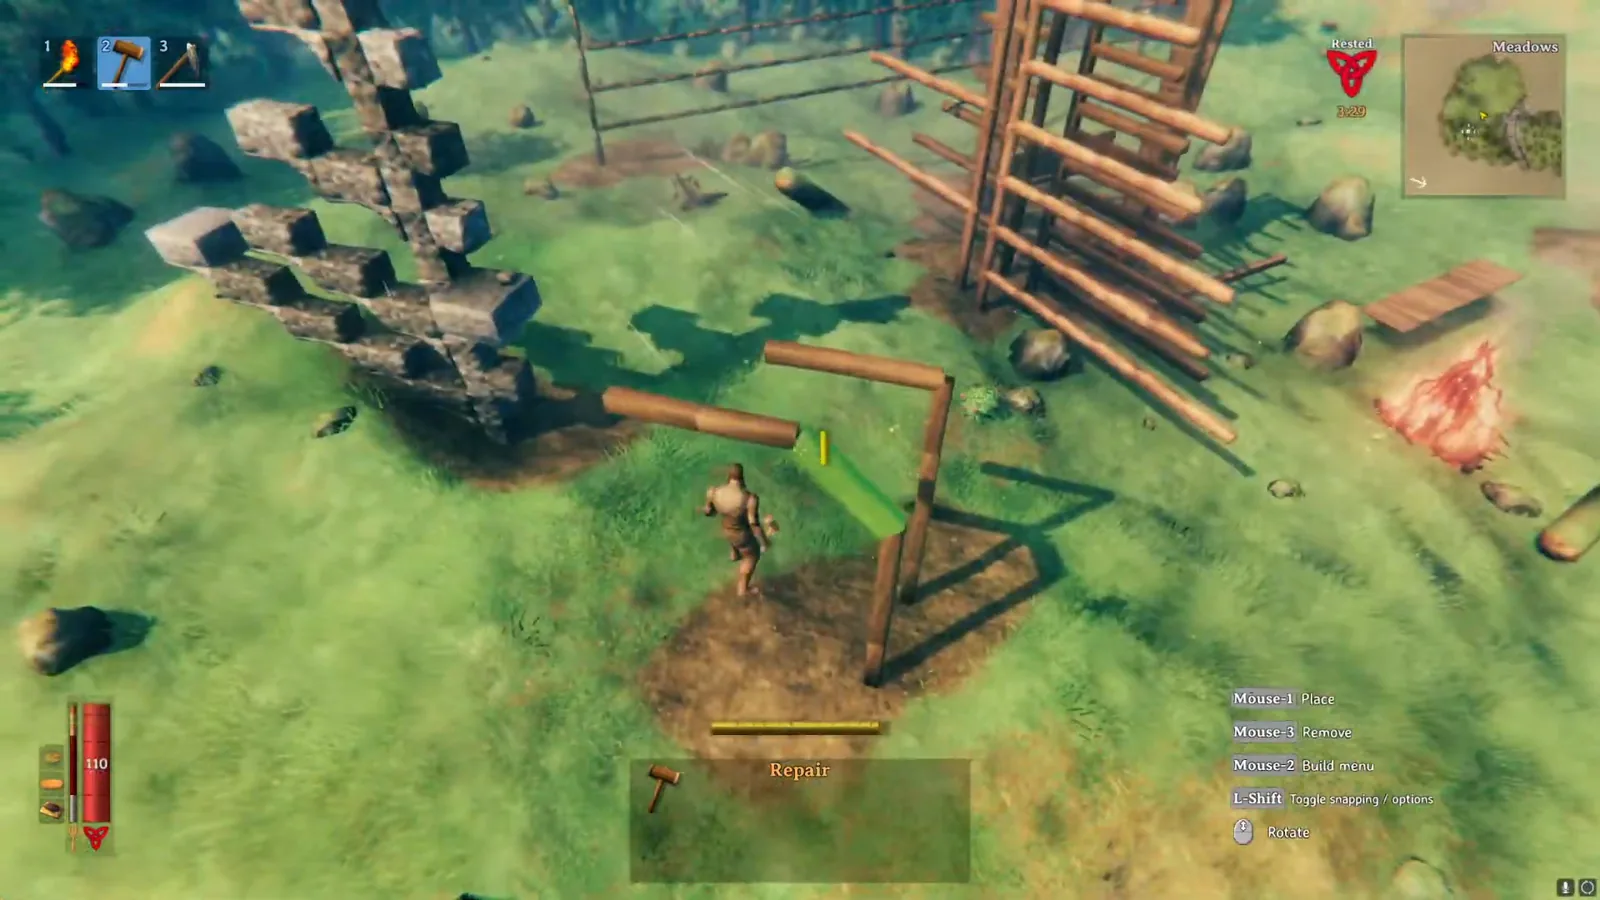
Valheim building stability is not real physics. Every piece has a support number that starts at its material's maximum when it touches the ground and drops with each step away from it. Up costs less than sideways, and only the shortest path to the ground counts. Blue means fully supported. At dark red, adding anything makes it collapse. Put stone, iron or terrain under your wood and it starts fresh at blue.
- free costs nothing
- cheap small cost
- setup needs preparation
- grind pays off slowly
- skip the thing to stop doing
This guide explains Valheim's structural integrity system: how support is calculated, what the colours mean, how much each material loses going up and sideways, and the tricks that let you build tall or wide without a collapse. It is based on Vinrenu's stability video (uploaded 5 March 2021, early access) and checked against the Valheim wiki on Fandom. The game is now on patch 1.0.20. The core rules haven't changed since the video, but the 1.0 hammer menu looks different from the one shown, and the video doesn't cover black marble, Grausten or the Deep North timber pieces. Those are added below from the wiki.
For base layout, roofs, comfort and decoration, see our Valheim building tips and base design guide. This page covers only the stability mechanics.
How support works in Valheim

free The wiki says it plainly: Valheim's building physics "does not work like it does with real materials". It works more like water pressure in pipes, flowing up from the ground and from trees through each piece. Weight doesn't matter. The wiki notes there is no limit on how many pieces a single beam can hold up. What matters is:
- Support value. Every piece has one. If it falls to the material's minimum or lower, the piece breaks.
- Max support. A piece touching the ground (or a rock or tree) gets its material's full maximum.
- Loss. Each piece built on another piece gets its parent's support, reduced by a loss factor times the distance between their centres (plus 0.1 m). Pieces stacked straight up use the material's vertical loss. Pieces joined side by side use the horizontal loss. Angled joins fall in between. A 45° roof strip, for example, uses the average of the two.
- Best path wins. If a piece touches several parents, the game takes the highest support any of them gives it. Extra poles don't add up.
So every limit in this guide comes from just three numbers per material: maximum support, minimum support, and how fast support drains up and sideways.
Reading the support colours: blue, green, orange and red

free Hold the hammer and point at any piece to see its support colour. These Valheim building colors run along one scale, from strongest to weakest:
| Colour | What it means |
|---|---|
| Blue | Full support: touching the ground, or fed at full strength by something stronger |
| Green | Still strong, a few steps from the ground |
| Orange | Getting weak; only a few more pieces will fit above it |
| Red | Close to the minimum |
| Dark red | At the limit; anything attached to it will break |
Valheim stability blue is what you want for a foundation. The wiki's building page describes blue as "grounded" and essentially 100% stable. In the video, a dark red pole can't support even one more wooden pole: the new piece stays up for a few seconds and then falls.
That delay is part of the system. The wiki explains that a new piece starts at its material's maximum support. The game then recalculates support every 0.5 seconds, for at most 50 pieces per update. So in a big base it takes a moment for the true value to settle, and a collapse can start a few seconds after you place the piece. For a short time a new piece can even raise its parent's support, until its own value drops. Wait a second or two before you trust the colour of a piece you've just placed, especially in a busy base.
Ground contact and your foundation

free A piece counts as touching something if any part of it (even an edge or corner) touches that surface. Ground support comes from:
- Terrain, including ground you've raised with the hoe. In the video, a pole set into a raised dirt mound turns blue straight away.
- Rocks and boulders. The wiki says pieces that cut into a boulder count as grounded.
- Trees, including ones you plant. The wiki says they act as "the ground" for support, which is how people build tall treehouses.
- Placeable boulders (1.0). The hoe gained two placeable boulders in 1.0. Since patch 1.0.14 they persist, can only go on the ground, give ground-level support, and break if the ground under them is removed. Patch 1.0.16 stopped them taking rain damage.
A foundation that touches the ground in many places isn't stronger than one that touches it in one place. Each piece only cares about its own best path down. The real advantage of a wide, blue floor is that every wall and pole built on it starts from full support.
Support loss and max building height by material

setup This is the wiki's material table, which comes from the game's code. The "max straight-up height" column is our own calculation, using the wiki's formula with 2 m pieces stacked vertically. Where the wiki or the video gives a measured height, it is listed too.
| Material | Pieces | Max / min support | Loss up | Loss sideways | Max straight-up height |
|---|---|---|---|---|---|
| Wood | Wood, thatch and shingle roofs, darkwood, ashwood | 100 / 10 | 1/8 | 1/5 | 16 m (wiki and video agree) |
| Hardwood | Log (core wood) poles and beams | 140 / 10 | 1/10 | 1/6 | 24 m (wiki and video agree) |
| Stone | Stone walls, pillars, floors, arches | 1000 / 100 | 1/8 | 1/1 | 16 m (wiki and video agree) |
| Iron | Wood iron (iron beams), cage, Dvergr metal, flametal | 1500 / 20 | 1/13 | 1/13 | 50 m (wiki and video agree) |
| Marble | Black marble | 1500 / 100 | 1/8 | 1/2 | about 18 m (our calculation) |
| Ashstone | Grausten | 2000 / 100 | 1/10 | 1/3 | about 26 m (our calculation) |
A few things stand out:
- Stone stability is not better than wood going up. Stone's support is ten times higher, but so is its minimum, and its vertical loss is the same. The wiki's building page confirms that a straight stone pillar and a straight wood pole both stop at 16 m. The caption track of the video says "60 meters" here, but the on-screen label reads 16 m, which matches the wiki.
- Iron beams are the outlier. They have the highest maximum, a low minimum and the smallest loss in both directions.
- Piece size barely matters. The wiki shows that 1 m wooden poles keep slightly more support per 2 m than 2 m poles, but the difference is tiny. The video also found every wooden piece (1 m pole, 2 m pole, walls) tops out at the same 16 m.
- The wiki doesn't list Timber yet. The 1.0 Timber poles and beams from the Deep North have no entry in the stability table, so we can't give you numbers. Our building tips guide's source video measured 32 m for timber. Treat that as unconfirmed.
The video points out that the true usable height is usually one piece lower than these limits. The top piece is so close to its minimum that it can't hold a floor or roof.
A note for anyone checking the maths: the wiki's worked example for a stacked 2 m wood pole plugs in the horizontal loss (1/5) and gets 58 support. With the vertical loss (1/8), as the wiki's own rules describe, a stacked pole keeps about 74. Only that version reproduces the 16 m limit the wiki states, so it's the one used above.
Building sideways: the half-height rule

free Wood loses 1/5 of its support sideways, compared with 1/8 going up, so overhangs drain support fast. The video's rule of thumb: you can build about half as far sideways as you can build up. For wood, that's about four poles (8 m) out from a grounded post near ground level.
Height and reach use up the same support. In the video's example, after going 8 m up a wooden frame (half of the 16 m budget), only about two poles (4 m) of sideways reach are left. And that is the bare maximum: to put a floor on the last beam, go one piece shorter. The video admits the rule isn't exact, but it comes close. The video says the same rule applies to core wood (hardwood), so expect about half of its 24 m height, roughly 12 m, sideways from the ground. For roofs and balconies, the practical takeaway is to bring a pole down to the ground or to a blue piece every few metres rather than cantilevering wood beams as far as they'll go.
Iron beams: the long-reach material

setup Iron beams (called "wood iron" on the wiki and "iron wood" in the video) lose the same 1/13 per metre in every direction. In the video, an iron beam line runs 50 m (25 pieces) straight out to the side and still holds another piece at the end. No other material comes close.
That makes iron beams the go-to for:
- Long roof spans and roof support over large halls, where wood beams would turn red halfway across.
- Overhangs and bridges that have to hang off a single pillar.
- A hidden skeleton. An iron frame inside wooden walls carries the structure while the wood is just the visible skin.
Iron beams need iron and a forge nearby to build and repair, so they're a Swamp-tier upgrade. Before that, mix wood and core wood and keep spans short.
Shortest path to the ground and diagonal braces

free Valheim calculates support along the shortest path down to the ground (the best-supported parent wins). Extra parallel poles and real-world bracing do nothing unless they make that path shorter.
The video demonstrates this with a wooden arm. Counted along the best path, both ends of the frame sit six pieces from the ground. Adding 45° angled beams as diagonal braces cuts across the corner and shortens the path, so the arm can reach two more poles further out. The video then removes four of the old vertical poles without anything changing, because they were never on the shortest path.
How to use this:
- Brace diagonally from a blue piece rather than adding more vertical poles to a beam that is already supported.
- Before you add a support, check whether it creates a shorter path. If the colour of the target piece doesn't change, the support is decorative.
- skip Don't stack redundant poles "for strength". They add materials and instance count, not stability.
Stone stability: strong upward, useless sideways

setup Stone's horizontal loss is 1/1. The wiki explains that this means 100% loss, so a stone piece supported only from the side can't extend outward. In the video, a stone wall can only stick out about 1 m (half its width) from the piece below.
The video shows two workarounds:
- Stone arches can step out sideways. The video gets up to about 10 m (five arches) of reach near the ground, less the higher up you start.
- A 2×2 stone floor can hang to the side as long as a 1×1 stone wall piece supports it from underneath. Stone floors can also sit on top of arches.
The wiki's material table has stone at 1000 maximum and 100 minimum, so a stone piece breaks at a support value that would still be full strength for wood. Separately from support, the wiki notes that stone, black marble and crystal pieces don't decay in rain or water, unlike wood.
Spanning gaps with two supports

setup There's one exception to "only the best path counts", and it's the key to big stone floors. The wiki says a piece supported by two parents on opposite sides (more than 100 degrees apart, both slightly below the piece's centre) gets a combined value. That value uses the material's vertical loss whatever the angle, averaged across both parents.
This changes what stone can do. The wiki gives an example: a grid of up to 7×7 stone floor pieces (14×14 m) held up only by iron supports at the corners. The catch is that the whole grid holds together as one unit. Remove one floor tile and a large part of it will fall.
The same rule helps wood. A beam or floor resting between two walls is carried from both ends at the cheaper vertical loss, so bridging between two supports beats cantilevering from one.
Stone and iron as a new ground for wood

setup A piece can never have more than its material's maximum support, but it gets full support whenever its parent passes on enough. Wood maxes out at 100 support, while stone starts at 1000 and iron at 1500. So wood placed on a well-supported stone or iron piece starts blue, exactly as if it stood on the ground. The video calls this using stone as ground support, and it shows a wooden pole glowing blue on top of a stone pillar.
How high this works (wood on top of a straight stack of 2 m pieces):
| Base material | Video's measurement | Our calculation from the wiki's numbers |
|---|---|---|
| Stone | 7 pieces (14 m) | 7 pieces (14 m) |
| Iron beams | 15 pieces (30 m) | 14 pieces (28 m) |
| Black marble | not covered | about 8 pieces (16 m) |
| Grausten | not covered | about 12 pieces (24 m) |
The video's caption track garbles the stone figure into "40 meters", but it also says seven pieces, which works out to 14 m and matches the calculation. For iron, plan on about 28 m to be safe: the video's 30 m is one piece more than the wiki's numbers allow. Above those heights the wood doesn't start blue. It starts green, orange or red, depending on how weak the base already is.
How to build tall: stacking materials

grind Building tall comes down to the previous section: use a strong material for the lower part, and switch to wood only where the base can still pass it full support.
- The highest possible build is iron beams all the way. At 50 m, it's the highest straight-up limit in the wiki's table. Wood can't add more height on top of a 50 m iron tower, because the iron there is nearly at its own minimum.
- Practical tall halls: a stone or iron lower frame for the first 14 to 28 m, then a wooden upper floor and roof that starts blue from that frame. In the video, a wooden pole placed higher than that on an iron tower starts green, so it has less budget left.
- Re-ground often. Every time a tall build reaches the ground, a tree or a raised terrain pillar, support resets to full. A tower built against a cliff can go far higher than a free-standing one.
- Workbench range matters up high. The video points out that the workbench's build area is a sphere, so on tall builds you'll need another workbench on an upper floor.
Reinforcement tricks that still work in 1.0

cheap None of these tricks depend on the old hammer menu, so they work the same in 1.0.20:
- Raise the terrain instead of adding poles. The wiki recommends raising the ground under a structure as much as you can so the floor and walls are blue. It costs stone and hoe swings instead of extra building pieces. Keep in mind that the wiki also says terrain edits cost performance.
- Build off trees and boulders. Both count as ground. Placeable boulders (1.0.14+) let you add ground-level support where you need it.
- Use the shortest path. Brace diagonally from blue pieces, and delete supports that don't change any colour.
- Bridge, don't cantilever. Supporting a span from two opposite sides uses the cheaper vertical loss.
- Give wood a fresh start. Put a stone plinth or iron frame under it so the wood starts blue again higher up.
- Mind the roof. Roof pieces count as wood in the stability table, so a big roof drains support like any wooden overhang. Run iron or core wood beams under it, and add poles down to blue walls. Since patch 0.214.2, the 45° thatch inner corner can support itself.
- skip Don't remove pieces under a stone floor grid that's held up by corner supports. It only stands as a whole.
Patches have fixed a few odd cases over the years, such as inconsistent support on the cage floor 1×1 piece (0.217.46), the 26° and 45° wood log pieces (0.203.10), and torches in world locations that used to support buildings (0.150.3). If a guide from 2021 uses one of those quirks, it may no longer work.
How this guide was fact-checked
- From the wiki (Fandom, Building stability page): the material table (max and min support, vertical and horizontal loss for wood, hardwood, stone, iron, marble and ashstone), the 0.1 m distance fudge factor, the two-parent rule and the 7×7 stone floor example, and the 0.5-second / 50-piece recalculation. The 16 m wood/stone, 24 m core wood and 50 m iron heights, the colour meaning, and the tree and boulder ground rules come from the wiki's Building page. Placeable boulder support (1.0.14) and the patch fixes come from the wiki's Version history.
- Our own calculation from the wiki's formula: the black marble (18 m) and Grausten (26 m) heights, and every "wood starts blue on top of X pieces" figure. Where the wiki and video both give a value, the calculation matches it. That's how we know these figures follow the game's rules.
- From the video's on-screen demonstration: the half-height rule for sideways building, 50 m of sideways reach for iron beams, the diagonal-brace example, stone arch reach and the 2×2 floor on a 1×1 wall.
- Corrections: the caption track's "60 meters" for stone is 16 m (on-screen label and wiki). Its "40 meters" for wood on stone is 14 m (seven pieces). The video's 30 m for wood on iron beams is one piece higher than the wiki's numbers allow (28 m). The wiki's own worked example uses the horizontal loss for a vertical stack; this guide uses the vertical loss, which matches the wiki's stated 16 m limit.
- Not on the wiki: the Deep North timber pieces have no entry in the stability table yet.
What this guide doesn't answer
- Base layout, roof angles, comfort and decoration: covered in our Valheim building tips guide.
- Exact numbers for Timber and other 1.0 pieces: the wiki doesn't list them yet, and we didn't test them in game.
- Exact colour thresholds: neither the wiki nor the video gives the support values where green turns orange or red.
- The 1.0 hammer menu and snap points: the video shows the early-access menu. See the building tips guide for the 1.0 controls.
- Rain damage, durability and raid defense: these are separate systems from support and are covered on the wiki's Building page.
Frequently asked
What do the building colors mean in Valheim?
With the hammer equipped, pointing at a piece shows its support. Blue means full support: the piece touches the ground (or a rock or tree), or sits on something strong enough to give it full support. It then fades through green and orange to red. A dark red piece is at its limit, and anything you attach to it breaks a few seconds later.
How high can you build in Valheim?
Straight up from the ground, wood and stone both stop at 16 m, core wood (log) at 24 m and iron beams at 50 m, per the wiki. By the wiki's numbers, black marble reaches about 18 m and Grausten about 26 m. The top piece usually can't hold a floor, so plan one piece lower. Iron beams all the way is the tallest single build.
Why does my Valheim building collapse?
Every piece loses support with each step away from the ground, and it breaks once it drops to its material's minimum. Sideways steps cost the most: wood loses 1/5 sideways but 1/8 going up, and stone loses 100% sideways. Overhangs and long wooden roof spans are the usual cause. Add a pole down to a blue piece or swap to iron beams.
Does stone or iron make wood stronger in Valheim?
Yes. Wood can't exceed 100 support, so wood placed on a well-supported stone or iron piece starts blue as if it were on the ground. That works on top of up to 7 stacked stone pieces (14 m). On iron beams the video measured 15 pieces, and the wiki's numbers give 14 pieces (28 m). Higher than that, the wood starts green or worse.
Do extra support beams help stability in Valheim?
Only if they shorten the path to the ground. Valheim uses the single best-supported path, so parallel poles do nothing. Diagonal 45 degree braces from a blue piece can let a wooden arm reach two poles further. The exception is a piece supported from two opposite sides, which gets the cheaper vertical loss. That's how a 7x7 stone floor can stand on iron corner supports.
Read next
Valheim Comfort & Rested Buff: Max Comfort Guide
Comfort sets how long Valheim's Rested buff lasts: 7 minutes plus one per level. This guide lists every comfort group, the 22-point max build and the seasonal pieces that reach 24.
Valheim Building Tips: Base Design, Roofs & Defense
Practical Valheim 1.0 base design tips: where to build, how to level ground and lay out zones, round huts and roofs, defense, and decorations that raise comfort. Video claims are checked against the wiki, with corrections noted.
Valheim 1.0 Update: Everything New and Changed
Everything the Valheim 1.0 update added and changed, from the Deep North and Kall to pocket upgrades, the Forge of Potential and older-biome rebalances, plus what patches 1.0.10 to 1.0.20 fixed and whether you need a new world.
Valheim Beginner Guide: First Days & Essential Tips
A spoiler-free Valheim 1.0 beginner guide to your first days in the Meadows: what to craft first, how to build a working starter base, which foods to eat and how Rested, Cold and Wet change your day. Recipes and numbers are checked against the Valheim wiki.