
🎯 The core idea
Satisfactory is overwhelmingly a co-op game, and setting up a dedicated server so a group can play on a shared save without one person's PC acting as host is a genuine technical hurdle -- SteamCMD, port forwarding and a batch file, not a single install button. This guide follows a real Windows dedicated-server setup from download to a friend successfully joining, cross-checked against the official Satisfactory Wiki's own dedicated server documentation for the parts that are easy to get wrong.
- free costs nothing
- cheap small cost
- setup needs preparation
- grind pays off slowly
- skip the thing to stop doing
Downloading SteamCMD

The dedicated server is installed through SteamCMD, a command-line version of the Steam client -- usage of SteamCMD is the officially preferred method for setting up a Windows dedicated server. Downloading it is a small zip file from Valve's own developer site; extract it into a dedicated folder (this guide's source video uses a new SteamCMD folder on the C drive) rather than somewhere it'll get lost, since you'll be running commands from inside it. The server itself runs on both Windows and Linux, so everything after this download step has a Linux equivalent too if that's what your host machine is running.
Installing the server files

Inside SteamCMD, three commands do the actual install: force_install_dir pointed at a new folder (this guide's source video uses C:\satisfactoryserver), login anonymous (no Steam account is needed for the dedicated server), and app_update 1690800 validate, which downloads and verifies the server files against Steam App ID 1690800 -- the dedicated server's own listing, separate from the regular game. Re-running that same app_update command later is also how you update the server to a new game version, and it's worth bookmarking since Satisfactory updates will eventually require it.
Creating a launch script

Rather than double-clicking FactoryServer.exe directly, a small batch file makes the server easier to relaunch and keeps its log window visible: create a text file, rename its extension from .txt to .bat (you'll need "file name extensions" turned on in File Explorer's View settings to do this reliably), and paste in a one-line script that runs FactoryServer.exe -log. Save it inside the server's install folder next to the executable it points to, and double-clicking it from then on starts the server with its console output visible, which is the easiest way to confirm it's actually running before anyone tries to join.
Finding the server machine's local IP

With the server running, the next step is finding the hosting machine's own network address: open Command Prompt and run ipconfig, then note the IPv4 address listed for the active network adapter. This local address is what you'll use to connect from the same machine or the same local network; setting a static IP on the server machine (through your router's settings) is worth doing too, since a local address that changes after a reboot means updating your connection details every time.
Setting the client to join by IP

On the machine you'll actually play from, starting a new game and opening multiplayer settings lets you set the session type to IP rather than the default -- that's what tells the client to connect to a specific server address instead of browsing a session list. From there, adding the server through the in-game Server Manager (rather than a general "Join Game" option) is the supported path: the official documentation specifically recommends adding a server through the Server Manager and joining from there, since going straight through "Join Game" is more prone to connection issues.
Creating a session through the Server Manager

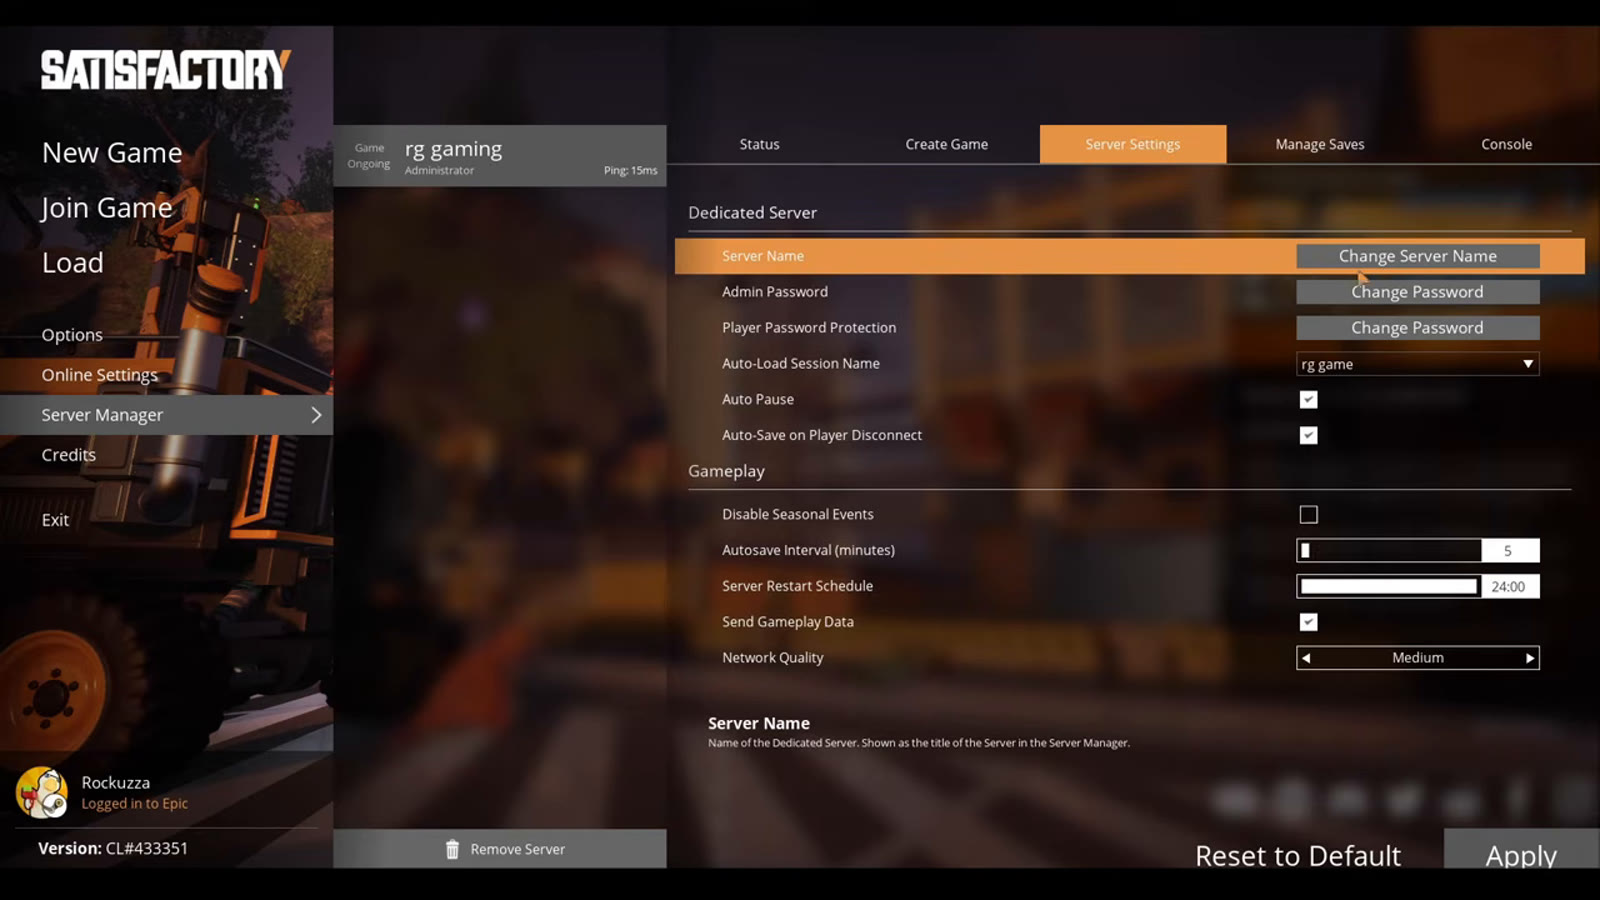
Once connected, the Server Manager is where the actual save gets created: start a new session, and it's worth setting a distinct server name, an admin password, and player password protection at this point rather than leaving the server open to anyone who finds its address. The Server Manager also handles save management directly -- creating, loading, uploading and downloading saves -- which is the built-in way to transfer a save from a solo playthrough onto a fresh dedicated server, or to back one up without digging through file paths by hand.
Sharing your public IP with friends

Friends joining from outside your local network need your public IP address rather than the local one ipconfig showed earlier -- a quick search for "what is my IP" or a dedicated service will show it. They'll enter that public IP (with the default port, 7777) into their own Server Manager the same way you added it locally, and this is exactly where port forwarding on your router matters: without ports 7777 and 8888 forwarded to the server machine, an outside connection has no way to reach it even with the correct IP typed in. A site like a port-checking tool can confirm those ports are actually open from outside your network before a friend tries to connect and hits a wall.
What doesn't reliably work

This guide's source video notes that the in-game session ID -- meant to be handed to a friend so they can type it in directly, as an alternative to entering a full IP address -- didn't work reliably in testing, which lines up with the Server Manager-based IP join being the path the official documentation actively recommends over any shortcut. Direct in-game invites through the friends overlay only work if the person you're inviting already owns and has launched the game; it's not a way to send them the game itself. And if you're playing across Steam and Epic, both platforms can connect to the same dedicated server, so account platform isn't a blocker on its own. If multiplayer still isn't working after all of that, confirming the server is actually running (its console window staying open rather than closing immediately) and re-checking that both ports are forwarded to the correct local IP are the two most common fixes before assuming something more complicated is wrong.
How this guide was fact-checked
The default dedicated server ports (7777 TCP/UDP and 8888 TCP) and the Steam App ID (1690800) are confirmed on the official Satisfactory Wiki's own dedicated servers page -- worth flagging since this guide's source video's on-screen audio makes the App ID hard to read clearly, and the wiki's figure is the one used here. SteamCMD being the preferred installation method, and the exact force_install_dir / login anonymous / app_update validate command structure, are also wiki-confirmed. The recommendation to join through the Server Manager rather than a direct "Join Game" option is stated explicitly in the wiki's own FAQ. Minimum system requirements (8 GB RAM, more recommended for four or more players; a CPU roughly equivalent to an Intel i5-3570 or Ryzen 5 3600) are wiki-confirmed. The port-forwarding, batch file creation, ipconfig lookup and Server Manager walkthrough all come directly from this guide's source video's own on-screen setup.
What this guide doesn't answer
This guide doesn't cover Linux dedicated server setup command-by-command, even though the server binary supports it -- the source video is Windows-focused, and a Linux setup differs enough in file paths and firewall tooling to need its own walkthrough rather than a side note here. It also doesn't cover console crossplay in detail: the official wiki is explicit that dedicated servers aren't available on console at all, so any crossplay between platforms happens through non-dedicated, player-hosted sessions instead, which is a different setup than what this guide covers. Finally, it doesn't cover installing mods on a dedicated server, which uses a separate tool (the Satisfactory Mod Manager's server-connection mode) and has its own dedicated documentation and caveats worth reading before attempting it on a server other players depend on.