
🎯 The core idea
Space City 2.0 landed in Season 8 as a rework, not a new map: the dormitory and outskirts are largely untouched, but nearly every body of water on the map is now swimmable, a brand-new docks area has grown out of the back of the plaza, and a second boss (Hudson) can now spawn alongside the returning Demolin. This is a full breakdown of the new water routes, the new loot areas, the reworked central-building interior and what genuinely didn't change.
- free costs nothing
- cheap small cost
- setup needs preparation
- grind pays off slowly
- skip the thing to stop doing
What actually changed in the Space City 2.0 rework

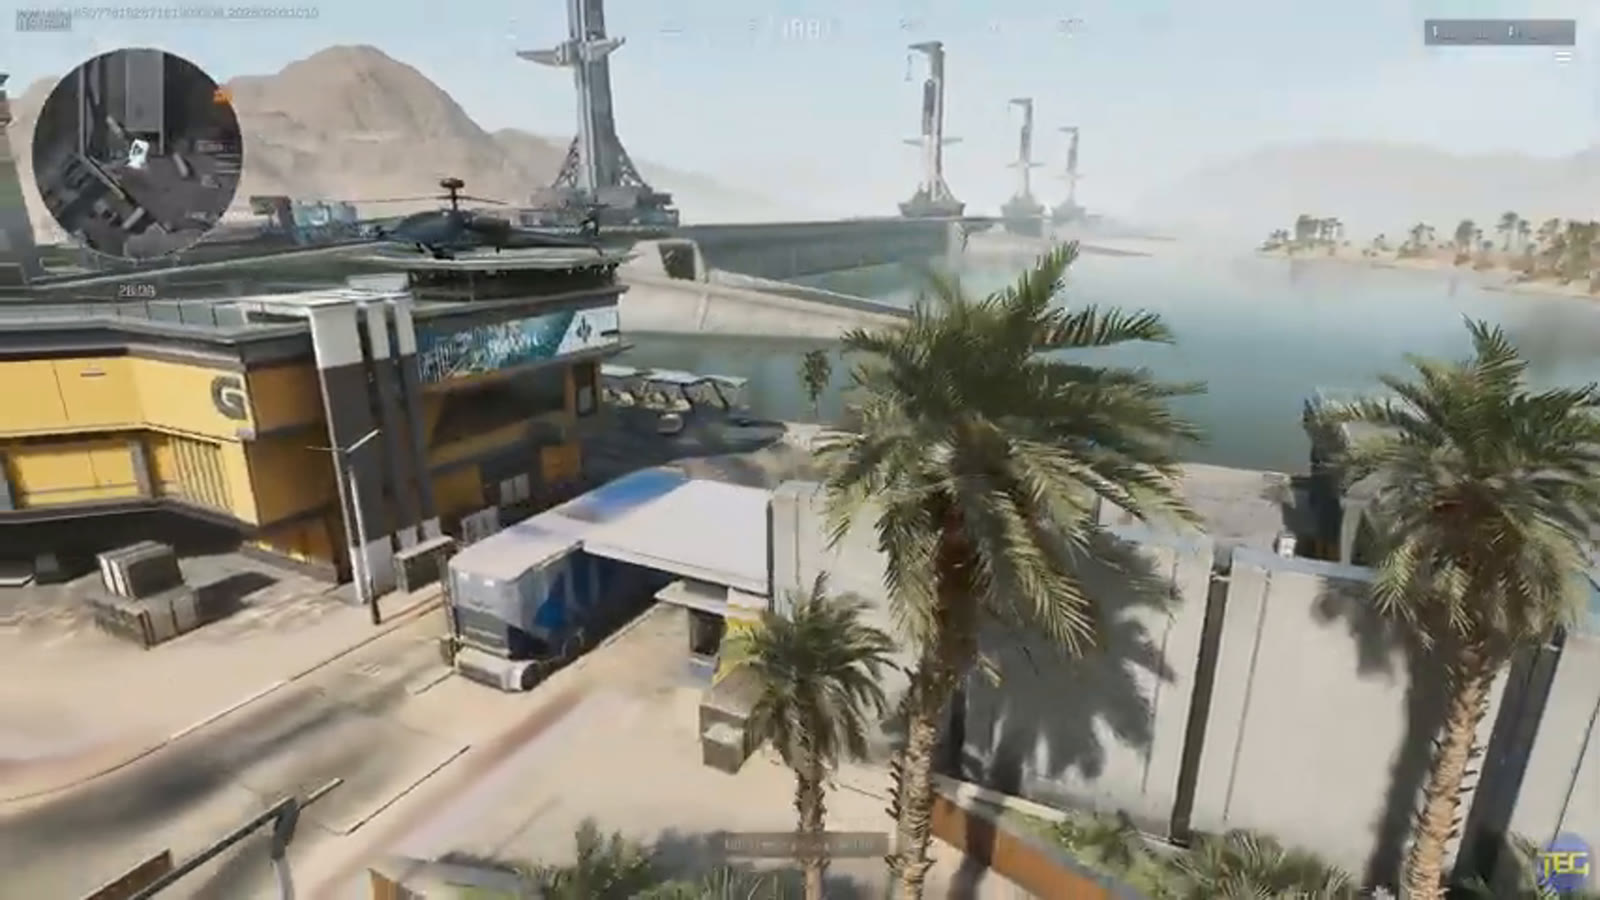
The dormitory area and most of the outskirts are basically unchanged in this rework — don't relearn spots you already know there. The headline change is that every body of water on the map is now swimmable, or at least survivable long enough to cross. That includes the water running from the dormitory area past the zips around to the bridge, plus a second area of water that opens up behind the plaza — where you used to sneak along behind the planters toward the extracts, there's now a much larger zone with a docks area and a helipad. Central control, the bridge, the core, dormitory, centrifuge and the black chamber all read as the same layout as before Season 8.
Two separate water systems, not one connected route

This is the part worth getting right before you plan a route: the map's water is two separate systems, and you cannot swim between them. One area sits out the back near the launch zone and the new boss area — you can drop in there, swim around, and climb out on a ladder near the bridge or up into the big bay area, but it dead-ends against the core. The other area is the larger one, running all the way from the suspension bridge, around underneath the central command bridge and employee passage, over to Westgate — also fully connected within itself, also unable to cross into the core from any point. Watch for sharks in both: they'll rush you if they spot you and can kill fast, and there are noticeably more of them in the launch-side water than the Westgate-side one.

There's a ladder in between the two bridges that drops straight into this water, and it's also where you'll find one of the map's few underwater loot containers — not a farming route by itself, but worth a quick check if you're already swimming through on your way somewhere else. A handful of similar containers are scattered through both water systems.
The new docks area, loot, and where Hudson spawns

The new docks area is reached by a new zip line near launch (next to the broken bridge, when it's active) or by climbing a new ladder between the two bridges and working along the ledges. It's a genuinely large addition — multiple levels, various rooms with loot containers, briefcases and the usual scatter of enemies. This is also where the new boss, Hudson, can appear: he spawns roughly 6-7 minutes into the round, announced by an audio cue and a cutscene of helicopters, planes and boats bringing him in. Before he shows up, four bodyguards spawn first — a group with shielded guns and an escort tank, similar to Demolin's setup. Killing all four guards pops the tank and drops a keycard that unlocks the door to Hudson's room; you don't need to damage the tank itself. Demolin, the map's original boss, still spawns as usual in her normal spots (sometimes centrally, sometimes at the launch tower) when Hudson doesn't show.
There's also a smaller, separate patch of water near the dormitory beach with one or two loot containers along its length — noticeably sparser than the loot you'd find swimming Tide Prison's water, so don't expect it to be a farming route on its own.
Central building: new vertical routes and flank options

Both staircases inside the central building now have a hole in the ceiling with a climbable pipe next to it, letting you drop down or mantle up between floors instead of being locked into the stairs as a one-way choke point. Further along, the corridors on both sides have picked up new holes leading into small side rooms with extra doorways — the old "who peeks first" chokepoint now has an actual flanking option built in.
CEO office: reworked loot rooms and a new drop-out route

The CEO office itself is one of the more significantly reworked interiors: you now walk in to a piece of bulletproof glass in the center of the room, and the surrounding layout has been rebuilt around it. Keycards in general still spawn across the map the same way they always have — this office is simply one of the more consistent rooms to check for them after the rework.
Buoyancy: a room you can flood on purpose

Buoyancy has a new control panel that slowly floods the room from the bottom up. You can still swim and use the zip while it's flooded, and once it's up you can swim inside a hollow container for cover — that one has no loot, but the other container in the room still holds its usual flight case and small safe, same as before the rework.
Two large new hanging fixtures have been added to the room as well, which change the sightlines slightly even if the rest of the layout is familiar.
Test range and everything else that's unchanged

Test range picked up one new box you can drop down from (with a tiny bit of fall damage) but can no longer climb back up, plus a large new piece of cover in the main room — otherwise its interior reads as the same layout as before. Dormitory, central command, centrifuge and the black chamber are all confirmed unchanged. The extraction setup is also identical to the old Space City: rocket launch (roughly 7 minutes after pressing the button, tied to picking up Operation Ascended), the main helicopter extract (trigger both switches inside, then extract), and the bagless extract (three slots on normal, one on hard).
Route tips for a solo or beginner run
This is a good map to learn solo precisely because so much of it is unchanged — the new content is additive rather than a full relayout, so existing route knowledge mostly still applies. If you're new to Space City 2.0 specifically, treat the water as a shortcut and an escape option rather than a loot farm: the docks area and the CEO office vault room are the more reliable loot locations right now, and the sparse container count in the dormitory-side water isn't worth a dedicated detour on its own. Watch the 6-7 minute mark for Hudson's spawn cue if you're hunting the new boss fight rather than Demolin.
How this guide was fact-checked
This guide is sourced from The Beard Guys' "Space City 2.0 Complete Map Guide" (12:53, published 2026-02-03) — a video deliberately chosen because it was recorded after the Space City 2.0 rework shipped in Season 8, since this catalogue treats pre-2026 Space City coverage as inaccurate for the current layout. The video has no chapter markers, so section breaks in this guide were inferred from the narration itself rather than pre-set timestamps. Every location, mechanic and loot detail here (the two separate water systems, the Hudson boss encounter, the CEO office key cards, the buoyancy flood mechanic, the test range changes) is described directly by the creator from first-hand exploration on the reworked map, and the extraction details cross-check against this catalogue's own Operations beginner and extraction guides, which describe the same rocket-launch, helicopter and bagless extract setup unchanged since before this rework.
What this guide doesn't answer
This guide doesn't give a full loot-tier ranking of every container on the map, since the source video is a tour of what changed rather than an exhaustive loot audit — it explicitly notes the dormitory-side water has "not a lot" of containers without giving an exact count. It also doesn't cover Hudson's weapon patterns or a fight-by-fight strategy for beating him, only how he spawns and how to reach him, since the creator didn't get a clean fight with him in this recording. Finally, it doesn't confirm whether the new corridor holes near the central building were newly added in this rework or simply overlooked before — the creator says so explicitly rather than guessing either way.
Read next
Delta Force Cracked Map Guide: Movement Routes, Climbs and Positioning (Warfare)
A movement-tech focused walkthrough of Cracked's rooftop dash chains, AC-unit and pole climbs, balcony bounces and the Graveyard callout, plus point-holding basics like tank and sniper awareness.
Delta Force AZ3 Nuclear Power Plant Map Guide: Radiation, Extracts & Keycards
A launch-day breakdown of Delta Force's AZ3 Nuclear Power Plant map: radiation tiers and decontamination, the west/east/core layout, spawn-based extracts, all 7 keycards plus the AZ3 pass key system, and the H1000 boss.
Delta Force Zero Dam 3.0 Map Guide: All Loot Locations (Season 9 Rework)
Every confirmed loot spawn in the new Zero Dam 3.0 water zone added in Delta Force's Season 9 rework, plus the new bird-alert mechanic and route order from Paid Extract.
Delta Force Brakkesh Map Guide: All Extracts and Full Tower Tour
Brakkesh's New Tower of Babel gates two of the map's four extraction points behind timed levers and a signal-jammed maze. Full breakdown of every extract on Normal and Hard difficulty, plus a room-by-room tour of the tower.