
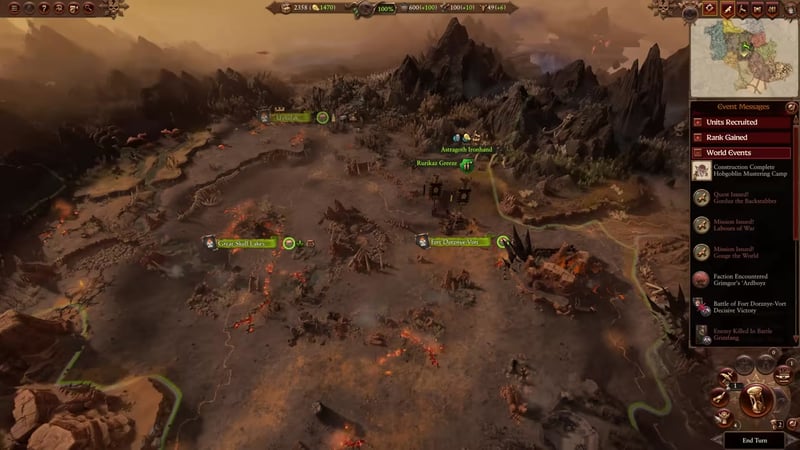
Conquer the opening moves of a Chaos Dwarf campaign with early hero unlocks, optimized recruitment, and targeted expansion. Learn how to prioritize resources, build effective armies, and manage your economy for smooth growth and campaign stability.
Quick answer
| What | Answer |
|---|---|
| First hero to unlock | Gorduz |
| Early enemy to remove | Grimgor Ironhide |
| Early hostile target | Tamurkan |
| Astrogoth first skill focus | Magic skill line |
| Main early economy focus | Raw materials |
| Best early army core | Hobgoblins and blunderbusses |
| Best tower movement building | Patrol routes |
Secure Gorduz and build your first hobgoblin stack
Unlocking Gorduz quickly sets up your most effective early-game army and grants powerful buffs for cheap units. Follow these steps to streamline hobgoblin recruitment and ramp up your fighting strength with minimal cost.

- Unlock Gorduz as your first legendary hero; use cutthroats, archers, and sneaky gits. 0:58
- Ensures steady supply and enables fast stacking. 1:26
- Fill your ranks with archers (cheap and effective) and sneaky gits (excellent flankers). 1:55
- Use Gorduz’s buffs for an independent hobgoblin stack that supports your main army. 2:23
- Boost hobgoblin buffs first, then casualty replenishment, then other abilities. Stealth and summons make your stack versatile.
Gorduz’s stealth buff applies to all hobgoblin units and his summon can target enemy ranged units with a large cast range.
Remove Grimgor before he snowballs
Grimgor Ironhide is a fast-growing threat near your starting province. Catch him before he expands, use terrain, and wipe out his army at the right moment for smooth campaign progress.


- Position Astrogoth to gain an extra turn of recruitment before hitting Saber Mountain. 3:22
- Use hills and rocks to force defensive charges and preserve your units. 3:51
- Set ambushes or lure enemies using Astrogoth, Castellan, and bull centaurs. 4:19
- Let them hold giants while archers and blunderbusses eliminate the threat. 4:48
- Wipe his forces in a settlement fight to prevent recovery. 5:45
- Astrogoth or a Great Taurus can draw enemy catapult fire. Labourers can absorb shots if needed.
- Keep infantry on flanks and single entities in front. Avoid artillery hits on key ranged units.
- Cast Burning Wrath and Ash Storm as enemies approach to provoke charges and disrupt.
- Push before he can recruit again. Target flanking cavalry and chariots with infantry.
Grimgor’s army grows fast after turn 12; attacking his garrisoned stack early prevents a massive war.
Take Tamurkan out early and finish the fight
Tamurkan becomes a late-game disaster if not dealt with at once. He spreads Nurgle corruption and can replenish armies rapidly, so prioritizing his defeat is crucial.

- He will always invade later, so elimination is best done early. 9:35
- Tamurkan is mounted on Bubbolos and regenerates. 10:59
- Focus him down with hobgoblin archers and Ash Storm; fire is his main weakness.
- His passive can kill nearby characters; finish him with ranged units.
- Kazak is fast, mounts, and regenerates; fight him away from Tamurkan.
- On hard difficulties, Nurgle replenishes instantly; keep moving and fill losses with laborers.
- Press constantly until Tamurkan’s faction is wiped out.
As soon as you defeat Tamurkan, expect him to raise new armies four turns later; speed is essential.
Use Astrogoth as a fast spellcaster and bait unit
Astrogoth’s versatility comes from mixing spellcasting with mobility and bait tactics. Build him as a powerful caster first, and use his skills to hold enemy lines and amplify your ranged damage.

Put your early skill points into Astrogoth’s magic line for Firestorm, Hellhammer, and Burning Wrath. His unique "Dark Sacrifice" skill sharply reduces Hellhammer’s Winds of Magic cost. Burning Wrath is available early — overcast it for useful damage; otherwise, use Ash Storm or Cascading Firecloak for utility and provocation.
Astrogoth operates best away from your main line. Run him forward to bait the enemy, cast spells, then retreat to lead enemies into your guns. His speed allows him to pull most foes, and he can fight what catches him.
Every kill up to 100 increases Astrogoth’s melee attack and weapon strength via the Mechanical Overdrive passive. This lets him convert spell damage into stronger melee performance.
Astrogoth grants all bull centaurs in his army a 15% ward save, making them highly durable. Add bull centaur units early to benefit from this synergy. After his magic and unique lines, invest in red line skill buffs for Chaos Dwarf ranged infantry and bull centaurs.
Astrogoth brings both spellcasting and strong melee, with easy stacking of buffs for ranged and monster units. Place him forward to pull, cast, and bait, but retreat before he’s surrounded.
Understand what each Chaos Dwarf resource does
Chaos Dwarfs balance five main resources, each fueling a distinct part of the economy, recruitment, and expansion. Use this comparison table to identify their roles and avoid bottlenecks.


| Resource | What it does | How to get | Usage tips |
|---|---|---|---|
| Gold | Pays for buildings, recruiting troops, upkeep | Trade, battles, convoys | Not the main bottleneck; needed but not priority |
| Labour | Needed for extraction, fast building | Win battles, sack, raid, manage provinces | Decays over time and with low control; decentralize labour using transfers for efficiency |
| Raw materials | Upgrade towers/factories, feeds armament output | Produced by labourers | Core economy ingredient; focus on 3 outpost provinces for every factory province; Miner’s Workshop boosts output by up to 30% |
| Armaments | Unlock/upgrade Chaos Dwarf units, increase unit caps | Produced from raw materials, events | Spend first on ranged units/monsters, not heavy infantry; arms advanced military buildings |
| Conclave Influence | Buys Tower of Zharr seats, occupies towers, forces confederations | Raise towers/temples, conquest, factory seats | Rush seats for movement and K'daai summons; use labour actions to trade labour for influence in emergencies |
Ports should be factories or towers; outpost ports are weak. Convoys trade surplus resources. Early provinces should be about a 3:1 outpost to factory split for best production.
Build armies around hobgoblins, blunderbusses, monsters, and support heroes
Chaos Dwarfs combine efficient hobgoblins with powerful ranged units and monsters. Use this table to select units and heroes for the strongest battlefield presence and best economy management.
| Unit/Hero | Role & Strengths | Early priority? |
|---|---|---|
| Hobgoblin Archers | Best early ranged spam; cheap and effective | Yes |
| Sneaky Gits | Flank bonus, poison, precursor weapon | Yes |
| Wolf Riders | Hunts enemy ranged and artillery | Yes |
| Hobgoblin Cutthroats | Mediocre melee, good blockers | Yes, but mainly as chaff |
| Labourers (Orc/Goblin) | Chaff, absorbs charges; orc ones are sturdier | Yes |
| Chaos Dwarf Warriors / Infernal Guard | Heavy infantry; high defense | No, skip early armaments on them |
| Blunderbusses & Fire Glaives | Devastating ranged infantry, use armaments to unlock | Yes, highest damage per cost |
| Bull Centaur Rendar Taur’ruk | Powerful monster unit, synergy with Astrogoth’s buff | Yes |
| K'daai Fireborn / Destroyer | Anti-infantry specialist monster | Yes, after blunderbusses |
| Hellcannon | Early artillery with good range, homing | Yes |
| Magma Cannon | Wall and infantry killer, needs elevation | Yes, situational |
| Deathshrieker Rocket Launcher | Good against lords, heroes; swap to single-rocket mode | Yes |
| Dreadquake Mortar | Top anti-infantry artillery when pulled by Skullcracker/Iron Daemon | Yes, but takes 2 war machine caps |
| Iron Daemon | Strong firepower, do not fire through own infantry | Yes |
| Castellan | Essential hero: campaign movement, ammunition, explosive buffs | Yes, one per army |
| Daemonsmith | Artillery reload, Hellforged healing, spellcaster | Yes |
| Bull Centaur Taur’ruk | Large-unit hunter and trainer | Yes |
Spend early armaments on ranged units and monsters, keep infantry as blockers and support. The Castellan and Daemonsmith are key support heroes.
Set your battle line so blunderbusses can do the killing
With the right formation, your ranged units can wipe enemies while your cheap infantry holds flanks and screens. Setup for maximum effectiveness and minimal losses.

- If one gets compromised, pivot and fire onto itself; box formation helps 31:36
- Volley over the guns for extra ranged pressure.
- Absorb charges, protect ranged units, block enemy flanking units.
- Holds leadership together, prevents mass routing.
- Astrogoth or bull centaurs can bait and drag targets back into your guns.
- Ensures strong units fight first; trickles in easy kills.
- Large rocks, hills, or map edges safeguard your firing line.
- Prevents friendly fire casualties.
This setup maximizes ranged firepower and keeps infantry roles clear; blunderbusses do most of the killing.
Project power across a wide empire
Efficient empire management lets you defend multiple fronts, recruit quickly, and respond to threats. Use movement buildings, recruitment buffs, and labour rushes for flexible control.


- Up to 20% movement range for entire province at tier 5 34:28
- 10% extra movement range empire-wide.
- Newly recruited lords and heroes get +2 recruit rank.
- Reduce global recruitment time by up to three turns, increase capacity.
- Bloodthirst Prison grants global recruitment for Daemonsmiths; Tomb of K'gai Khn boosts hobgoblin ranks.
- Further increases recruit rank.
- Lower recruitment costs, increase unit experience, maximize hobgoblin buffs.
- Build/upgrade walls and garrisons instantly using accumulated labour.
- Deploy artillery and sorcerer-profits for instant defense.
- Movement and defense bonuses compound, allowing fast empire response.
Stack movement buffs, recruitment buildings, and use labour to defend settlements before armies can reach them.
Also worth knowing
- Arbaal can be a more dangerous early threat than Tamurkan. In some campaigns, Arbaal declares war before Grimgor is handled. If so, go north to neutralize him first or secure at least one settlement for a peace deal.
- The Tower of Zharr seat granting a free melee unit every four turns is extremely valuable. This lets you reserve armaments for ranged units and monsters, easing early military production bottlenecks.
- Labour decay is proportional to total labour in a province and tied to control. Decentralizing labour across provinces reduces decay rates and is more efficient, but requires micro-managing transfers.
- Chasing broken enemies after battle increases labour gains. Use fast units like hobgoblin wolf rider regiments of renown to slow routed enemies and stack ancillaries that boost captives for maximum labour income.
- In four-settlement provinces, avoid stacking three outposts unless playing on low difficulty. The penalty to control and excess labour decay outweigh the gain; mixing in a factory keeps production and public order balanced.
- Rushing Tower of Zharr seats that grant influence per factory settlement accelerates your ascension for late-game power. Influence is key for confederations and tower upgrades.
Frequently asked
What should I do first in a Chaos Dwarf campaign?
Recruit hobgoblin units immediately and build toward Gorduz as soon as possible. After that, push east from the starting province so you can keep recruiting while taking the next key settlements. The early campaign is built around stabilizing with cheap units while your stronger pieces come online.
Should I fight Grimgor or Tamurkan first?
Grimgor is the immediate danger you should remove early, before he can grow into a larger stack count. Tamurkan also needs to be pressured early because Nurgle recruitment can refill armies very quickly and he becomes much harder to contain later. Both targets are time-sensitive, but Grimgor is the opening priority.
What resources matter most for Chaos Dwarfs?
Raw materials are the foundation because they unlock settlement upgrades and armament production. Labour fuels extraction and fast building, armaments unlock and improve military units, and conclave influence buys Tower of Zharr seats and confederation pressure. Gold is still needed, but it is not the main bottleneck.
How should I build Chaos Dwarf armies early on?
Use hobgoblins to hold, screen, and flank, while blunderbusses and other ranged damage do most of the killing. Keep infantry on the flanks, keep firing lines clear, and use single entities or fast units to pull enemies back into your guns. Heavy infantry is not worth early armaments compared with ranged units and monsters.
Read next
Total War: Warhammer 3 Lizardmen Guide: Geomantic Web, Rites and Blessed Spawnings
A practical early-to-late campaign plan for Kroq-Gar and the Last Defenders, focused on surviving the opening wars, building efficient armies, and scaling into a Stegadon-heavy late game. It is for players who want a clear path through the faction’s early economy, unit choices, heroes, and research priorities.
Total War: Warhammer 3 Nurgle Plagues Guide: Symptoms, Spreading and the Rework
This plan covers the main campaign changes in the Nurgle rework: plagues, cyclical buildings, recruitment, the army ability, and the updated tech tree. It is for players who want a quick, practical breakdown of what changed and what to prioritize first.
Total War: Warhammer 3 High Elves Guide: Patronage, Influence and the Intrigue Game
This plan covers the shared High Elf mechanics in Immortal Empires and how each legendary lord changes the campaign plan. It is for players who want to choose a lord, understand the faction systems, and know what to prioritize early.
Total War: Warhammer 3 Greenskins Guide: Waaagh!, Scrap Upgrades and Da Best Start
This guide covers the core Greenskin campaign mechanics and how they shape expansion, army building, and faction choice. It is for players who want a practical overview of the major lord starts and what each one is best at.