
🎯 The core idea
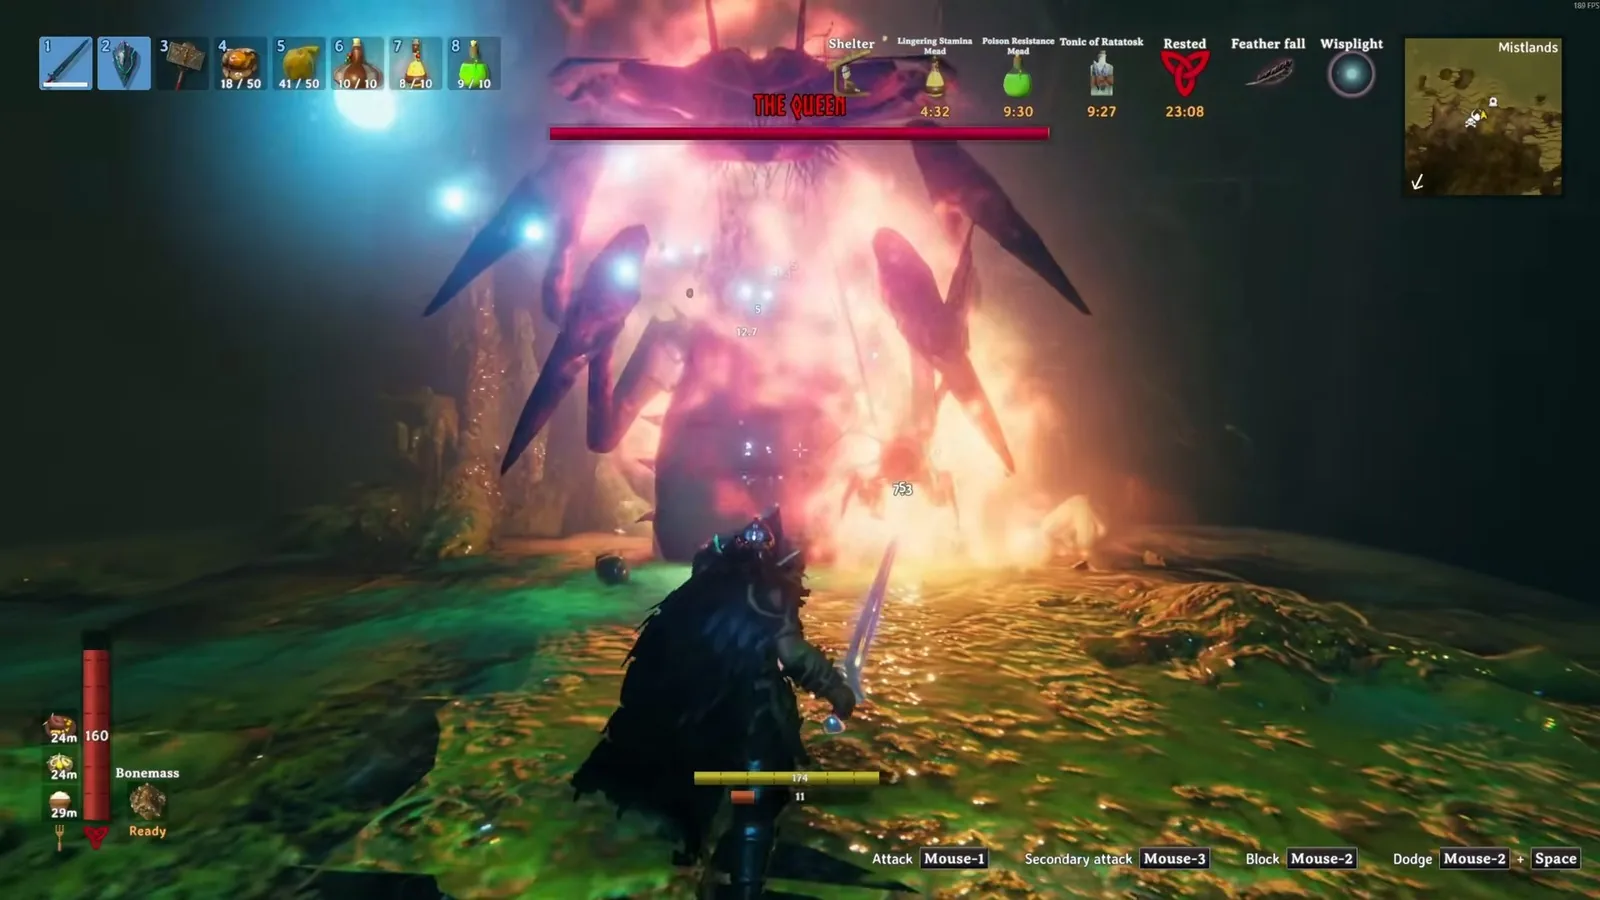
The Queen is Valheim's sixth boss and the end of the Mistlands. You fight her inside the Infested Citadel, which only opens with a Sealbreaker built from nine fragments found in Infested Mines. She has 12,500 health, hits very hard and keeps calling Seekers. Bring Poison resistance mead, a Feather cape and a Wisplight, use the safe entrance to heal, and the fight is about patience, not reflexes.
- free costs nothing
- cheap small cost
- setup needs preparation
- grind pays off slowly
- skip the thing to stop doing
The Queen's weakness: no blunt, slash or fire resistance

free The Valheim Queen doesn't have a classic weak spot like the earlier bosses. If you beat Bonemass with a mace (see our Valheim Bonemass boss guide), the good news is that blunt still works here. The Valheim wiki's damage table for her is short:
| Damage type | Multiplier | What it means for you |
|---|---|---|
| Blunt, Slash, Fire, Frost, Lightning, Poison | 1x (neutral) | Swords, sledges, bombs and staffs all do full damage |
| Pierce | 0.5x (resistant) | Bows, crossbows, spears and polearms do half |
| Spirit, Chop, Pickaxe | 0x (immune) | No damage at all |
So the practical Queen weakness is "anything but pierce". The wiki's strategy page adds that her speed plus the pierce resistance make bows and crossbows a poor choice. Melee and magic both work.
She has 12,500 health, two and a half times Bonemass's 5,000. Expect a long fight. The video's kill took roughly 17 minutes from the first hit to the last.
Queen location: Infested Mines, the Vegvisir and the Sealbreaker

grind The Queen is the only boss you fight inside a dungeon, the Valheim Infested Citadel: a broken Dvergr black marble building under a big rock in the Mistlands. Its vault door needs a Sealbreaker, and both the key and the map marker come from Infested Mines, the Mistlands dungeons guarded by Seekers.
- Queen location: per the wiki, a Vegvisir in an Infested Mine marks the nearest Infested Citadel on your map.
- Sealbreaker fragments: they sit in blue-lit glass displays all around the mines. Break the glass to take each fragment. You need nine.
- Building the key: craft the Valheim Sealbreaker at a Galdr table from the nine fragments. The wiki says it isn't consumed when you open the door, and it can go through portals.
The Galdr table itself needs 5 Black cores, which come from the same mines, usually from treasure rooms behind hidden doors with blue runes. So one mine run often covers the table, the fragments and the Vegvisir at once.
Your first fight costs no sacrifice: she is already alive and wandering the lower floor when you walk in. To fight her again later, the wiki says you offer 3 Seeker soldier trophies at the hive seat at the top of the citadel.
grind The Valheim Seeker Soldier is the big beetle-like Seeker with mandibles. You'll meet plenty while clearing mines, and you need their trophies only if you want to summon the Queen a second time, for example to give a friend the kill.
| Seeker soldier (0 stars, wiki) | Value |
|---|---|
| Health | 1,500 |
| Resistant (0.5x) | Blunt, Pierce, Slash |
| Weak point | Abdomen, 1.5x to blunt, pierce, slash, fire, frost and lightning |
| Drops | Carapace, Mandible, Seeker meat, Seeker soldier trophy |
| Trophy chance | 5% |
Patch 1.0.20 (15 October 2026) made trophy drop chance rise with a creature's star level. The wiki's table still lists 5% for every star level, so it hasn't caught up yet. In practice, starred soldiers are now the better trophy farm.
Queen melee build from the video

setup The video's creator fought her with a sword-and-shield plus sledge setup, all Mistlands tier. Their inventory, as shown on screen:
| Slot | Item | Why it's in the build |
|---|---|---|
| One-handed weapon | Mistwalker, quality 3 | 75 slash + 52 frost on the tooltip, and its glow clears the mist |
| Shield | Carapace shield | Blocking her slaps between hits |
| Two-handed weapon | Demolisher | Area hits that clear Seekers and fill adrenaline |
| Head, legs | Carapace helmet and greaves, quality 3 | The highest armour in the Mistlands, per the wiki |
| Chest | Root harnesk, quality 4 | Their pick for the chest slot |
| Cape | Feather cape | No fall damage when she knocks you off a staircase |
| Trinket | Iron Brooch | Health and armour burst from adrenaline |
| Utility | Wisplight | Lets you see through the ground-floor mist |
Two 1.0 changes matter for this Queen melee build. First, the 1.0.00 patch notes on the wiki increased durability for Mistlands and Ashlands gear. The video's quality 3 Mistwalker shows 350 durability, while the wiki's item table still lists 300 for that level, so the wiki's item page looks pre-1.0 here. Second, 1.0 increased the mist removal range of the Wisplight and the Mistwalker and added mist removal to all Mistlands weapons, which makes the dark citadel easier to read.
The wiki's strategy page agrees on two items: the Feather cape, because without it a knock-off from an upper floor can kill you from fall damage, and a Wisplight, because the ground floor is nearly blind without one.
Iron Brooch and Demolisher: healing through adrenaline

cheap The video's trick is self-healing from the Iron Brooch trinket. Fill its adrenaline bar and it fires automatically. The tooltip in the video shows a cost of 65 adrenaline and "increased armour and a quick burst of health regeneration". The wiki's trinket table puts it at 50 health and 20 armour for 30 seconds. The recipe is 5 Iron, 5 Ancient bark and 1 Leech trophy at a Forge, so it's a cheap Swamp-era item.
The wiki's adrenaline numbers show how it actually fills:
| Action | Adrenaline |
|---|---|
| Two-handed club (Demolisher) swing that hits | +2, once per swing |
| One-handed sword primary hit | +1 |
| Block with a one-handed shield | +1 |
| Parry | +5 |
| Dodge an attack | +5 |
| Bomb direct hit | +2 |
| Activate a Forsaken power | +10 |
One clarification on the video. The creator says each wave of Seekers is a chance to heal "because my hammer does AoE damage". That's right in the sense that the Seekers give you something safe to hit. But per the wiki, a two-handed club gives its +2 only once per swing, no matter how many Seekers it hits. Adrenaline also starts draining after 6 to 10 seconds without a gain, so keep swinging steadily instead of saving it up.
Food, meads and the Bonemass power

setup The creator ate Misthare supreme with a bread and a salad, and drank a Tonic of Ratatoskr for movement speed. They also used the Bonemass power for the fight. The wiki's strategy page recommends Bonemass's power for a first Queen kill too, though it warns you're unlikely to finish her inside its 5 minutes.
| Consumable | Wiki numbers | Use in this fight |
|---|---|---|
| Misthare supreme | 85 health, 28 stamina, 25 minutes | Highest health food in the Mistlands |
| Poison resistance mead | Very resistant to poison for 10 minutes | Her bite and spit both poison you |
| Major healing mead | 125 health over 10 seconds, 2-minute cooldown | Emergency heal |
| Lingering stamina mead | (video) | Stamina for blocking and rolling |
| Tonic of Ratatoskr | (video) | Faster movement. The Fandom wiki has no page for it |
The creator forgot the Poison resistance mead for part of the fight and said on camera that this is probably why they took so much damage. The wiki calls the mead crucial. Drink it before you go in and again when it runs out. Arrive Rested too, because the plan below relies on healing between pushes.
For a melee run, the wiki suggests two top-tier health foods and one top-tier stamina food.
The Queen's attacks and how to dodge each one

free Every number below comes from the Valheim wiki. Note the health thresholds: most of her attacks only unlock as she gets hurt, so the fight gets harder as it goes.
| Attack | When she uses it | Damage | What to do |
|---|---|---|---|
| Slap | Within 9 m, every 4 s | 130 slash, 10 m wide 145° arc | Block or roll. Her most common attack |
| Pierce AoE | Within 4 m, every 4 s | 150 pierce in a 4.5 m circle | Don't stand right under her |
| Call | Below 99% health, every 60 s | Spawns Seekers and Seeker Broods from holes within 30 m | Kill the spawns, see below |
| Spit | Below 80% health, 5 to 25 m away, every 20 s | 20 globs of 40 blunt + 40 poison, plus Slimed | Use pillars as cover. Each glob can hatch a Brood |
| Bite | Below 70% health, within 10 m | 140 pierce + 100 poison | Roll sideways. The wiki warns the hitbox is wider than it looks |
| Teleport | Below 90% health, every 60 s | Burrows and comes up somewhere within 200 m | Look up the stairs. The video's creator kept finding her on the upper floors |
| Rush | Below 60% health, 5 to 25 m away, every 25 s | Charges 16 m, 100 slash in a 120° arc | Get out of the line or roll through |
The wiki's strategy page says her knockback is huge and throws you across the arena even after a successful parry. Two tricks from the wiki help. Fight with a wall or pillar behind you so the knockback is short. Or roll just before each hit lands, which avoids both damage and knockback and leaves time for two hits.
Seekers, Seeker Broods and the Demolisher

free Every 60 seconds she roars and holes around the arena hatch Seekers and Seeker Broods. The wiki caps each hole at four Broods and two Seekers nearby, and each spit glob that lands has a 30% chance to hatch another Brood, up to 30 Broods in the citadel. Broods are weak alone but swarm you and block your rolls. Seekers hit hard.
The video's creator dealt with every wave first, before going back to the Queen, and that's also the wiki's advice. The Demolisher is the wiki's top pick for it: its 145 blunt slam hits a 4-metre sphere with no multi-target penalty, and it works across the height differences on the stairs. It can hit the Queen in the same swing. The wiki also warns it has a long wind-up, so don't start a slam when she is mid-attack.
| Demolisher (quality 1, wiki) | Value |
|---|---|
| Recipe | 10 Yggdrasil wood, 20 Iron, 10 Refined eitr, Black forge |
| Damage | 145 blunt, 290 stagger |
| Area | 4 m radius, no multi-target penalty |
| Stamina per swing | 28 |
The wiki lists polearm spin attacks as the other option for clearing Broods, but polearms are pierce, so switch back for the Queen herself.
Bile bombs: fire and poison from range

cheap The creator threw Bile bombs at the Queen all fight long and called them very important. They're a good match: she takes full damage from both fire and poison.
Per the wiki, a Bile bomb leaves a 4-metre fire-and-poison cloud for 10 seconds. Anything that stays inside can take up to 150 fire and 80 poison damage. Three bombs cost 1 Sap, 1 Bilebag and 3 Resin at a Workbench. The Bilebag comes from Gjall, which is the bottleneck.
The wiki notes you can kill her in a few minutes by spamming Bile bombs alone, but farming that many Gjall costs more time than it saves. The video's approach, a bomb every so often while you fight, is the sensible middle ground. Throw them at her feet when she's busy roaring or chasing Seekers.
The Infested Citadel entrance is a safe zone

free The small covered area at the citadel entrance is out of her reach. The wiki confirms she won't attack you there, and the video's creator ran back there every time their health got low. You'll see "You are sheltered" on screen while you wait.
What the wiki adds:
- Seekers and Broods she already spawned will follow you in, but no new ones spawn until you step out and re-aggro her.
- When you leave the entrance after a while, she always does a roar, which gives you a free hit or two.
- Her health doesn't reset when you leave, die or log out. It only regenerates slowly, like any creature's.
- A small base just outside the entrance helps with health, Rested, repairs and a portal.
skip Don't plan on killing her from the doorway. The wiki says a recent patch made her lose aggro and walk away when she can't reach you. The creator noticed the same thing: hit her from the entrance too often and she leaves. You can still lure her back with a bow shot and land a few hits through the wall with a sledge or battleaxe, but it's slow.
How to beat the Queen solo: the fight loop

free Here's how to beat the Queen in Valheim the way the video does it, as a Queen solo run:
- Go in with Poison resistance mead active and the Bonemass power ready.
- Find her. On the ground floor she hides in the mist, and after teleports she often goes up the stairs.
- Fight next to a pillar. Hold block during her slaps with sword and shield, and hit back between them.
- When she roars, switch to the Demolisher, clear the Seekers and Broods, and let the brooch heal you.
- Throw a Bile bomb at her when there's a gap.
- When your health is low and the healing mead is on cooldown, walk back to the entrance, heal and return.
The creator noted she sometimes struggles to hit you on the stairs. The wiki doesn't document this, so treat it as what happened in this video. They also said they mostly blocked instead of parrying, and that timing parries would make the fight faster.
The creator calls it an easy fight once you have the safe zone. The wiki is less relaxed: her attacks deal very high damage and knockback, and their own footage shows several near-deaths. It's a manageable fight with a retreat spot, not an easy one.
Queen magic build: the ranged alternative

setup The video only covers melee, so this section comes from the wiki's strategy page. A Queen magic build has a real advantage: most of her attacks are fast melee swings, and magic lets you stay out of their reach.
- Staff of Embers is the wiki's main pick. It deals area blunt and fire damage, neither of which she resists, and clears whole Seeker waves.
- Food: two top-tier Eitr foods and one top-tier health food.
- Minor eitr mead for a quick Eitr refill.
- Blood magic costs health, so use it sparingly when solo. The Staff of Protection is better in a group.
- Dead Raiser isn't worth it here. The wiki says the Skeletts don't do enough damage and get knocked out of range.
Seekers will still sneak up on a mage, so keep an eye behind you.
Queen drops: Majestic Carapace, trophy and her power

free When her bar empties, the game shows "Long live the Queen". The Queen drops 5 Majestic carapace and 1 Queen trophy. The video shows the pickups as "Majestic Carapace x4" plus one more, which matches the wiki's five.
The Valheim Majestic Carapace is what moves you on to the Ashlands. Build an Artisan press next to your Artisan table (5 Black marble, 5 Bronze, 1 Majestic carapace) to upgrade it to level 2. That unlocks Ceramic plates and the Shield core, which you need for the Drakkar, the ship for the Ashlands. You only need one carapace for the press, so the other four are spares.
Hang the trophy on her stone at the Sacrificial Stones for The Queen's power. Per the wiki it lasts 300 seconds for you and nearby allies: +100% Eitr regeneration, resistant to poison and no stamina cost for sneaking. It shares the 20-minute cooldown with every other Forsaken power.
Killing her also changes your world. Seekers start spawning at night in the Meadows, Black Forest, Swamp, Mountains and Plains, and Seeker Broods and Ticks at night in the Mistlands. The Bog Witch starts selling Herbs of the Hidden Hills for 180 coins, and Haldor starts selling Deeper Pockets.
How this guide was fact-checked
The source is MrCoreRPG's Valheim 1.0 Queen video, uploaded on 29 September 2026, 20 days after Valheim 1.0 and Deep North launched on 9 September 2026. The live patch is 1.0.20 at the time of writing. The wiki's version history shows no change to the Queen herself between 1.0.00 and 1.0.20. The 1.0.20 trophy change affects Seeker soldier trophies for a re-summon, not her own drops. So this is a current Valheim 1.0 Queen guide. If you're coming here after the earlier bosses, see our Eikthyr, The Elder and Bonemass guides.
From the community Valheim wiki (Fandom), which wins wherever it and the video disagree:
- The Queen's health (12,500), resistances, attacks, thresholds and cooldowns (page last edited 8 October 2026)
- How the Infested Citadel is found and opened, and the 3-trophy re-summon
- Sealbreaker and Sealbreaker fragment details, and Black cores for the Galdr table
- Seeker soldier stats and trophy chance
- Iron Brooch, adrenaline gain, Demolisher, Mistwalker, Feather cape and Bile bomb numbers
- Food and mead numbers
- The safe entrance, the patched entrance cheese, the Bile bomb cheese and the magic build (Boss strategies page, last edited 3 October 2026)
- Her drops, the Artisan press, The Queen's power and what her death unlocks
- The 1.0.00 durability and mist-removal changes and the 1.0.20 trophy change (version history)
The wiki.gg mirror refused automated access, so every wiki fact here comes from Fandom.
From the video's own footage:
- The full melee loadout, including the Root harnesk at quality 4 and the Mistwalker tooltip
- The Iron Brooch tooltip (65 adrenaline)
- Using the Bonemass power, Bile bombs and the entrance for healing
- The Queen favouring the upper floors after teleporting, and struggling to hit on the stairs
- The "Long live the Queen" message and the five Majestic carapace pickups
Corrections and clarifications to the video:
- AoE healing: the video suggests the hammer's area hit is why Seeker waves heal you. Per the wiki, a two-handed club gives adrenaline once per swing, however many enemies it hits.
- "A very easy fight": the wiki describes extremely high damage and knockback. It's easy to retreat, not easy to fight.
- Durability: the wiki's Mistwalker page lists 300 durability at quality 3, but the video's 1.0 tooltip shows 350, in line with the 1.0 durability increase for Mistlands gear.
- Tonic of Ratatoskr: the Fandom wiki has no page for it, so its effect here is the video's description only.
What this guide doesn't answer
- Clearing Infested Mines safely: we cover what you take from them, not the dungeon fights with Seeker Soldiers and Ticks.
- Full Mistlands gear progression: Carapace armour, Black forge and Eitr refinery recipes are a separate gear topic.
- Where the citadel is in your seed: world generation decides it. Use a mine Vegvisir.
- Moder and Yagluth: you need both down before the Mistlands, and they deserve their own guides.
- Group fights: this guide follows a solo run. The wiki suggests the Staff of Protection for groups, but we didn't test a party fight.
- Fader and the Ashlands: the Majestic Carapace gets you there, but the Ashlands need their own preparation.
- Mods and world modifiers: everything here assumes default 1.0 combat difficulty.
Frequently asked
How do you find the Queen in Valheim?
The Queen lives in the Infested Citadel, a broken Dvergr black marble building under a large rock in the Mistlands. A Vegvisir inside an Infested Mine marks the nearest citadel on your map. To open its vault door you need a Sealbreaker, crafted at a Galdr table from 9 Sealbreaker fragments that you break out of blue-lit glass displays in the same mines. The Sealbreaker is not used up when you open the door.
What is the Queen weak to in Valheim?
The Queen has no damage type she takes extra damage from. She is neutral to blunt, slash, fire, frost, lightning and poison, resistant to pierce (half damage) and immune to spirit, chop and pickaxe. That makes bows, crossbows, spears and polearms a poor choice against her, while swords, sledges like the Demolisher, Bile bombs and staffs such as the Staff of Embers all do full damage.
Is the Infested Citadel entrance really safe from the Queen?
Yes. The small covered area at the entrance is out of her reach, so you can retreat there to heal. Seekers she already spawned will follow you in, but no new ones spawn until you go back out. Her health does not reset when you leave, die or log out. Killing her from the doorway no longer works well: if she cannot reach you she loses interest and walks away.
What does the Queen drop in Valheim?
She drops 5 Majestic carapace and 1 Queen trophy. One Majestic carapace builds the Artisan press, which upgrades the Artisan table to level 2 and unlocks Ceramic plates and the Shield core needed for the Drakkar ship to reach the Ashlands. The trophy unlocks The Queen's power at the Sacrificial Stones: 300 seconds of +100% Eitr regeneration, poison resistance and free sneaking.
How do you summon the Queen again after killing her?
Your first fight needs no offering, because the Queen is already alive inside the Infested Citadel. To fight her again, offer 3 Seeker soldier trophies at the hive seat at the top of the citadel. The wiki lists a 5% trophy chance for Seeker soldiers, and patch 1.0.20 made trophy drop chance rise with a creature's star level, so starred Seeker soldiers are the better farm.
Read next
Valheim Fader Guide: How to Summon & Beat Him (1.0)
How to find, summon and beat Fader, Valheim's seventh boss, in 1.0: Bell fragments from Charred Fortresses, a Flametal loadout with barley wine, every attack with its cooldown and health threshold, a phase-by-phase solo plan, plus Kindled Ribs and his Forsaken power.
Valheim Yagluth Guide: How to Summon & Beat Him (1.0)
How to find, summon and beat Yagluth in Valheim 1.0: 5 Fuling totems, Fire resistance barley wine, a Frostner and Padded armour loadout, his three fire attacks and how to dodge each, plus the Torn spirit drops and his +10% damage power.
Valheim Moder Guide: How to Summon & Beat Her (1.0)
How to find, summon and beat Moder in Valheim 1.0: the Vegvisir, three 200-weight Dragon eggs, frost resistance gear and food, her four attacks, a pillar-and-bow fight plan, plus the Dragon tears and her reworked 1.0 Forsaken power.
Valheim Bonemass Guide: How to Summon & Beat Him (1.0)
How to find, summon and beat Bonemass in Valheim 1.0: the crypt Vegvisir, 10 Withered bones, Poison resistance mead, a blunt iron loadout, his three attacks and a kite-and-heal plan, plus the Wishbone and his blocking power.