
🎯 The core idea
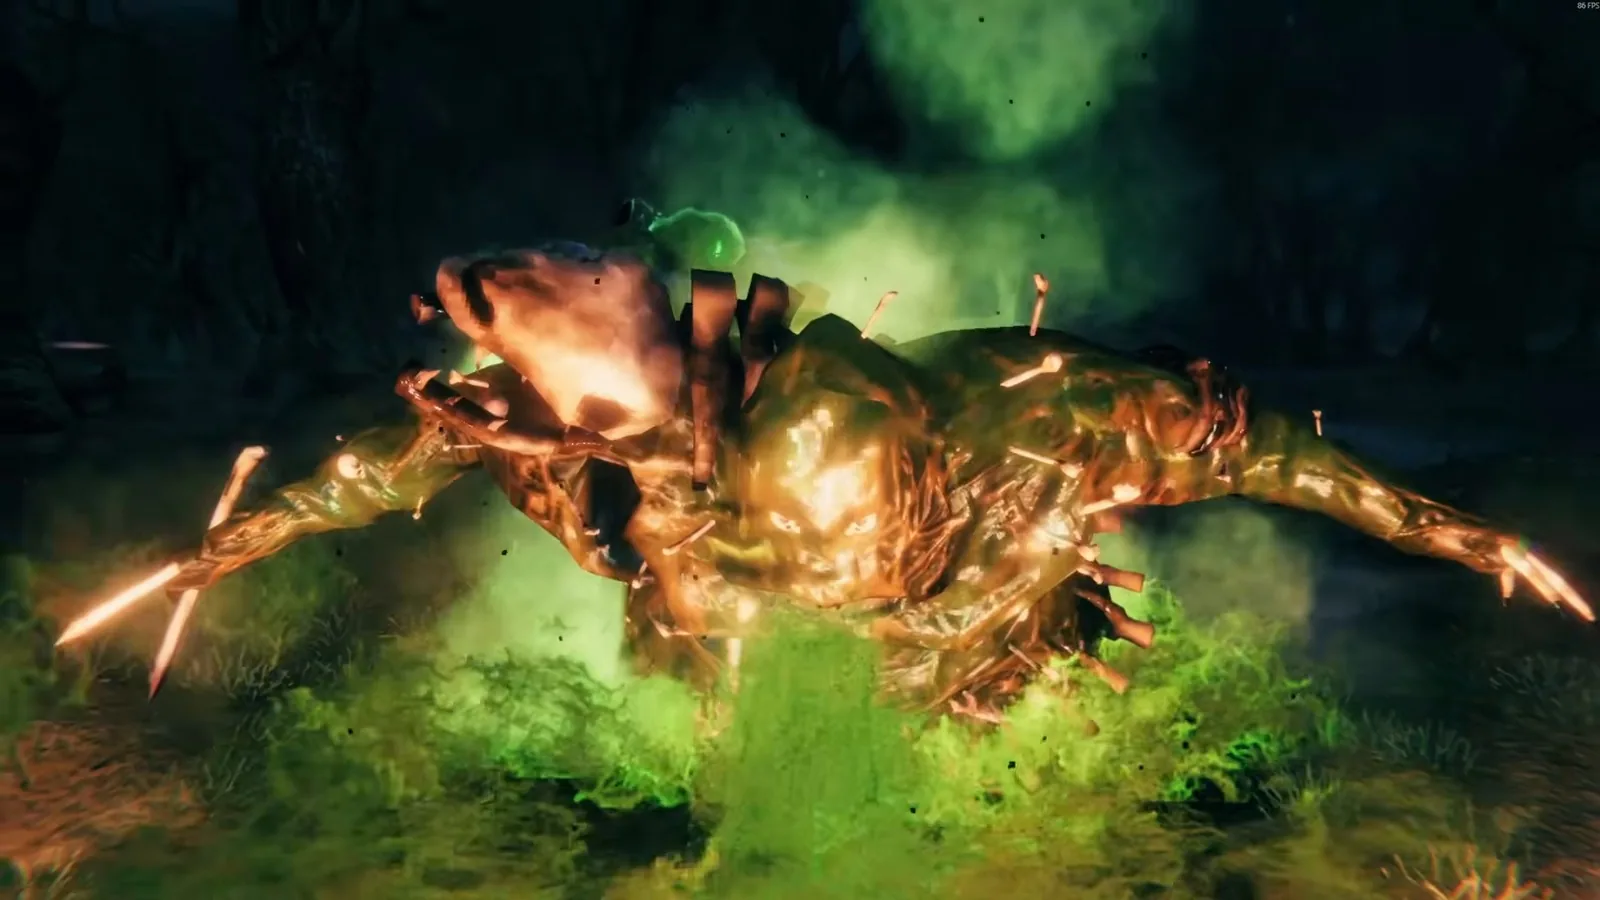
Bonemass is Valheim's third boss and the gate to the Mountains: beat him and you get the Wishbone, the only easy way to find silver. In Valheim 1.0 he has 5,000 health, takes 1.5x damage from blunt and frost, and shrugs off pierce, fire and poison. Drink Poison resistance mead before you summon him, bring an iron mace or sledge, and back off whenever he leans back to vomit.
- free costs nothing
- cheap small cost
- setup needs preparation
- grind pays off slowly
- skip the thing to stop doing
Bonemass weakness: blunt and frost, not arrows

skip If you beat the first boss with a bow (see our Valheim Eikthyr boss guide), drop that habit here. The Valheim wiki's damage table for Bonemass is very lopsided:
| Damage type | Multiplier | What it means for you |
|---|---|---|
| Blunt, Frost | 1.5x (weak) | Maces, sledges and frost arrows hit hardest |
| Lightning, Spirit | 1x (neutral) | Normal damage |
| Slash | 0.5x (resistant) | Swords and axes do half damage |
| Fire, Pierce | 0.25x (very resistant) | Arrows, spears and fire are close to useless |
| Poison, Stagger, Chop, Pickaxe | 0x (immune) | No poison damage, and he never staggers |
So the Bonemass weakness is blunt, with frost as a bonus. For most players at this stage that means an iron mace or an Iron sledge. The wiki's strategy page calls pierce damage, bows included, "extremely ineffective". Frost arrows do work, but they need Obsidian and Freeze glands from the Mountains, which you usually haven't reached yet.
He has 5,000 health, ten times Eikthyr's 500. Expect a long fight, not a burst kill.
Sunken Crypts: where the bones and the map marker come from

setup Everything you need to summon Bonemass comes from Sunken Crypts, the stone tombs with green lights that sit in the Swamp. The wiki says they only open with the Swamp key that The Elder drops, and the key isn't used up when you open a gate. Crypts tend to spawn in clusters of four, deep inside the Swamp.
Inside, the corridors are blocked by Muddy scrap piles. Mine them with any pickaxe for Scrap iron, Leather scraps and Withered bones. The video's creator built a full set of iron gear by smelting the iron from these crypts before the fight, and that's the normal route. Bring Poison resistance mead or a Root mask into the crypts too, because the wiki notes they spawn poisonous Blobs, along with Draugr and Draugr Elites.
Bonemass location: register the Vegvisir

free You don't have to search the Swamp for his altar. Some crypt rooms contain a glowing Vegvisir, a carved red stone the video calls a "rune". Interact with it ("Register location") and the nearest Bonemass location is marked on your map. The wiki adds that Vegvisirs can also appear at ruined structures in the Swamp, but crypts are the reliable source.
If the first crypt has no Vegvisir, keep clearing others in the cluster. You'll be mining scrap piles for bones and iron anyway, so nothing is wasted.
How to summon Bonemass: 10 Withered bones at the altar

grind To summon Bonemass, bring 10 Withered bones to his Forsaken altar, a giant skull half sunk in the mud, and offer them with the interact key. The wiki confirms the count. The video gets the number right and keeps the bones on a hotbar slot (6) so the offering is one keypress.
Each Valheim withered bone comes from crypt scrap piles, and occasionally from chests. The wiki puts a crypt chest's chance at only 4.8% for a single bone, so mining the scrap piles is how you'll get most of them. Bones stack to 30 and can go through portals, so you can farm them in one trip and carry them to the altar.
The video mentions you can use a hoe to level the area around the altar and drain the standing water. The creator skipped it. The wiki's strategy page recommends it, because flat raised ground also keeps Leeches out of the fight. It's optional, but it costs only stone and time.
Rested buff and a respawn point next to the altar

setup Before summoning, the creator builds a tiny hut near the altar with a fire inside. They sit by the fire to get Rested and set their respawn point there. Both are worth copying.
Per the Valheim wiki, Rested kicks in after 20 seconds of resting and gives +50% health regeneration and +100% stamina regeneration. It lasts 7 minutes plus 1 minute per comfort level. The health regeneration matters more here than in the Eikthyr fight, because the whole plan below relies on walking away and healing up. A nearby spawn point means a death costs you a short walk, not a trip back across the Swamp.
Bonemass also brings his own weather. The wiki says his aura forces rain, so you'll be Wet for the whole fight and can't dry off by pulling him away. Per the wiki, Wet cuts health regeneration by 25% and stamina regeneration by 15%, which is one more reason to arrive Rested.
Poison resistance mead: the one item you can't skip

cheap The video's creator forgot to drink it at first, took a big hit, and said so on camera. The wiki is blunter: the fight is balanced around Poison resistance mead or a Root mask, and fighting without one is "very dangerous".
| Poison resistance mead (Valheim 1.0) | Value |
|---|---|
| Mead base ingredients | 10 Honey, 5 Thistle, 1 Neck tail, 10 Coal |
| Made at | Mead ketill, then fermented |
| Fermenting time | 2 in-game days |
| Yield | 6 meads per base |
| Effect | Very resistant to poison: 75% less poison duration and tick damage |
| Duration | 10 minutes |
Two details from the wiki matter in this fight. First, the mead only protects against poison applied after you drink it, so drink it right before you offer the bones, not after the first vomit hits you. Second, 10 minutes can run out in a 5,000-health fight, so bring two or three. The Root mask gives a weaker "resistant" level but never expires. It needs Roots from Abominations, so most players use the mead for their first kill.
Iron gear for the Bonemass solo fight

setup The creator fought Bonemass solo in full iron armour with a one-handed iron mace and a round shield. Their closing advice is the same: craft iron armour from crypt iron, get the mace and the shield, then drink your mead.
| Item | Recipe (wiki) | Why it works here |
|---|---|---|
| Iron mace | 4 Wood, 20 Iron, 3 Leather scraps, Forge level 2 | 55 blunt per hit at quality 1, and Bonemass takes 1.5x blunt |
| Banded shield | 10 Finewood, 8 Iron, Forge level 2 | 42 block armour at quality 1, good for parrying his punch |
| Iron sledge | 10 Ancient bark, 30 Iron, 4 Ymir flesh, 1 Draugr Elite trophy, Forge level 2 | Two-handed area slam, great for clearing minions |
The wiki's strategy page names the Iron sledge and the Stagbreaker as very effective against his summoned minions, because they hit everything around you at once. The sledge slows you by 15% while equipped, so the one-handed mace with a shield is the easier choice for a kiting fight like the video's.
Bonemass attacks and how to avoid each one

free Bonemass has three attacks. All the numbers below come from the Valheim wiki.
| Attack | What it does | Damage | Cooldown | How to handle it |
|---|---|---|---|---|
| Punch | Swipe in an 8.5 m, 66° arc in front of him, used within 8 m | 80 blunt + 50 poison | 7 s | Parry, roll through it, or sprint out of range. A normal block can stagger you |
| Poison vomit | He leans back, then vomits a poison cloud with a 9 m radius that lingers for 15 s. Used within 15 m | 130 poison | 30 s | Unblockable. Run, don't roll. Stand behind him, where the cloud barely reaches |
| Throw | Pulls a glob from his armpit and throws it towards you. It spawns 4 random Skeletons or Blobs. Used within 30 m | Minions | 50 s | Kill the spawns as they land |
The punch also deals 1,000 chop and pickaxe damage to trees and rocks, so don't hide behind either. The creator says blocking the swipe is the part that matters, but the wiki warns a normal block will likely stagger you and let the leftover damage through. A parry (block at the moment of impact) is the safe version.
For the vomit, the wiki says rolling is too slow and costs more stamina than simply running away. With mead active, the creator often ignored the cloud and kept hitting him. That works, but only because the mead cuts the poison by 75%.
Bonemass minions: Skeletons and Blobs

free Every 50 seconds, Bonemass throws a glob that tries to spawn four random minions, each a Skeleton or a Blob. The wiki caps them at eight Skeletons and eight Blobs alive at once, and he keeps trying to summon even at the cap. If you ignore them, they pile up fast.
The creator's rule in the video is to deal with the minions first, and a blunt weapon makes that quick. Skeletons die in one hit from the iron mace in the footage. The wiki adds a useful detail: the throw animation is slow, and he's open to attack while he does it. You can either punish him during the throw, or step back and be ready to hit the minions when they land.
How to beat Bonemass: hit, back off, heal

free The video's whole plan is simple, and it's the core of how to beat Bonemass without being good at parrying:
- Wait for a punch, block or parry it, then get two or three mace hits in.
- Clear minions as soon as they land.
- When your health drops to about 60, walk back towards the altar skull and wait until your health regenerates to full.
- Go back in and repeat.
The creator says Bonemass is very slow and in their run he didn't follow them to the skull while they healed. The wiki doesn't document this, so treat it as what happened in this video, not a guaranteed rule. If he follows you, keep backing off. He's slow enough that you can outwalk him while your health refills.
This is a patient Bonemass solo plan. In the video it took a few minutes and several retreats, with many missed blocks, and the creator still won comfortably.
Bonemass cheese options from the wiki

skip If you'd rather not trade hits, the wiki's strategy page lists two Bonemass cheese methods. Both still need preparation:
- Altar-top sledge: summon him, climb onto his altar from the back, and swing a two-handed club like the Iron sledge from there. Its area hit reaches him and knocks minions off the altar, while you stay out of reach of most attacks. You'll still get poisoned, so the mead is still required.
- Frost arrows from high ground: about a hundred Frost arrows shot from a tree or a stone tower near the altar. This needs Mountain materials, so it's mostly an option for a second kill or a later world.
The wiki also points out that the poison cloud doesn't reach far behind him, because of the size of his body. Standing behind him is a safe spot that's still in melee range.
Bonemass drops: the trophy and the Valheim Wishbone

free When the bar empties, the game shows "The Mass ceases its writhing". Per the wiki, Bonemass drops one Bonemass trophy and one Wishbone per player who took part.
The Valheim Wishbone is an accessory, and it's the real reward. Equip it and it pings when you're within about 20 metres of something buried, with faster, higher dings as you get closer:
- Silver veins in the Mountains, which you need for the next tier of gear
- Muddy scrap piles buried in the Swamp
- Buried treasure in the Meadows
Dig on the spot where it pulses fastest. It shares a slot with the Megingjord and the Wisplight, so you can only wear one of them at a time.
Killing him also changes your world. The wiki lists new raid events he enables, including bats and "You are being hunted", and Skeletons start spawning at night in several biomes. If you keep starred Boars outside, build them a covered barn before the fight, because bats ignore walls.
Bonemass power: block without stamina

free Take the trophy to the Sacrificial Stones where you first spawned and hang it on Bonemass's stone to unlock the Bonemass power. Activate it with the Forsaken power key (F by default).
Per the wiki, for 300 seconds it gives you, and everyone within 10 metres:
- 25% less pierce, slash and blunt damage taken
- Blocking costs no stamina
- 5 stamina returned for each block
Like every Forsaken power, it shares one 20-minute cooldown that doesn't reset if you sleep or log out. Its damage resistance doesn't stack with the Crystal Heart trinket. Save it for hard fights where you block a lot, like raids or the Mountains, not for travel. For travel, switch back to Eikthyr's stamina power at the stones.
How this guide was fact-checked
The source is MrCoreRPG's Valheim 1.0 Bonemass video, uploaded on 18 September 2026, nine days after 1.0 and Deep North launched. The live patch is 1.0.20 at the time of writing. The wiki's version history shows no change to Bonemass, his drops, his power or Poison resistance mead between 1.0.00 and 1.0.20, so this is still a valid Valheim 1.0 Bonemass guide. The 1.0.20 change ties trophy drop chance to a creature's star level, which doesn't affect a guaranteed boss trophy.
From the community Valheim wiki (Fandom), which wins wherever it and the video disagree:
- Health (5,000), the full damage multiplier table and stagger immunity
- The attack table: damage, range, radius and cooldowns
- The summon cost (10 Withered bones) and how the altar is found
- Sunken Crypt access, scrap pile and chest loot
- The Poison resistance mead recipe and effect
- The Iron mace, Banded shield and Iron sledge recipes and stats
- The drop table, the Wishbone's uses and the events he unlocks
- The Bonemass power's effects and the shared Forsaken power cooldown
- The Rested buff numbers and the forced rain
- The cheese and minion tips from the Boss strategies page (last edited 3 October 2026)
The Bonemass page was last edited on 13 September 2026, after 1.0's release. The wiki.gg mirror refused automated access, so every wiki fact here comes from Fandom.
From the video's own footage:
- Building a fire hut at the altar for Rested and a respawn point
- The kite-and-heal loop at the altar skull and the 60-health retreat point
- Iron armour, an iron mace and a shield as the solo loadout
- One-hit Skeleton kills with the mace
- Bonemass staying away from the skull while the player healed
Corrections and clarifications to the video:
- "Rune": the stone in the crypt that marks the altar is a Vegvisir.
- "Potion": the item is Poison resistance mead, and the wiki says it only protects against poison applied after you drink it.
- Blocking the swipe: the video treats blocking as enough. The wiki warns a normal block will likely stagger you, so this guide recommends parrying or rolling.
- "Super easy": the video calls the fight easy. The wiki says it is balanced around poison resistance and is very dangerous without it. The creator's own early hit without mead shows why.
What this guide doesn't answer
- Farming iron and building full iron armour: the crypt route is covered here only as far as the summon needs it. Armour recipes and upgrade costs are a separate gear topic.
- The Elder fight and the Swamp key: you need the key before any of this, but that boss has its own guide.
- Where the altar is in your seed: world generation decides it. Use a crypt Vegvisir, not someone else's map.
- Group fights: this guide follows a solo run. The wiki's strategy page suggests most of a group focus on the minions while one player handles Bonemass, but that wasn't tested here.
- Moder and silver gear: the Wishbone finds the silver, but the Mountains and the next boss need their own preparation.
- Mods and world modifiers: everything here assumes default 1.0 combat difficulty.
Frequently asked
How do you summon Bonemass in Valheim?
Offer 10 Withered bones at his Forsaken altar, a giant skull in the Swamp. To find the altar, register a Vegvisir inside a Sunken Crypt (you need The Elder's Swamp key to get in). Withered bones come mostly from mining Muddy scrap piles in the crypts.
What is Bonemass weak to?
Blunt and frost damage, both at 1.5x. He resists slash (0.5x), barely takes pierce or fire (0.25x), and is immune to poison and stagger. An iron mace or Iron sledge is the usual pick, and bows are close to useless.
Do you need Poison resistance mead for Bonemass?
Practically, yes. The wiki says the fight is balanced around Poison resistance mead or a Root mask. The mead cuts poison duration and damage by 75% for 10 minutes, but only for poison applied after you drink it, so drink it right before summoning and bring spares.
What does Bonemass drop?
One Bonemass trophy and one Wishbone per player. The Wishbone pings near buried silver veins in the Mountains, muddy scrap piles in the Swamp and treasure in the Meadows. Hang the trophy at the Sacrificial Stones to unlock his Forsaken power.
What does the Bonemass power do?
For 300 seconds it gives you and players within 10 metres 25% less pierce, slash and blunt damage, makes blocking cost no stamina, and returns 5 stamina per block. It shares the 20-minute cooldown with every other Forsaken power.
Read next
Valheim Fader Guide: How to Summon & Beat Him (1.0)
How to find, summon and beat Fader, Valheim's seventh boss, in 1.0: Bell fragments from Charred Fortresses, a Flametal loadout with barley wine, every attack with its cooldown and health threshold, a phase-by-phase solo plan, plus Kindled Ribs and his Forsaken power.
Valheim The Queen Guide: How to Find & Beat Her (1.0)
How to find and beat The Queen, Valheim's sixth boss, in 1.0: Infested Mines, the Sealbreaker, a melee build with the Demolisher and Iron Brooch, her attack table, the safe entrance, a magic alternative and her Majestic carapace drop.
Valheim Yagluth Guide: How to Summon & Beat Him (1.0)
How to find, summon and beat Yagluth in Valheim 1.0: 5 Fuling totems, Fire resistance barley wine, a Frostner and Padded armour loadout, his three fire attacks and how to dodge each, plus the Torn spirit drops and his +10% damage power.
Valheim Moder Guide: How to Summon & Beat Her (1.0)
How to find, summon and beat Moder in Valheim 1.0: the Vegvisir, three 200-weight Dragon eggs, frost resistance gear and food, her four attacks, a pillar-and-bow fight plan, plus the Dragon tears and her reworked 1.0 Forsaken power.