
🎯 The core idea
Good warding is not about how many wards you place. It is about placing each one where it covers a path the enemy must walk, at the far edge of its range, on the side of the map your team is about to play. In 2026, Faelights turn the right spots into superwards with 45 seconds of bonus vision, so knowing those twelve rings is now part of basic vision control.
- free costs nothing
- cheap small cost
- setup needs preparation
- grind pays off slowly
- skip the thing to stop doing
This League of Legends warding guide is built on a short Practice Tool lesson by Varry, a Challenger player, recorded in October 2025. That was before patch 26.1 brought Faelights and changed trinket timers, so every section below that touches the 2026 vision system was written from the official patch notes and the League of Legends Wiki instead of the video. Where the video and the current game differ, the text says so.
Hotkey settings for placing wards with a range indicator

setup Before any ward spot matters, check how your trinket and item keys cast. In Options → Hotkeys → Items the client has two columns: Normal Cast and Quick Cast. Quick cast drops the ward the moment you press the key, which is fast but makes you guess where the edge of a brush is. Normal cast shows you the placement first and waits for a click.
Varry's setup is to keep quick cast on the main keys and bind normal cast to a second set, so you have both. The frame above shows exactly that: the trinket and item slots on Shift + 1 to 7 in the Normal Cast column. Use quick cast when you are running for your life, and the second key when you have half a second to place a ward properly. The second option is the one that gives you better vision.
Place wards at the far edge of their range

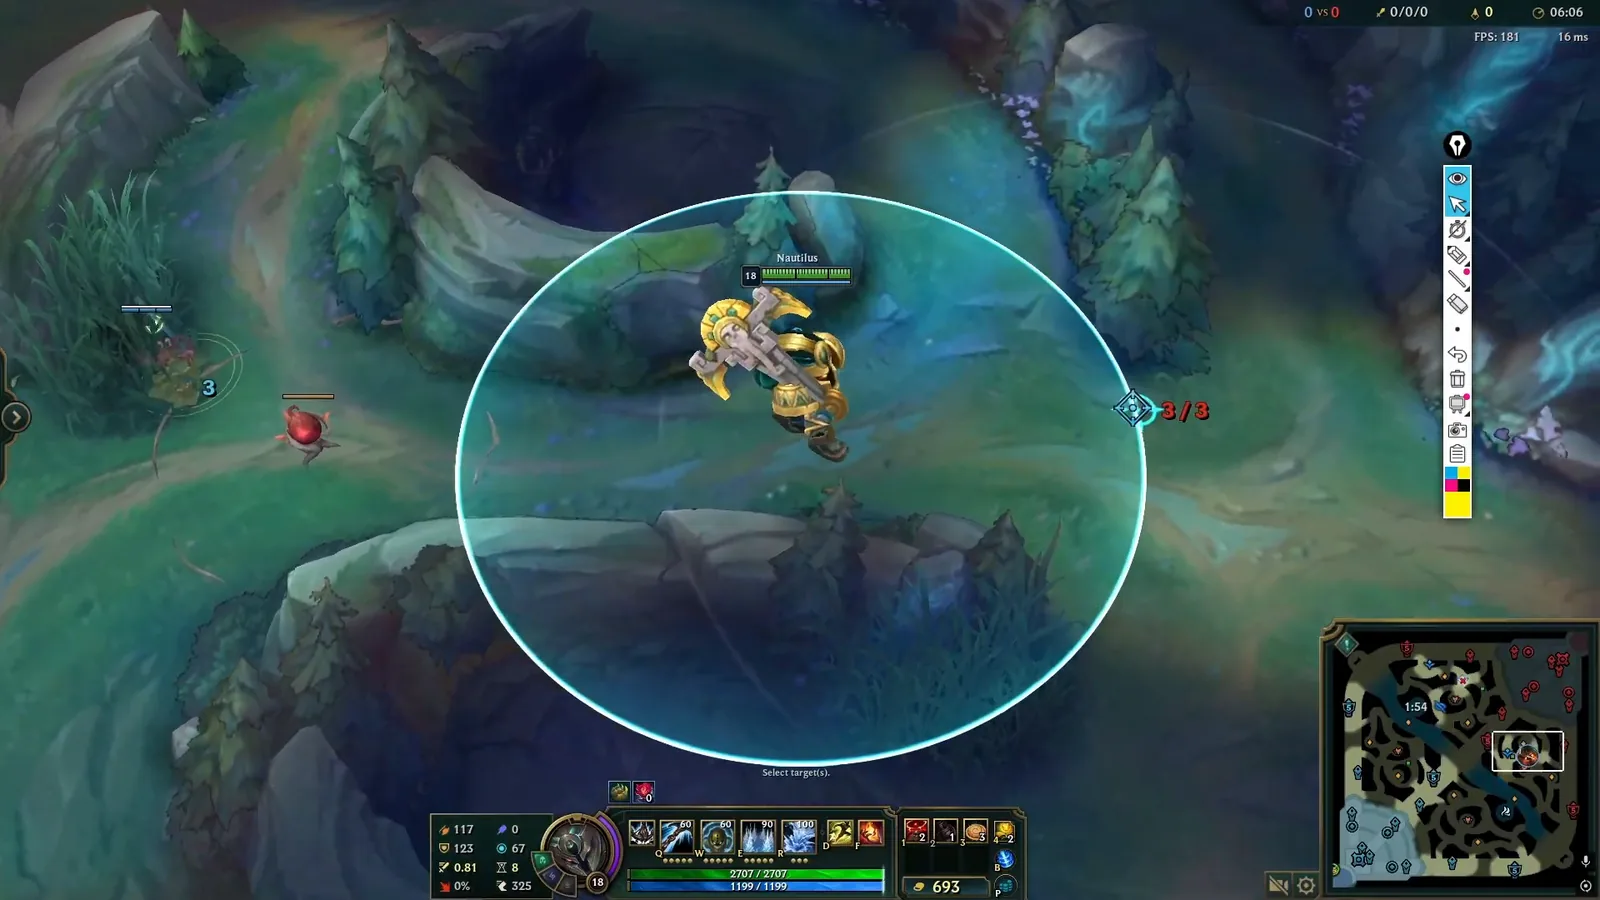
free With the indicator on, you can see the cast range circle and where the ward will land. A Stealth Ward has 625 range and a Control Ward has 600, so the indicator stops you from wasting a step walking closer than you need to. The video shows the ward icon changing color as the cursor moves past the edge of a brush, which tells you whether the ward will sit inside the grass or just outside it.
Why it matters: a Stealth Ward or Control Ward sees 900 units around it. A ward pushed to the far side of a brush sees that much further into the river or jungle path you actually care about, instead of spending half its circle on the wall behind you.
Ward the far side of a brush, not the middle

skip The most common mistake in the video: a player walks into a bush, drops a ward right where they stand and walks out. That ward sees the bush and very little else. Instead, place it at the edge of the brush that faces the path enemies take, so the same ward covers the bush and the entrance next to it.
The same idea applies to every ward spot on the map. Before you place, ask which path you want to see, then put the ward at the point of the brush closest to that path. If there are two entrances, a ward between them that sees both is worth more than a ward in the dead center of the grass.
Vision lines: wards that enemies cannot cross unseen

setup The second half of the video is about vision lines, and it is the best idea in it. A vision line is a chain of vision that runs across the map from one safe point to another, for example from your still-standing outer (tier 1) turret through the river to the other side. Anyone who crosses the line shows up, so a line tells you much more than three wards in random corners.
Varry's example: a player who opens top side, drops a ward, runs somewhere else, drops another and recalls has three wards that do not connect. An enemy can walk between them without being seen. Draw the line first, then fill it: start from a source of vision you already have (a turret, a lane), and place each ward so its circle touches the next one.
Best ward spots in each phase of the game

free Where to ward depends on the phase of the game and on your lane. These are the standard spots that every role should know:
| Phase | Ward spot | What it tells you |
|---|---|---|
| Laning, top or bot | River pixel brush at the end of the river (a Faelight) | Jungler coming from the river toward your lane |
| Laning, top or bot | Tri-brush or the brush by your side lane | Jungler walking through the enemy jungle toward you |
| Laning, mid | Both river entrances beside mid lane | Ganks from either side; mid needs two wards, not one |
| Before an objective | Brush and entrances around the Dragon or Baron pit | Who is already at the pit and from where they arrive |
| After you take a lead | Enemy buff camp entrances and their jungle paths | Where the enemy jungler is farming |
| Late game | Side-lane jungle paths near your splitpusher | Whether it is safe to keep pushing |
Your own jungle, right next to your own turrets, is rarely a good ward spot. The game agrees: vision score is cut for wards close to your base and is zero next to an allied structure.
Faelights: the ward spots that became superwards in 2026

cheap Faelights are rings of glowing mushrooms on Summoner's Rift, added in patch 26.1 (January 2026). They are not in the source video, which was recorded before they existed. Place any ward on a Faelight and it becomes a superward:
- +25% sight radius on that ward for as long as it lives.
- A bonus vision region with its own shape for that spot, lasting 45 seconds. A countdown circle on the ward shows the time left. When it runs out, the ward keeps working as a normal ward with the bigger radius. (Some early 2026 coverage said the bonus vision lasts until the ward dies; the patch notes and wiki say 45 seconds.)
- The bonus region sees into brush that lies inside it, and the ward type does not matter: a Control Ward does not make the region bigger, so a cheap Stealth Ward is usually the right choice.
- The superward gives 25% more vision score.
You do not have to be pixel-perfect: a ward placed between 75 and 225 units from the ring snaps onto it. If your team already has a ward on that Faelight, the old one is destroyed to make room for the new one. Wards placed on a spot before its Faelight appears get the superward effect when it spawns.
The enemy only learns they are standing in your bonus region if they have a Sweeper Drone or Control Ward in that area, or if they pinged the ward itself (Sixth Sense does this for them). Otherwise they have no warning. That is why the jungle changed so much: see the jungle guide for how to gank around Faelights, and the Season 2026 changes guide for the rest of the system.
Faelights ward spots map: all twelve locations

free Eight Faelights exist from the start of the game and four more appear when the map turns into the Elemental Rift, which happens after the second drake is killed. Here are all Faelight ward spots by side of the map:
| When it appears | Location | Bonus vision covers |
|---|---|---|
| Game start (4) | Near each base gate, two per team | The jungle just outside that base |
| Game start (2) | Pixel brush at each end of the river, near top and bot | The river toward that side lane; since patch 26.3 it stops before the Scuttle pad and the pit entrance |
| Game start (2) | River wall brush across from the Baron pit and the Dragon pit | The river nearer mid lane, not the pit itself |
| Elemental Rift (1) | Blue side: brush across from Krugs, between bot outer and inner turret | The jungle path along bot lane, up to the area by the inner turret |
| Elemental Rift (1) | Red side: brush across from Krugs, between top outer and inner turret | The jungle path along top lane, up to the area by the inner turret |
| Elemental Rift (1) | Blue side: side brush next to the top outer turret | Through the Gromp camp up to the river |
| Elemental Rift (1) | Red side: side brush between bot outer and inner turret | Through the Gromp camp toward the inner turret |
Riot's own reasoning for the layout helps you use it: spots near the side lanes are easy, strong wards for the laning phase and for splitpushing, while spots toward the middle of the map are weaker. The base-gate Faelights are designed to be easy for a losing team to retake. In practice, the river pixel brush Faelight is the highest value early ward for top and bot laners, and the four Elemental Rift spots are what let a splitpusher see a collapse coming without a support nearby.
Patch 26.3 shrank the pixel brush regions after Riot saw early vision zoning junglers too hard, so do not expect that ward to show the whole river any more.
Trinkets: Stealth Ward, Oracle Lens and Farsight Alteration

free Every player gets a free trinket. This short trinket guide uses the current numbers from the wiki:
| Trinket | What it does | Cooldown | Notes |
|---|---|---|---|
| Stealth Ward (yellow) | Places an invisible ward that lasts 90–120 s | 210–90 s per charge, 2 charges | Up to 3 Stealth or Totem Wards on the map per player |
| Oracle Lens (red) | A Sweeper Drone follows you for 8 s and reveals and disables hidden wards and traps | 160–100 s, 2 charges | Duration went from 6 to 8 s in patch 26.1 |
| Farsight Alteration (blue) | A visible, 1-health ward placed from up to 4,000 range that lasts until killed | 198–99 s | Level 9 required; smaller 500 sight radius |
All these cooldowns scale with the average champion level in the game, not your own. The yellow trinket was the big 2026 change: patch 26.1 cut its recharge to 170–90 s, then 26.3 raised the early value back to 210 s because laners were zoning junglers. It is now 210–90 s. The Season 2026 changes guide covers that partial revert. The video was recorded when the yellow trinket was still 210–120 s and does not cover any of this.
Most players start with the Stealth Ward. Supports usually swap to Oracle Lens once their support item gives them wards, and junglers often do the same once they want to clear vision before objectives. Marksmen and mages sometimes take Farsight later to check a brush without walking in. Swapping keeps your current cooldown, so you lose nothing by changing.
Control Ward placement and sweeping enemy vision

cheap A Control Ward costs 75 gold, sees 900 units, and reveals and disables enemy Stealth Wards in its range. It is visible to the enemy, has 4 health, and stays until it is destroyed. You can carry two and have one placed at a time. Supports start the game with Control Wards in their role quest slot (since patch 26.3), and after the support quest is done they cost only 40 gold.
Good Control Ward placement follows one rule: put it where the enemy also wants vision. That means the brushes around the Dragon and Baron pits before they spawn, the river brush your lane gets ganked from, and the tri-brush on your side. A Control Ward in a spot the enemy never walks through is 75 gold sitting in a corner.
Sweeping does the other half of vision control. Before an objective, the player with Oracle Lens (the trinket older guides call Sweeping Lens) walks the pit and its entrances with the 8-second drone, the team kills the revealed wards, and a Control Ward goes down so the enemy cannot simply re-ward. Never face-check an unwarded brush when you can check it with a skillshot or a sweep first, as the frame above shows.
Warding for objectives: 60 seconds before the spawn

setup Warding for objectives starts long before the monster spawns. A useful order: about a minute before Dragon or Baron, push your lanes on that side, then sweep and place a Control Ward in the pit brush, then put Stealth Wards on the entrances the enemy will walk through, including any Faelight on that side of the river. Your team should be standing in vision you own, not walking into fog.
The 2026 timers make this easier to plan: Dragon spawns at 5:00, Voidgrubs at 8:00 and Baron at 20:00, as covered in the ranked climbing guide. Set up vision before each one, not when the fight already started.
Vision bombing before a reset

free Varry's favourite support trick is the vision bomb. When your team has just finished a play on one side, say bot lane, and is about to reset anyway, use every ward you are holding to light up the side of the map you will play next. Then recall.
The trick is that you lose nothing. Your wards recharge while you shop, the enemy has to spend sweeps and Control Wards to clear them, and you walk out of base with full charges. If they cleared your vision, you place it all again. If they did not, you now have twice as much. Supports with idle time between plays should do this every time instead of standing in lane.
Ward the side of the map you are playing toward

skip Vision is only useful where the next fight will be. Three wards on top side are close to useless if your team is about to take Dragon. Before warding, look at which side lanes are pushed, where the next objective spawns and where your jungler is, and ward that side.
The video mentions weak side vision as the next step: when your team plays bot, a ward or two on the opposite side shows whether the enemy is crossing the map to fight you or trading an objective across the map. Varry keeps that for advanced players, but one well-placed weak side ward on a Faelight costs very little.
How to ward as support and as jungler

grind Supports get the most wards. The support starting item World Atlas upgrades to Runic Compass and gains a ward active with 3 wards in stock, then upgrades again to Bounty of Worlds with 4 wards in stock. Use them constantly: a support who sits on full charges is wasting vision. Your job is to hold the river near your lane, Control Ward the bot side brush, sweep before Dragon, and vision bomb when you have nothing else to do.
How to ward as jungler is different. You have fewer wards, so use them to track: a ward in the enemy jungle at a buff or camp entrance (a deep ward) tells you where their jungler is and when to invade. The Domination rune Deep Ward makes Stealth Wards placed in the enemy jungle (and in the river from level 9) last 30–45 seconds longer and gives them 1 extra health, which is useful for junglers and roaming supports. Good deep ward spots are the entrances to the enemy buffs and the path between their buff and their Gromp or Krugs, not the camp itself. The jungle guide explains how to read the enemy path from those wards.
Vision score and ward timers

grind Your vision score in League of Legends is roughly one point per minute of ward lifetime you provide plus one point per minute of enemy ward lifetime you deny. It keeps counting while you are in base, as long as your wards live. The wiki lists what lowers it, and that list is a good guide on how to improve vision score:
- Stale wards: a ward that sees no enemy champion, ward or epic monster loses value after 60 seconds, down to half value at 120 seconds. Move your wards forward as the game moves.
- Redundant wards: wards next to other allied vision (wards, turrets, minions) score 25–75% less.
- Safe wards: wards near your own base score less, and next to your own structures they score nothing.
- Clearing wards counts: killing an enemy ward gives points for the lifetime it had left.
- Faelight superwards give 25% more.
Ward timers matter for both teams. A Stealth Ward lives 90–120 seconds depending on average level, and Control Wards and Farsight Wards stay until killed. When you see an enemy ward, ping it so it is tracked with a timer for your team. The Domination rune Sixth Sense tracks nearby enemy wards automatically. Once a tracked ward expires, that spot is dark again, which is your moment to walk through it or replace your own.
How this guide was fact-checked
- From the source video (Varry, uploaded 18 October 2025): the hotkey setup with normal and quick cast, the range indicator, warding at the far edge of a brush, vision lines from turret to turret, vision bombing before a reset, and the idea of warding the side you play toward. The video shows these in Practice Tool and they are still accurate.
- From the League of Legends Wiki: Faelight rules and locations, Stealth Ward, Control Ward, Oracle Lens and Farsight Alteration stats, ward limits, World Atlas, Runic Compass and Bounty of Worlds ward stock, the Deep Ward and Sixth Sense runes, and the vision score rules.
- From the official patch notes: 26.1 (Faelights, Stealth Ward recharge 210–120 s to 170–90 s, Oracle Lens 6 s to 8 s, support quest Control Wards at 40 gold), 26.2 and 26.3 (pixel brush Faelight regions cut before the Scuttle pad and pit entrance, Stealth Ward back to 210–90 s, Control Wards in the support quest slot from the start). Patches up to 26.21 were checked and have no further ward or Faelight changes.
- Corrections to the video: its title says 2026, but it was recorded before Season 2026 and has no Faelights, which this guide adds in full. It gives no trinket timings, but it was recorded on the 2025 values; since then the yellow trinket became 210–90 s and Oracle Lens lasts 8 seconds. Where other 2026 coverage claims Faelight bonus vision lasts until the ward dies, the patch notes put it at 45 seconds.
What this guide doesn't answer
- Exact pixel positions for every ward spot: they change with the map and are easier to learn from a minimap overlay in Practice Tool than from text.
- Champion-specific vision tools such as Ashe's Hawkshot or Teemo's mushrooms: they depend on the champion, not on warding fundamentals.
- Pro-level vision setups for Baron and Soul fights: these depend on team coordination beyond solo queue.
- Full support and jungle playbooks: the roles themselves are covered in the jungle guide and the ranked climbing guide.
- Ward skins and cosmetic ward unlocks: they have no gameplay effect.
Frequently asked
Where should I ward in League of Legends?
Ward the paths the enemy has to walk on the side of the map your team is about to play. In lane, that means the river pixel brush (a Faelight) and the tri-brush or side brush on top or bot, or both river entrances in mid. Before Dragon or Baron, ward the pit brushes and entrances. Place each ward at the far edge of a brush and chain them into vision lines instead of scattering them.
What are Faelights in League of Legends?
Faelights are rings of glowing mushrooms added in patch 26.1. Any ward placed on one becomes a superward with 25% more sight radius and a bonus vision region that lasts 45 seconds, then keeps working as a normal ward. There are eight at game start (near the base gates, the river pixel brushes and the river wall brushes) and four more near the side lanes once the Elemental Rift arrives after the second drake.
How long does the Faelight bonus vision last?
45 seconds. A countdown circle on the ward shows the time left. After that the ward keeps its 25% larger sight radius until it dies, but the bonus region is gone. The ward type does not matter, so a Control Ward does not give a bigger or longer region than a Stealth Ward.
What is the cooldown of the yellow trinket in 2026?
The Stealth Ward trinket recharges in 210 to 90 seconds based on the average champion level, holds 2 charges, and each ward lasts 90 to 120 seconds. Patch 26.1 had cut the recharge to 170 to 90 seconds, but patch 26.3 put the early value back to 210 seconds. Oracle Lens now sweeps for 8 seconds instead of 6.
How do I improve my vision score in LoL?
Keep wards where they see enemies: a ward that sees nothing loses value after 60 seconds and drops to half at 120 seconds. Avoid stacking wards next to other allied vision or your own turrets, clear enemy wards with Oracle Lens and Control Wards because denied lifetime also scores, and use Faelights, which give 25% more vision score.
Read next
LoL Wave Management: Freeze, Slow Push and Crash
Every minion wave moves because of two forces: minion count and how close the fight is to a turret. This guide shows how to use them to crash, slow push, freeze or hold a wave, and what Season 2026's earlier spawns and faster late waves change.
How to Play Support in League of Legends (2026)
A complete Season 2026 support guide: how to lane with confident posture, use World Atlas charges for level 2 and saved CS, roam at the right time and ward safely. Video advice is checked against the wiki and patch notes up to 26.21.
How to Jungle in League of Legends: Beginner Guide
A beginner's guide to jungling in League of Legends Season 2026: camp timers, pets and the jungle quest, when to gank around Faelights, tracking the enemy jungler and securing Voidgrubs, drakes and Baron. Checked against the wiki and patch notes up to 26.21.
Best LoL Settings and Hotkeys: Quick Cast, Camera, Interface
The League of Legends settings worth changing in 2026: quick cast and self cast hotkeys, auto attack off, attack move click and Target Champions Only, camera, interface, graphics and sound. Checked against the wiki and patch notes up to 26.21, including the new Role Quest Slot key.