
This guide takes a Ranger from about 2.1k item level to the 2.8k raid tier. It covers a rotation that keeps Deadshot rolling, which skill levels to chase first, which stat lines to roll on each gear slot, and how to set up Arcana cards, power boards and stigmas for the most damage.
Quick answer
| What | Answer |
|---|---|
| Marking Shot | Cast every 14-15 seconds, never on cooldown |
| Deadshot | Cast on cooldown; about 30-35% of total damage |
| Skill levels | Level 20 Deadshot, then level 16 in the other key skills |
| Weapon lines | Weapon damage boost, combat speed, might, precision |
| Crit cap | 50% crit on the Western version |
| Best wings | Four Spirit Wings, 3.5% boss damage boost |
| Stigma levels | Target 20 Vital Authority, 20 Bow of Blessing, 15 Griffon Arrow, 1 Supporting Fire |
Run the Ranger rotation and macro
Two skills stay off the macro, and both are about timing. Marking Shot has an animation that locks you out of attacking for about half a second, so firing it on cooldown throws damage away. Cast it once every 14 to 15 seconds instead 1:00. Deadshot is the opposite: it is your strongest skill, about 30 to 35% of everything you deal, so press it by hand every time it comes off cooldown 1:29.
Everything else goes on a hold macro bound to left and right click: Gale Arrow, Burst Arrow and the other damage skills. Leave Explosion Trap and Suppressing Arrow off it for regular bosses; they are PvP tools.

Buffs can sit on the macro on auto-use, and for most current content that is fine and more comfortable. The higher-damage setup takes them out and has you press them yourself. For a boss, follow this order:
On a training dummy this peaks over 200k DPS and sometimes hits 240k, depending on crits and perfect crits; it settles around 120k DPS by the 35-second mark. Dungeon numbers run lower because bosses carry evasion and armor: a random group clear of the 2.1k Fire Temple parsed at 103k and 97k DPS.
If your damage dropped after moving Deadshot onto the macro, that is the cause. The macro does not fire it the instant it comes back, and a skill worth a third of your damage cannot afford the delay.
Level the right skills first
Three build tiers set the targets. Expect level 16 skills by the time you reach 2.1k 3:54; the 2.5k tier is the endgame goal.
| Tier | Skill levels | What changes |
|---|---|---|
| Starter | Level 14 skills | The basic option at each skill level |
| 2.1k | Level 16 skills | Deadshot takes skill speed and extra damage; Drill Dart gains one extra hit, doubling its damage; Gale Arrow gets -10 seconds cooldown |
| 2.5k | 20 Deadshot, 20 Drill Dart, 20 Snipe, 16 Tempest Shot, 16 or 20 Gale Arrow | Snipe is the least valuable of these; with 20 Gale Arrow, take its mobile skill |

Raise them in this order 12:09:
| Priority | Skill | Target | Why |
|---|---|---|---|
| 1 | Deadshot | 20 | Your largest damage source |
| 2 | Drill Dart | 16 | The extra hit doubles its damage |
| 3 | Tempest Shot | 16 | Skill speed |
| 4 | Gale Arrow | 16 | -10 seconds cooldown |
Nothing else moves the needle much. A 16 Burst Arrow only adds a little cooldown reduction.
Most of your extra skill levels come from Arcana cards, with a few from wings. Do not neglect the two skill point boards either — the starter board at 300 points and the advanced board at 400-plus. Take every small node that gives damage, crit or attack 4:51.
Roll the right stat lines on gear
A weapon holds at most five stat lines. Seven are worth having, ranked here, and you want five of them — ideally the top five.

| Rank | Weapon line |
|---|---|
| 1 | Weapon damage boost |
| 2 | Combat speed |
| 3 | Might |
| 4 | Precision |
| 5 | Damage boost |
| 6 | Multi hit |
| 7 | Attack |
The guard follows the same list 5:48, though combat speed on a guard is extremely hard to roll. Work through the slots in this order:
| Order | Slot | Lines to chase |
|---|---|---|
| 1 | Weapon and guard (equal) | The seven lines above |
| 2 | Two rings | Skill slots, attack, might |
| 3 | Amulet | Skill slots, attack, skill speed |
| Later | Gloves | Skill speed — very strong |
| Later | Shoulders | Crit damage — very strong |
| Later | Boots | Move speed, plus a passive line |
| Later | Cape | Double damage, increase attack, Focused Eye |
How to reroll
Open the Soul Binder and pick the item. You have two options:
- Reset rerolls every line and costs three rare books. Use it only on the weapon and guard, and only until one or two good lines land 6:47.
- Sync rerolls on a unique once the base is decent. Check the odds before you commit — combat speed is only a 4% chance 7:16.
Spare unique gear and the books are both rare, so do not spend them on slots outside the weapon and guard.
The Western version caps crit at 50%, so you need much less crit than builds from other regions suggest. It also has four stigma slots instead of eight and fewer skill levels. Check which version a stat sheet was written for before copying its break points.
Build your Arcana cards and chalice
Arcana cards start to matter at the 2.2k or 2.5k transcendence dungeon, tiers three and four, where unique legendary cards drop 9:24. Before that, keep every card you get, even the common ones, as enhancement material. Each enhancement adds plus one to a random stat, and the early target is three good lines out of four.

Fill the slots in this pattern: a vigor chalice and a vigor parchment in the first two, then the magic compass, magic bell and mirror of magic in the last three. That combination gives the most god-effect stats. Each card has its own target 11:10:
| Card | Lines to chase |
|---|---|
| Compass | Gale Arrow and Deadshot |
| Bell | The highest Hunter's Eye you can get |
| Mirror | The highest Focused Eye you can get |
Focused Eye and Hunter's Resolve are your two strongest passives, and no card can carry both — the chalice, which you craft, is the only exception. Hunter's Soul is the third-best passive and a clear step below those two.
To craft a chalice, disenchant cards for mysterious crystals; five of them transmute one 12:38. Early on, put Deadshot on it to push that skill to level 20, which is a major power spike. Later, switch the chalice to a passive: past level 20 an active skill gains little, while a passive boosts every skill you have. Once all your active skills reach 20, passives become the top priority.
Stack titles, wings, pets and Genus boards
These systems add a large share of your combat power, and the pet and Genus progress is account bound, so every character you play shares it.
Title
The best title unlocks when every pet board reaches level 10. It gives a 4.5% damage boost plus its own extra 1%, for 5.5% PvE damage in total, along with attack and crit 14:04. Use Golden Glow until you have it.
Wings
| Wings | Main bonus | Notes |
|---|---|---|
| Four Spirit Wings | 3.5% boss damage boost, 95 boss attack | Also 2.5% inner defense; the best to equip now |
| Den boss wings | 2.5% damage boost, 60 attack bonus | Own them too, but equip Four Spirit Wings for the better equipped effect |
| Seasonal shop wings | 4% cooldown reduction, 60 attack bonus | Endgame best in slot; 210,000 seasonal points |
Start saving seasonal points early 15:03.
Pets
Max every grindable Cogni and Natura pet. Each maxed Cogni pet gives 2 flat crit and 1 might, and each maxed Natura pet gives 1 precision. The bonuses stack across the whole collection: a near-complete set comes to 27 might, 55 crit and 31 precision 16:02. Ferra and variant pets are not worth the time.
Genus Insight
Farm rainbow crystals from cubes rather than mobs; it is much faster. Plan on 30 to 40 cubes to finish everything. Then:
- Raise every wheel to level 10.
- On each board, roll only the fourth line first — it carries the big damage stat — and lock it 17:57.
- Roll the remaining lines.
A finished setup is worth more than 7k combat power on its own: swapping to an unfinished board dropped one character from 161.3k to 155.9k. The full value is probably 8-9k.
Unlock the Pantheon statue
Zico's statue gives 45 of each of three god stats, which is one of the larger single power spikes available.
Choose skill and passive options
| Skill | Options to take | Notes |
|---|---|---|
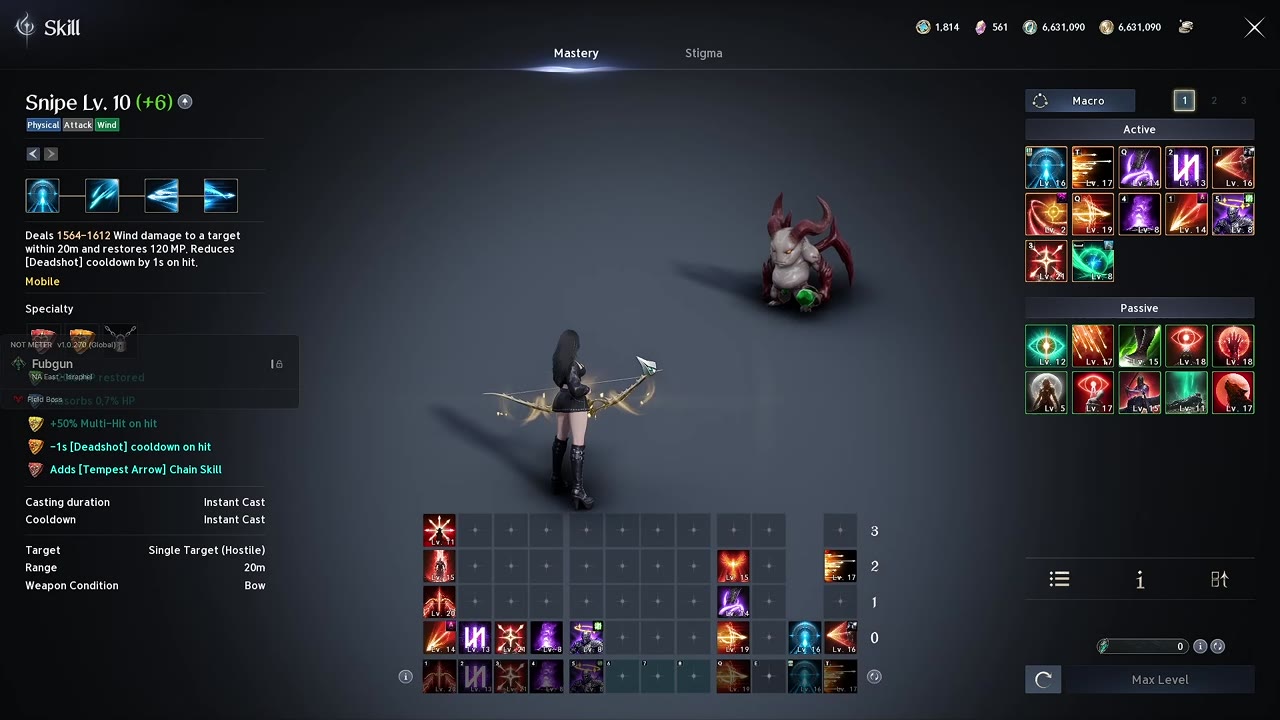
| Snipe | -1 cooldown and the Tempest Arrow chain skill | With a third level 20, take multi hit |
| Tempest Shot | 12% more damage and 20% skill speed | Not crit capped? Take 10% skill crit over the 12% damage. If crit capped, level 20 adds little |
| Marking Shot | Plus five seconds duration and perfect chance for duration | Level 12 is enough |
| Drill Dart | Plus one Drill Dart and 20 skill speed at level 16 | Multi hit at level 20 |
| Gale Arrow | Cooldown reduction, combat speed and PvE damage boost at 16 | Duration before 16; mobile skill at 20 |
| Deadshot | 30 skill speed and extra damage | Last pick: multi hit or mobile skill |
| Alliance skill | 20% HP on use | Nothing else is worth it |
| Arrow Scattershot | — | Never pressed; leave it off your bars |
| Blizzard Trap, Piercing Arrow | — | Mostly PvP |
For Deadshot, multi hit gives more damage, while the mobile skill lets you keep casting through movement 20:51. If a raid boss forces a lot of dodging or blocks, switch to mobile skill.
Rank your passives like this 21:19:
| Rank | Passive |
|---|---|
| 1 | Focused Eye — stack as high as you can |
| 2 | 100% crit damage |
| 3 | Hunter's Soul, the best of the damage passives |
| 4 | Concentrated Fire and the other damage passives, roughly equal |
Farm stigma shards and slot your stigmas
The long-term target is 20 Vital Authority, 20 Bow of Blessing, 15 Griffon Arrow and 1 Supporting Fire 21:48. Supporting Fire matters least, but the whole set costs a lot of shards. Take it in stages:
Bow of Blessing levels 5 and 10 are the big jumps: they add 50% multi hit for the buff's duration and attack scaling with crit.
Where the shards come from
In the Abyss, spend abyss points on stigma shards and nothing else. Board points only feed the PvP board, which raises item level but gives no power. Reaching 28 into the second step there adds up to 78 stigmas, and the weekly seven- to eight-hour abyss session is the most reliable way to keep the shards coming.
Also worth knowing
- No pet is box-only. Pets with no visible source can be farmed on the opposing faction's map through rifts, and some drop from dungeon bosses. Those pets are worth chasing for the title and the stacking stats, even if their entry suggests otherwise.
Frequently asked
Should Ranger buffs be in the macro?
The most optimal approach is to press buffs manually and keep only damage skills on the hold-left-and-right-click macro. Before a boss fight, pre-pop all buffs and open with Marking Shot, then Gale Arrow, then Deadshot, since the buff animation deals no damage anyway. Keeping buffs on the macro is more comfortable and fine for content that does not need min-maxing.
Why keep Marking Shot and Deadshot out of the Ranger macro?
Marking Shot has an animation that stops you attacking for about half a second, so firing it on cooldown from a macro loses damage; cast it every 14 to 15 seconds instead. Deadshot is the highest damage skill, around 30 to 35 percent of total damage, and should be cast on cooldown by hand. Every other damage skill can sit on the hold macro.
What should I upgrade after 20/15/15/1 stigmas?
The long-term goal is 20 Vital Authority, 20 Bow of Blessing, 15 Griffon Arrow and 1 Supporting Fire. Level 5 and level 10 Bow of Blessing add a large amount of damage, including 50 percent multi hit for its duration, so a level 20 Bow of Blessing becomes worthwhile once Vital Authority is 20, Bow of Blessing is 10 and Supporting Fire and Explosive Arrow are at 1. Do not swap to Griffon Arrow until it is level 15.
Do collected pet stats stack in AION 2?
Yes. Each maxed Cogni pet gives 2 flat crit and 1 might, and each maxed Natura pet gives 1 precision, so owning every one adds up to a large bonus. The pet system is account bound, so every character shares the progress.
Read next
AION 2 Templar PvE Build, Stigmas and Gear Guide
Covers the Templar's PvE skill specs, stigma choices, macro, boss opener, gear stats, Arcana, Pantheon and Pet Genus rolling. Written for Templar players who want to maximise damage in dungeons.
AION 2 Chanter PvE Guide: Skills, Stigmas and Macro Setup
Covers the Chanter's leveling skill setup, stigmas, passives and one-button macro, then the changes that matter from level 45 onward. Written for new Chanter players who want to deal strong damage while buffing a party in PvE.
AION 2 Assassin PvE Build: Skills, Macros and Rotation
Covers the Assassin's skill leveling order, stigma choices, skill bar and macro setup, DPS rotation, and the Daevanion, wing, Genus Insight and Pantheon upgrades that raise PvE damage. Written for Assassin players in AION 2 Global who want to stop under-performing in boss fights.
AION 2 Sorcerer Build: Skills, Passives, Stigmas and Rotation
A PvE Sorcerer build for AION 2 covering skill levelling order, specialties, passives, stigmas, Daevanion boards, the cast rotation and a three-button macro. It is written for players who want strong single-target and area damage against bosses, not just on a training dummy.