
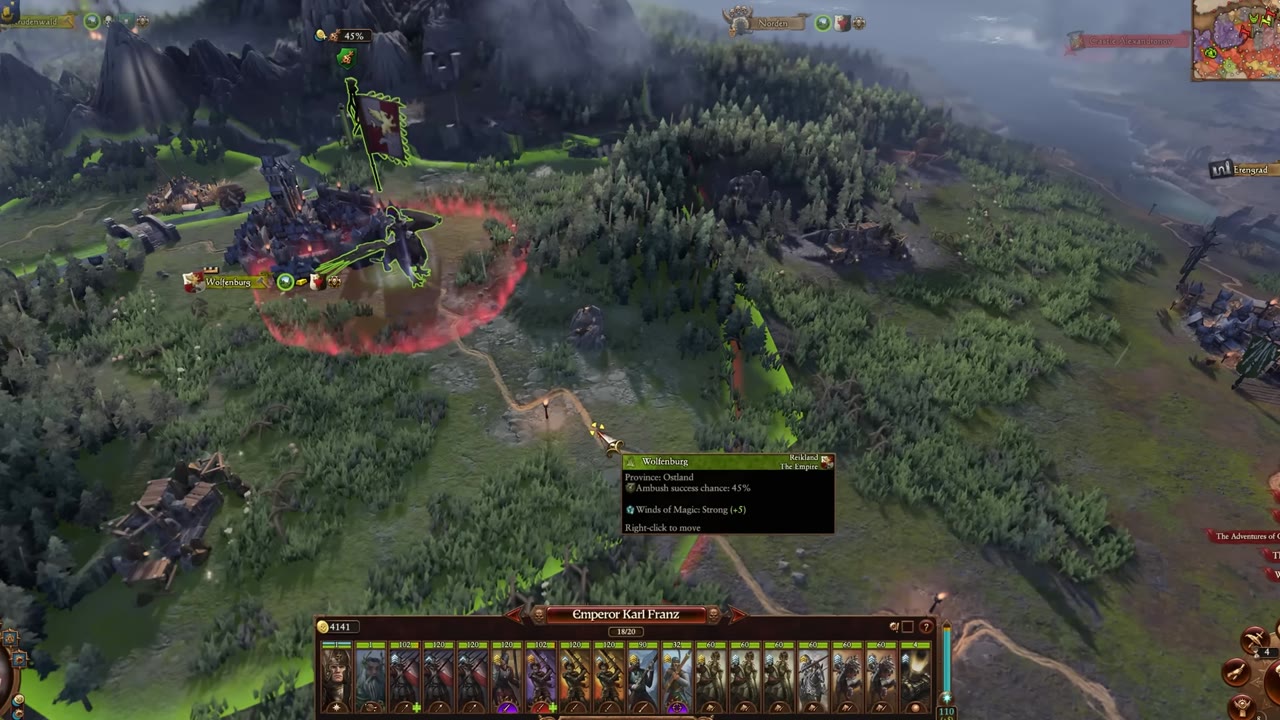
Ambush stance in Total War: Warhammer 3 lets you turn terrain, movement, and faction skills into surprise attacks or safe escapes. You'll be able to set up ambushes in the right spots, understand the numbers behind success and defense, and plan your trap or retreat so you're not left exposed.
Quick answer
| What | Answer |
|---|---|
| Minimum movement | 25 movement range |
| Open ground chance | 45% |
| Dense forest chance | 80% |
| Desert or tundra chance | 40% |
| Encamp defense | 75% ambush defense chance |
| Ambushed leadership penalty | -10 leadership |
| Snitch base ambush bonus | 25% |
Set up ambush stance correctly
Ambush stance can only be activated if your army has at least 25 movement points left in the turn. Terrain is the primary factor in deciding your ambush success chance—the percentage that an enemy will be caught if they enter your red ambush zone.
- Open ground or open road generally provides a 45% ambush chance.
- Light forest bumps this up to 70%.
- Dense forest is even better, offering up to 80%.
- Desert, tundra, and snow terrain are weaker at 40%.
- Grassland and chaotic wasteland also sit at 45%.
- Hilly light forest can offer up to 10% more ambush chance than standard light forest.
- Mountain terrain is strong at 70%.
- All terrain bonuses stack additively with any faction or lord skills.
Faction bonuses and lord traits can provide significant additional ambush chance, making it possible to reach or exceed 100% with the right combinations.


Stack ambush bonuses and defense
Certain factions are naturally strong at ambushing. Skaven and Beastmen, for example, have inherent advantages in both ambush chance and unique mechanics.
Deathmaster Snitch is exceptionally strong, starting with a base 25% ambush chance. He can add 20% for the Jump Scare skill and 30% for Ancient Cunning, for a total of 75% before adding terrain bonuses. With the right skills and location, it's easy for him to achieve 100% ambush chance.
Other lords and heroes can supply ambush chance boosts. Night Goblin Big Boss heroes grant 10% bonus, Witch Hunters can add 20%, and some traits received from repeated ambushing further increase the stat.
Ambush defense chance is a separate mechanic, reducing the likelihood of your army being ambushed. Lords such as Boris can acquire up to 30% ambush defense through skills like Alert, and most factions can use the encamp stance, which provides 75% ambush defense chance. These bonuses combine additively: stacking 30% from skills and 75% from encamp stance will make an army nearly unambushable against weaker attackers.
However, if the attacker’s ambush chance is unusually high (such as Snitch with full bonuses and terrain), even an army with more than 100% defense can still be ambushed—the defense is subtracted from the attacker's chance, so any excess can still push through.

Choose ambush positions that cover the route
To trigger an ambush successfully, the enemy army must travel through the red ambush zone surrounding your army. This means position matters just as much as percentage chance.
Dense forests offer high ambush percentages, but if those spots are far from the likely path, the enemy may never enter your red circle. Light forests along roads or hilly areas often provide better coverage, even if their ambush chance is a bit lower. It's more effective to ambush where the enemy is certain to move than to sit where the odds are highest but traffic is rare.
Predicting the enemy’s origin and destination is critical. Place your army so that your red circle covers the road or the direct route between settlements. Consider where the AI is likely to attack, and set your ambush in the middle of that route.
Leave yourself a way out
Ambush traps can fail—or expose you to more enemy armies than expected. Planning an escape route keeps your army safe.

Break up multiple armies with one ambush
Ambush stance is powerful for splitting enemy forces, creating manageable fights instead of overwhelming battles.
Ambushing outside a settlement can bait enemies into attacking what looks like an undefended target. This allows you to fight their field army away from the garrison—making the settlement much easier to capture afterward.
You can also break up two or three nearby enemy armies by ambushing along their likely route. If a group of armies is within range to reinforce each other, an ambush can catch only one, forcing you to fight them individually instead of together. Sometimes you can lure multiple armies, and then retreat if the fight turns against you.
This tactic is especially effective when the AI would reinforce hard against a standard attack, but gets caught out by your hidden army.

Use ambushes to beat ranged armies
Missile-heavy armies rely on getting damage in before you reach them, but ambushes start the battle much closer than usual.
When you ambush a ranged army, combat begins almost on top of their formation. This removes their ammunition advantage: the example shown suggests you can deny up to 90% of their ammo, since your units are in immediate contact before most shots can be fired.
Ambushing is particularly strong against missile-focused opponents, as it forces them to fight with their weaker melee troops and morale under pressure.
Bait enemies into your ambush
A classic way to trigger an ambush is to use a weak force as bait in force march, encouraging the AI to attack.

Stay hidden or use ambush to escape
Ambush stance makes your army invisible to enemy forces unless discovered. The higher your ambush chance, the lower your risk of being found at the start of the turn. Armies hidden in ambush can wait for surrounding threats to move on, creating an opening to attack or escape.
A retreat across a river is especially effective. If the ambush fails or attracts attention, you can use your retreat move to cross rivers for free, while enemies need a full turn to follow and often cannot reach you right away.
When an enemy is ambushed, their army immediately suffers a -10 leadership penalty that decays over about a minute. This makes it easier to rout low-morale units, especially if your faction can stack additional leadership debuffs or damage early in the battle.


Also worth knowing
- Ambush discovery chance is separate from ambush success. Armies can be pulled out of ambush stance at the start of the turn if nearby enemy or neutral lords and heroes spot them, even with 100% ambush success chance.
- Nearby settlements and visible enemy armies can reveal your ambush. Approach settlements cautiously, as their line of sight may break your hiding—even if your numbers are high.
- Heroes embedded in or near armies can break ambush stance. Enemy agents can "kick" your army out of hiding, regardless of the displayed percentage.
- Naval forces at sea don't reveal land ambushes. If only enemy fleets are present, your army remains hidden until a land force or agent arrives.
- Bretonnia loses chivalry each turn spent in ambush. Using ambush stance with Bretonnian armies is considered dishonorable and incurs penalties and negative traits.
- Tzeentch’s teleport stance is a separate ambush mechanic. It allows teleporting on top of enemy armies and instant ambushing, bypassing most defense mechanics.
Frequently asked
What terrain gives the best ambush chance?
Dense forest gives the highest value mentioned here at 80%. Mountains are also strong at 70%, while open ground is only 45% and desert or tundra is 40%. Hilly light forest can be better than regular light forest by 10%.
How much movement do you need to enter ambush stance?
An army needs at least 25 movement range to enter ambush stance. If you have less than that, you cannot use it that turn.
Does ambush defense matter against high ambush chance armies?
Yes. Ambush defense reduces the enemy's ambush success chance, and the examples here show encamp stance giving 75% defense and some lord skills adding another 30%. The stated rule of thumb is that defense comes off the attacker’s success chance, so very high success can still beat weaker defense.
What is the point of using ambush near a settlement?
It can split an enemy army away from a garrison or force the AI to attack an apparently weak target. That can let you fight the field army first, then take the settlement with much less resistance. It is also useful for breaking up multiple nearby stacks into smaller fights.
Read next
Total War: Warhammer 3 Corruption Guide: Types and Cures
This plan covers how corruption works, how each type affects regions and factions, and how to spread or remove it efficiently. It is for players who want to use corruption deliberately instead of treating it as background pressure.
Total War: Warhammer 3 Siege Guide 2026: How to Attack and Defend Settlements
This guide covers a fast settlement-siege tactic built around drawing defenders away from the victory point and capturing it with a small mobile force. It is for players who want to end sieges quickly, especially when autoresolve or prolonged assaults are undesirable.
Total War: Warhammer 3 Hero-Only Campaign: How Far Heroes Alone Can Carry You
Plan a hero-only campaign around factions that can grow hero capacity quickly, with Skaven and Throt as the core example. The sections focus on early survival, hero recruitment, settlement expansion, and when the strategy starts to fall apart.
Total War: Warhammer 3 Lores of Magic Guide: Every Lore Ranked and Best Spells
A ranked overview of the strongest magic lores in Total War: Warhammer 3, with the spells that make each one stand out. It is for players choosing which lore to prioritize for campaign and battle value.