
🎯 The core idea
Season 9 shipped a completely new aim assist system for controller players, and it changes almost every other setting worth tuning around it. This guide walks through a console pro's full settings pass — sensitivity, the aim curve, dead zones, the new aim assist type, and a ready-to-use profile code — pulled directly from his own settings menu on screen, not just described in voiceover.
This is a controller/console settings guide specifically. If you play on mouse and keyboard, the sensitivity and dead zone numbers here won't transfer — only the aim assist and HFR mode sections are relevant to you.
- free costs nothing
- cheap small cost
- setup needs preparation
- grind pays off slowly
- skip the thing to stop doing
Display and audio: the two settings to fix before anything else

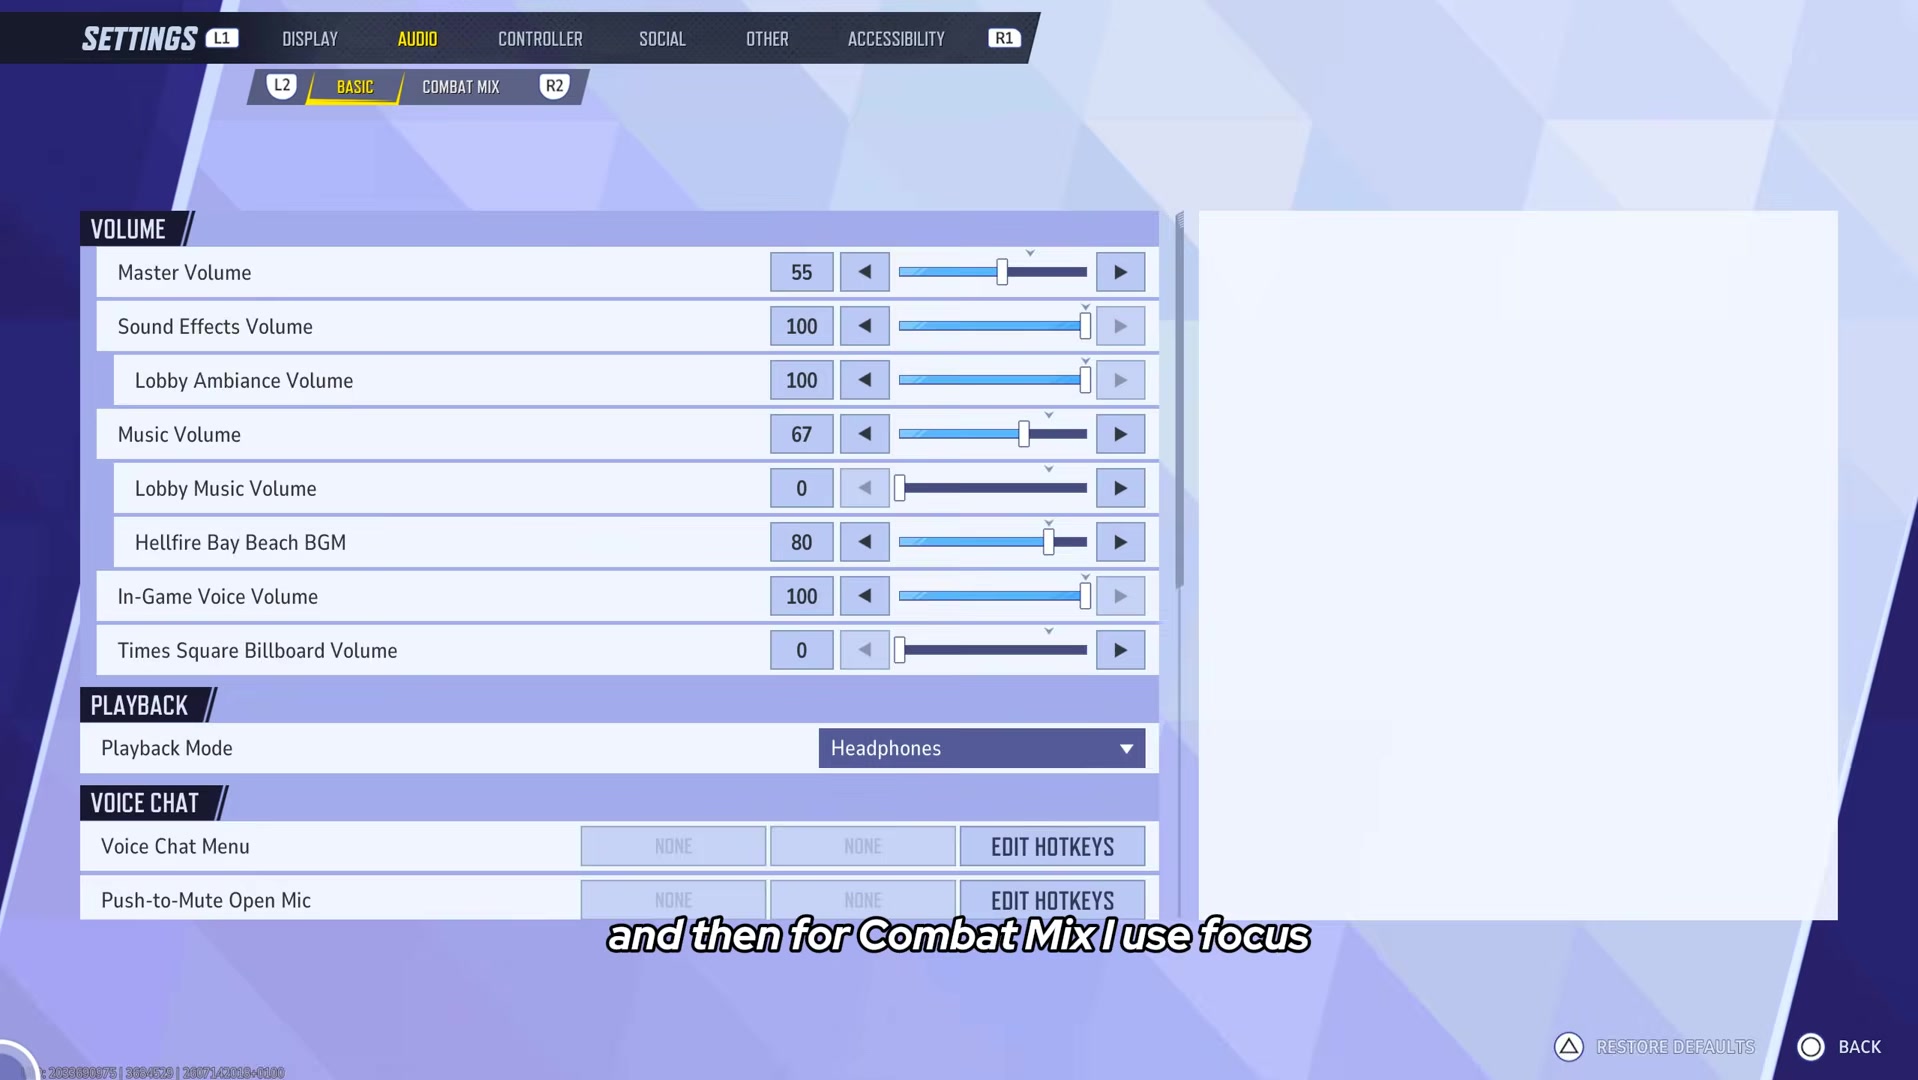
Audio settings are otherwise mostly personal taste — this setup runs music down and sound effects at max, with Combat Mix set to Focus rather than the other available presets, which prioritizes combat-relevant sounds over ambience.
Sensitivity: find your own number first

Sensitivity is personal preference before anything else, and there's no universally correct number — but there are ranges worth starting from depending on what speed you're after:
The aim curve: why a high sensitivity is controllable at all

The reason a 500 sensitivity is usable rather than uncontrollable is the curve underneath it. This setup runs a Dual-Zone S-Curve, which the game itself describes as sensitivity "mildly adjusted at low and high stick tilts, with a sharper adjustment at mid-tilt." In practice that means three phases: faster acceleration at the start for smooth micro-adjustments, a slower, more accurate middle section for tracking, and a speed-up again at the very end of the stick's range to help with fast target switching.

The curve is what makes this decoupled from sensitivity itself — it's usable at any sensitivity value, including the game's default, which is why some players run a comparatively low sense with this same curve and still track targets well. Sensitivity and curve are two separate decisions, not one setting.
Dead zones: the setting most likely to hurt your aim assist if set wrong

The Eye-Gaze Minimum Targeting Input Deadzone (its actual in-menu name, despite not having anything to do with eye tracking) is the inner dead zone of the right stick — the setting to raise if your controller drifts. The tradeoff: the higher it's set, the worse your micro-adjustments get, since it's effectively turning off the innermost part of the stick's range.
Counterintuitively, a dead zone of exactly zero is not recommended, even on Hall-effect or TMR sticks capable of running it without drift. At zero, aim assist has nothing to "catch onto" — any tiny stick movement, even while already on target, causes the crosshair to glide instead of holding. A small dead zone (as low as 1) gives aim assist an anchor point to grab, while still keeping the dead zone low enough not to blunt fine aim. The outer dead zone (Maximum Input Deadzone) should stay at zero, since raising it cuts into your stick's full range of motion and disrupts both the curve and your muscle memory.

A separate, more advanced trick uses the Character Movement Dead Zone to deliberately exploit rotational aim assist — the extra tracking assistance the game grants while your left stick is registering movement. Setting this dead zone low enough that a small amount of natural stick drift keeps registering as "movement," without actually moving your character or pulling it off-direction, keeps rotational aim assist active even while standing still. This number is controller-specific and has to be found by trial and error — lower it one step at a time, move briefly, then stand still and check whether the extra assist kicks in.
For horizontal and vertical dead zone boosts (an extra sensitivity kick when the stick is pushed fully in one direction, useful for fast flick shots), keep both values identical — mismatched horizontal and vertical boosts make aim inconsistent between the two axes. Dead zone latency and dead zone response time settings are both recommended left at zero; they were found to add inconsistency rather than remove it. All three invert-look options should stay off.
Aim assist: Season 9's biggest change

Season 9 added a second aim assist system, called New, alongside the previous Classic system that had been in place since launch — effectively an aim assist buff for anyone willing to relearn a system the game had run on for nine seasons straight. The in-game description states New gives "more precise slowdown" that "follows target," against Classic's "more flexible/free, fast switching" — and in practice New is described as substantially stronger than Classic, closer to the aim assist behavior in games like Overwatch or Fortnite. It applies globally: there's no way to set Classic for some heroes and New for others, so the choice is one setting for your whole roster.
One setting from that menu is easy to miss but has an outsized effect: Close-Range Aim Assist. With it off, aiming at a target under 5 meters away gives zero aim assist at all — a closer distance than it sounds, and one that matters a lot for hitscan heroes who still have to fight up close, like Psylocke, Star-Lord and Venom. Leaving it on keeps aim assist active at every range. For melee heroes it's more genuinely a matter of preference, since it changes how much the game "pulls" your aim while already in someone's face.

New aim assist is recommended for most heroes, but it's strong enough that melee players may want to soften it: raising the ease-in to roughly 100 and lowering the window size to roughly 10 gives more freedom to aim manually while surrounded by enemies up close, since the default strength can otherwise pull toward targets you didn't intend to aim at. For in-between heroes like Spider-Man, the default new-system values are a reasonable starting point, with ease-in as the first thing to raise if it ever feels too aggressive.
Crosshair and colors
For crosshair, a small purple reticle is used specifically because it contrasts against yellow enemy outlines — purple and yellow sit opposite each other on the color wheel, which keeps the crosshair visible against almost any background. Enemy color is set to yellow, while allies, shields and regenerating health each get their own distinct shade (mostly a pinkish purple) so every HUD element reads at a glance during a fight.
A starting-point profile code

Because sensitivity, dead zone and boost values are so personal, a single shared profile code can't cover everyone — so the template code shared alongside this video keeps the curve and aim assist settings intact, but resets sensitivity to a neutral 300 with no boosts and a 3-point dead zone, meant to be a starting point you adjust from rather than a final answer. It has to be entered using the in-game import button, and the code must be typed in capital letters or it won't register. Tested as-is without changes, the template plays smoothly — the higher values throughout the rest of this guide reflect one player's preference for a faster, higher-sensitivity setup, not a requirement.
How this guide was fact-checked
The Marvel Rivals Wiki (marvelrivals.wiki.gg) has no pages covering client settings, controller configuration, aim assist mechanics or display options — confirmed by checking its navigation and page list, which covers heroes, abilities and game systems rather than settings menus, consistent with what's been found for every strategy-and-settings guide in this catalogue so far. This guide is therefore built entirely from the source video's own on-screen settings menus, which is a stronger source than narration alone: every specific number cited here (500/500 sensitivity, the Dual-Zone S-Curve graph, Aim Assist Type "New," Window Size 20, Strength 100, Ease-In 75/75/0) was read directly off the settings screen captured in the images above, not transcribed from speech. The one aim assist description that comes from narration rather than an on-screen number is the melee-specific recommendation (ease-in ~100, window size ~10), since the footage doesn't show that adjustment actually being made on screen — it's presented here as the creator's spoken advice rather than a verified menu value.
What this guide doesn't answer
This guide doesn't cover mouse-and-keyboard settings, keybinds, or a controller-vs-mouse comparison — the source video is a controller-specific settings breakdown, and none of those topics come up in it. It also doesn't cover broader in-game graphics settings like texture quality, shadow detail or upscaling options, or field-of-view (FOV) settings — the only display-related setting actually covered is HFR/120fps mode, and this guide doesn't invent numbers for settings the source never opens. The "colorful" visual look shown in the footage also isn't purely an in-game graphics setting — part of it comes from the creator's TV sharpness and saturation being pushed up outside the game, plus video editing, which this guide states plainly rather than presenting as a Marvel Rivals setting anyone can replicate exactly. And it doesn't cover Xbox-specific menu differences in detail, since the footage shown throughout is captured on a PS5 (the face-button icons visible in every settings screenshot are PlayStation's) — the settings and values should carry over, but exact menu navigation may differ slightly on Xbox.
Frequently asked
Should I use the new or classic aim assist system in Season 9?
For most heroes, yes — the new system added in Season 9 is noticeably stronger than the classic system that had been in place for the previous nine seasons, closer to the aim assist feel in games like Overwatch or Fortnite. Melee players may want to soften it by raising the ease-in and lowering the window size, since the stronger pull can grab onto targets you didn't intend to aim at while you're surrounded up close.
What sensitivity should I run on controller?
There's no universally correct number — it's genuinely personal preference. As a starting point: 150-250 for a slower feel, 250-400 for medium, and 400-500 for a fast setup. Going under 150 generally isn't recommended, and if you want to work up to a high sensitivity, increase it by 25-50 per day rather than jumping straight to your target number.
Why shouldn't I set my dead zone to zero?
At a dead zone of exactly zero, aim assist loses its anchor point — any tiny, unintentional stick movement causes your crosshair to glide off target instead of holding, even while you're already aiming correctly. A small dead zone (as low as 1) gives aim assist something to grab onto while still keeping your micro-adjustments sharp.
What does Close-Range Aim Assist actually do?
It removes a hidden aim assist gap: without it enabled, you get zero aim assist on any target under 5 meters away, which is closer than it sounds and matters a lot for hitscan heroes who still end up fighting at close range, like Psylocke, Star-Lord and Venom.
Is this settings guide useful for PC or mouse-and-keyboard players?
Only partially. The sensitivity, dead zone and stick-curve sections are controller-specific and won't transfer to mouse and keyboard, but the HFR/120fps mode and the aim assist type explanation apply to anyone using a controller regardless of platform, and the audio setup is universal.
Read next
Marvel Rivals PC Settings & FPS Optimization Guide (2026)
A complete PC optimization pass for Marvel Rivals: GPU driver setup, Windows-level tweaks, in-game graphics settings, and the third-party tools worth using, with on-screen footage used to correct a couple of the video's own narration errors.
Console Settings Guide: Fix Input Lag on PS5 (Marvel Rivals)
A latency-benchmark creator measured real millisecond input delay on PS5 across USB vs Bluetooth, HFR vs Pro Mode, VRR, HDR and controller vibration — with one setting worth an 8-9 ms drop on its own.
Best Crosshair & Controller Settings Guide (Season 9, All Heroes)
A Top 500 controller player's full Season 9 settings pass: display and FPS caps, audio, controller sensitivity and aim assist, and a from-scratch build of a clean red-X crosshair used across every hero.
Loki Guide: Clones, Kill Timing and the Current Mantis Team-Up (Marvel Rivals)
An advanced Loki breakdown fact-checked against current data: splash healing fundamentals, the doppelganger and devious exchange combo, why the Hela team-up no longer works, and the current Mantis team-up that replaces it.