
🎯 The core idea
A manifold is a row of splitters feeding machines in parallel — cheap and compact, but slow to reach 100% efficiency; a load balancer actively splits a belt into precise equal (or exact-need) amounts up front, at the cost of more space and more setup math. Neither one is "better" — they solve different problems.
- free costs nothing
- cheap small cost
- setup needs preparation
- grind pays off slowly
- skip the thing to stop doing
How a manifold actually works

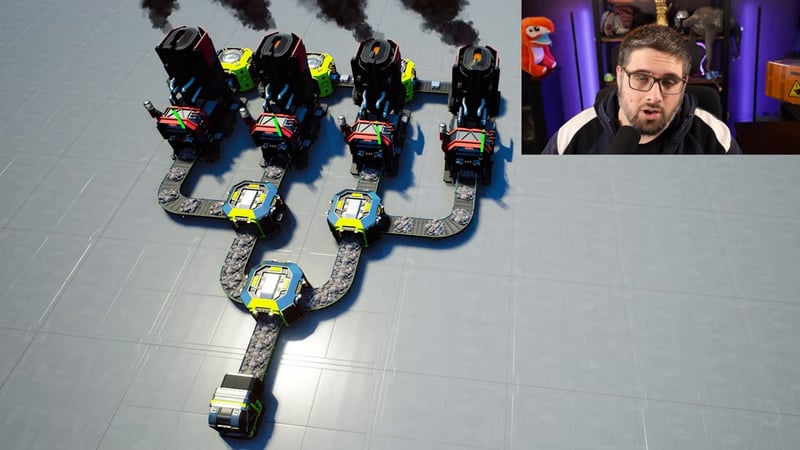
A manifold is just a line of splitters, all facing the same direction, each one feeding a machine (typically in parallel) before passing the remainder further down the line. With 120 iron ore/min coming in, the first splitter sends some to its smelter and passes the rest to the next splitter, and so on down to the last machine. Manifolds are popular because they're easy to place, compact, and trivially scalable — going from 4 smelters to 26 is just a matter of extending the same row of splitters and mergers.
Why manifolds take time to reach 100% efficiency

This is the part that confuses new players: a manifold splitter always divides its input evenly between its outputs, whether or not the machine on that output can use all of it. With 120 ore/min hitting the first splitter, it sends 60/60 — but if a smelter only needs 30/min, the extra 30/min backs up and overflows down the line to the next splitter, which repeats the same even split against whatever it's still receiving. Only once every machine ahead in the line has filled its internal buffer does the flow settle into exactly the amount each remaining machine needs.
Depending on how long and complex your manifold is, this fill-up process can take a long time to fully settle — the video cites up to 30 minutes for a large line to reach 100% efficiency, even though it does get there eventually.
How a load balancer works instead

A load balancer splits one belt across multiple outputs so that every machine gets the amount it needs (not necessarily an equal amount — just the right amount) from the moment it's built, with no fill-up delay. Where a manifold is a row of splitters run in a chain, a load balancer is built to actively divide flow — using combinations of splitters and mergers — so each output line carries a specific calculated amount.

The tradeoff is space and complexity: a load balancer scaled up to the same output as a large manifold takes a visibly bigger footprint and more careful planning, and — unlike a manifold, which scales by just adding more splitters to the row — a load balancer built for one machine count sometimes has to be rebuilt from scratch if that count changes. Load balancers work cleanly in multiples of two or three (since a splitter has up to three outputs); once you need to divide by a prime number, the design gets significantly more complex.
Where each one actually wins

Manifolds shine when a single line feeds multiple different machines or different overclock speeds, because you only need to make sure the total input covers the sum of everyone's demand — you don't need to calculate an exact split. That flexibility is one of the manifold's biggest practical advantages over a load balancer, where mixing different per-machine needs on one balanced line gets mathematically messy fast.

Load balancers earn their keep when supply is uncertain. In a reinforced iron plate factory setup, if the input drops from 120 iron ingots/min (full supply) to 60/min, a load-balanced line keeps every machine running at a stable, even 50% efficiency — still producing a steady average output. A manifold given the same shortfall behaves very differently: the first machines in the row get fed preferentially, downstream machines start and stop as buffers fill and drain, and the whole line's output fluctuates unpredictably instead of settling into a stable partial rate.
Load balancers are also the standard choice around Nuclear Power — fuel rods sitting on a manifold's belt (and piling up in machine buffers) sit there generating radiation for longer. Feeding exactly enough via a load balancer keeps far fewer rods in the open at once.
Splitting unevenly: 3x3 and 4x4 balancers, and the prime-number trick

Load balancers aren't only for feeding machines — they're also used to even out belts carrying different amounts, such as combining ore from an impure, a normal, and a pure node (30/60/120 per minute) into three equal 70/min belts via a 3×3 balancer. A 4×4 balancer works the same way at larger scale (four unequal inputs balanced into four equal outputs).

Prime numbers of machines are the load balancer's usual pain point, since a splitter only has up to three outputs. A splitter array works around this: rather than dividing directly by an awkward number, you route one belt's worth of items through a loop that subtracts exactly the amount one machine needs, leaving a cleanly divisible remainder for the rest.

The overall recommendation
For most general factory building, manifolds win: they're smaller, faster to set up, and versatile enough to feed mixed machines and overclocks — the only real cost is the time they take to fill up to 100% efficiency, which is easy to tolerate if you can wait it out. Reach for a load balancer instead in three specific situations: a simple early-game setup where the wait isn't worth it, Nuclear Power (to limit rods sitting in the open), and balancing train station outputs, where a stable, predictable feed rate matters more than raw compactness.
As a piece of factory design basics and layout theory, that startup delay is really the whole tradeoff in one sentence: a manifold's even distribution across splitters costs time, a load balancer's calculated distribution costs space and setup effort, and everything above is just working out which cost you'd rather pay for a given line.
How this guide was fact-checked
The splitter/merger mechanics described here (even-split behavior, upgrading to Smart/Programmable Splitters via Ctrl+aim) were checked against the current Satisfactory Wiki's Conveyor Splitter page, which is reachable and confirms this behavior is unchanged from the version shown in the source video. The Content Plan notes flagged this as a pre-1.0 video (2024-04-07) but "zero version risk" since splitter/merger math hasn't changed since — the wiki fetch supports that assessment. All numeric examples (the 120/60/60 overflow math, the 3×3 and 4×4 balancer figures, the reinforced-iron-plate shortage comparison) are transcribed directly from the source video's own walkthrough rather than recalculated, since they were demonstrated on screen.
What this guide doesn't answer
This guide doesn't cover the specific belt-throughput cap of each conveyor Mark (i.e. exactly how many items/min a Mark 1 through Mark 6 belt can carry) — the video treats those numbers as background knowledge rather than teaching them directly, so check the wiki's Conveyor Belt page for the current per-tier throughput table. It also doesn't go deep on train-station load balancing, which the video explicitly defers to a separate upcoming train guide from the same creator.
Frequently asked
Which is better in Satisfactory, a manifold or a load balancer?
Neither is universally better — manifolds are smaller, faster to build and more versatile for mixed machines, but take time to reach full efficiency. Load balancers give every machine exactly what it needs immediately, at the cost of more space and setup math. Manifolds win for most general building; load balancers win for early-game simplicity, nuclear power, and train station outputs.
Why does a manifold take so long to reach 100% efficiency?
A manifold splitter always divides its input evenly, whether or not the machine on that output needs all of it. The excess overflows down the line and each machine's buffer has to fill before the flow settles — for a long, complex manifold this fill-up process can take up to 30 minutes.
How do you handle prime numbers when load balancing in Satisfactory?
Use a splitter array: loop one belt's worth of items out to a merger to remove exactly one machine's requirement from the main line, leaving a remainder that divides cleanly by 2s and 3s. Just make sure the belt tier feeding the array has enough spare capacity for the added loop-back amount.
Why do nuclear power setups favor load balancers over manifolds?
Fuel rods sitting on a manifold's belt (and piling up in machine buffers while it fills) generate radiation for longer. A load balancer feeds each reactor exactly enough immediately, keeping far fewer rods sitting out in the open at once.
What happens to a manifold vs a load balancer if the input supply drops?
A load-balanced line keeps every machine running at a stable, reduced efficiency (e.g. all machines at 50% if supply halves). A manifold behaves unpredictably instead: the first machines in the row get fed preferentially, downstream machines start and stop as buffers drain, and total output fluctuates rather than settling into a steady rate.
Read next
Satisfactory Conveyor Belt & Logistics Guide (Smart Belts, Balancers & Limiters)
Satisfactory Blueprint Designer Guide: Sizes, Saving & Curves
How to unlock the Blueprint Designer, avoid the Save Blueprint mistake, organize dozens of blueprints, and build smooth curved blueprints for trains and highways.
Satisfactory Pipes & Fluid Mechanics Guide: Headlift, Flow Rates & Fixes
A complete walkthrough of Satisfactory fluid mechanics: pipe tiers and flow rates, headlift and dynamic pressure, splitting between pipe tiers, valve mistakes, buffers, priority junctions, and how to stop manifolds from sloshing.