
🎯 The core idea
Tough Crates, which most players call Heavy Crates, are the teal, metal-edged boxes added in the City Never Sleeps map rework. Only a Heavy Melee breaks them, and each one always drops souls, twice what a regular crate gives. Every lane has the same easy pair by the bridge plus a lane shop crate. The big payoffs are timed clusters: the Sunken Plaza mist and the Bell Tower at 5 minutes, and eight boxes around the Mid-Boss pit at 10.
- free costs nothing
- cheap small cost
- setup needs preparation
- grind pays off slowly
- skip the thing to stop doing
What a Tough Crate is and why heavy melee matters

The official wiki calls them Tough Crates. Players and most videos, including the Ryezor video this guide is built on, call them heavy crates or heavy boxes. They are the same object. They are bigger than normal crates, teal, with thick metal edges and a lock that has a fist on it. The fist is the hint: a Tough Crate only breaks to a Heavy Melee. Shooting it or walking through it doesn't work like it does on a regular box.
A Heavy Melee is the charged punch you get by holding the melee key (Q by default). The wiki puts the full animation at 1.25 seconds, with a 1 second cooldown when it hits and 1.3 seconds when it misses. It costs no stamina and works in the air too, so you can punch a rooftop crate as you drop onto it. One wiki footnote matters for one hero: the heavy melee damage upgrade on Puddle Punch can't destroy Tough Crates.
| Breakable | Base souls | Growth per minute | Drop chance | How to break |
|---|---|---|---|---|
| Crate | 23 | +2 | 60% | Shoot, punch, dash or slide through |
| Tough Crate | 46 | +4 | 100% | Heavy Melee only |
Numbers are from the wiki's Crate page. Crate souls count as Haunted Souls and show up as "Breakable Pickups" in the post-game Souls by Source graph. The wiki notes that soul scaling starts at minute 0 even though crates don't spawn until minute 3, so a Tough Crate is already worth more than its base value the first time you punch it.
The pattern every lane repeats

free Once you know the template, most of the 73 heavy crate locations the video counts are easy to predict. Across the four side lanes (green and yellow on each team), the video shows the same core set:
- Two crates on the lane next to the bridge. This is the closest pair to where you stand while laning. Take them during a wave lull with no extra walking.
- One crate at the lane's side shop. It is a few steps back from the lane, so it fits into any shopping trip.
- One crate at the secret shop on lanes that have one. The video points these out on Archmother green and yellow and on Hidden King green.
- One crate up by the bridge buff. The frame above shows the blue bridge buff beam on Archmother's green lane.
So each side lane gives you four or five crates within a few seconds of the wave. Everything else is a detour. The sections below go lane by lane through all the crate spots and say which detours pay off.
Archmother green lane: Greenwich and Central Park

On Archmother's green lane, after the bridge pair and the secret shop crate, there's a crate just back from the shop next to a dumpster and a parked truck. The minimap labels this area Greenwich / Central Park. The golden figure beside it in the frame is a Buff Container (the statue that drops permanent stat buffs). It isn't a Tough Crate, and this guide doesn't cover it.
The green lane also has a crate down by the Sinner's Sacrifice and one up by the bridge buff. The wiki says Sinner's Sacrifice machines first spawn at 8 minutes. Before that, the crate next to the machine is the only reason to go there.
The Theater: the densest crate building on Archmother's side

setup The Theater behind Archmother's green lane holds the biggest cluster of crates on that side. Going by the video's walkthrough:
- one under the stairs as you come in
- one right around the next corner
- a couple more spread through the seating area, plus one on the far side that sits closer to mid lane
- two more up the stairs on the upper level
- one just outside the building
- one high up near the roof, above the stage (the frame shows its health bar over the stage)
The creator says he likes to run the whole Theater when he has a free minute. It takes little time and adds up to a lot of souls. The one on the mid-lane side is the exception: he doesn't think it's worth the walk from green lane.
Archmother yellow lane and the Sunken Plaza mist

Yellow lane follows the template: two crates by the bridge, one at the shop and one just past it. The rest are more spread out than on green lane: two near each other a little further back, two more on the way back toward base (the creator grabs these on his way back to lane), and one next to spawn that's only worth taking if you're already passing.
The big one is the mist. In the purple-fogged Sunken Plaza (the minimap label in the frame), there are four Tough Crates in one spot. According to the video, these four first spawn at 5 minutes, not 3. The wiki doesn't list a timer for the mist area, so treat the 5-minute figure as the video's. The frame also shows Gutter Ghoul Haunts in that plaza, so clear or avoid them before you start punching. Yellow lane also has a crate at the secret shop and the usual one by the bridge buff.
Blue lane on both sides is nearly a mirror

Blue lane is the middle of the three lanes (the video calls it mid lane), and it has the fewest crates. On Archmother's blue lane the video shows one next to the parked bus, one up above and one off to the side. These three are quick grabs. There's one more in the Sinner's Sacrifice room and one just over the bridge.
The creator says both blue lanes are close to mirrored. The main difference is that one team's version has a crate inside the Sinner's Sacrifice room, while the other's sits just around a corner. The frame above is Archmother's blue lane near Broadway / Times Square.
Hidden King yellow lane: York, Factory and the rooftops

setup The video's creator thinks Hidden King's yellow lane has the most Tough Crates of any lane, and his walkthrough backs that up. After the bridge pair and the shop crate:
- a crate in a corner just off the zipline. You can hop off on the way to lane, punch it and keep going (the frame, labelled York / Factory)
- one just inside the next room, and one more if you climb into the small hallway above
- one in a corner after you drop down from there, close to mid lane, plus another just around it
- one on a roof up the zipline and another on the opposite roof
- one down by the Sinner's Sacrifice, plus the usual bridge buff crate
- two in the "doubles" building: one inside and one on its roof
His route is to take the lane crates as soon as they spawn, go through the door to the corner crate, run the hallway and loop back. That way you collect most of these in one pass.
Underground tunnel crates under Hidden King's yellow lane

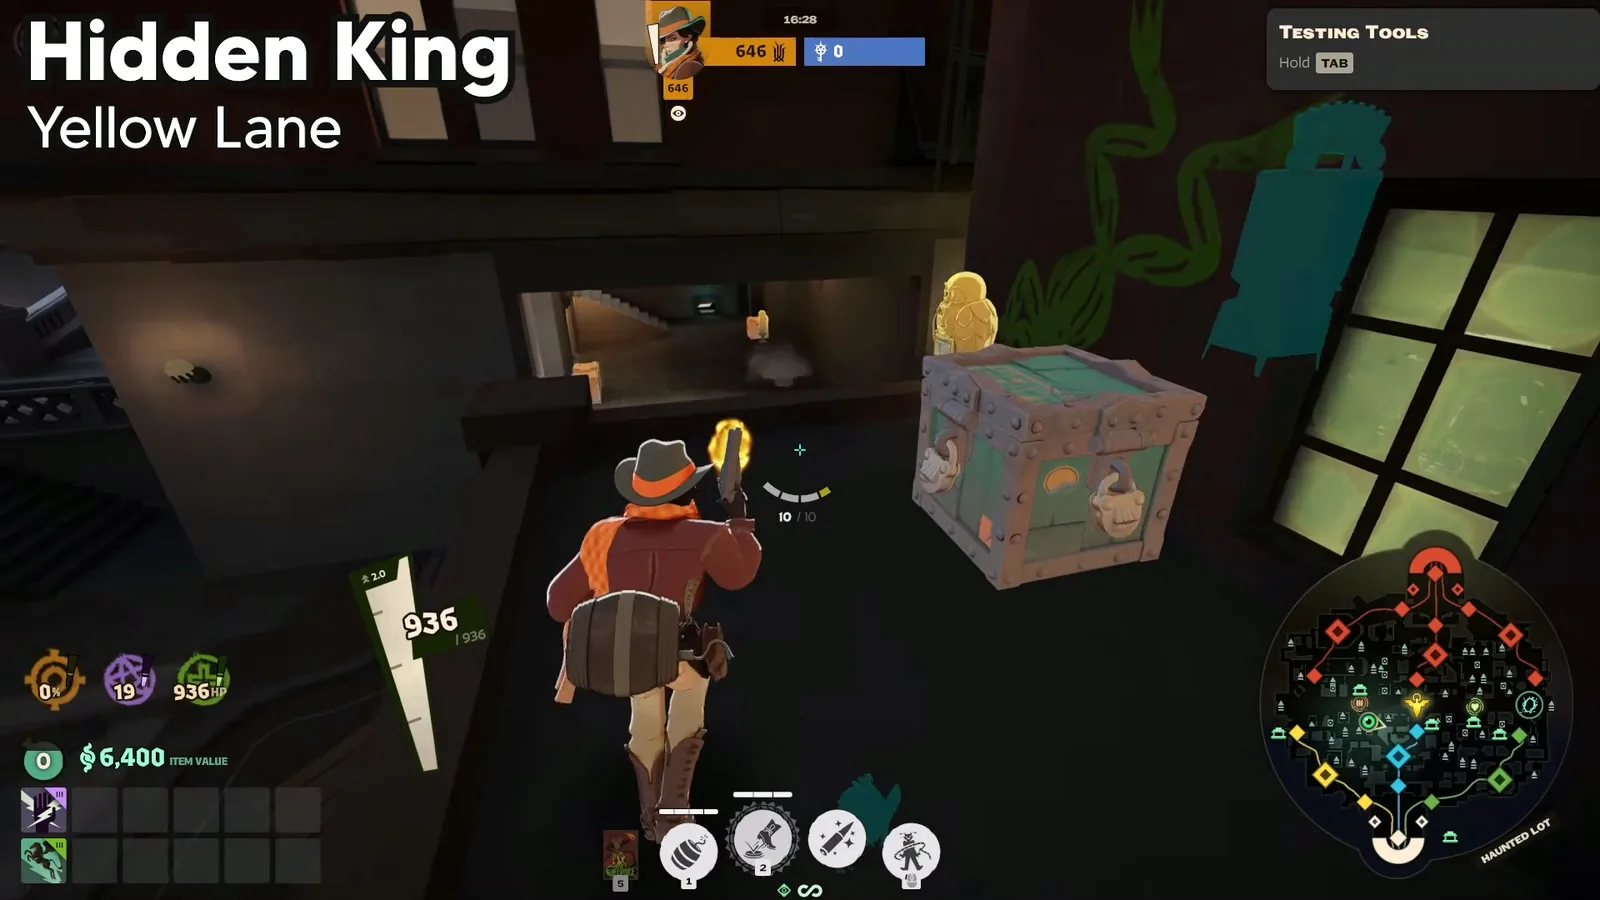
Hidden King's yellow lane also has two Tough Crates underground, one and then another just around the corner. The minimap calls the area Haunted Lot. The frame shows the stairs down, with an Underhand Haunt waiting at the bottom.
The video doesn't give a timer for these two. The wiki does: crates in the Tunnels first spawn at 5 minutes and respawn 5 minutes after being broken. That has been true since the September 16, 2026 patch (before that they used the normal 3-minute timer). Don't run down at minute 3 expecting them to be there.
Hidden King green lane and its zipline pair

Green lane on Hidden King's side has fewer crates near the lane. There's the bridge pair, one at the shop and one up from there. The rest sit further back:
- one behind the Walker, shown in the frame (minimap: Greenwich / Brownstone)
- two close together right by the zipline. The video calls this a good spot to grab while you're riding back to lane.
- one alone in a room a little further up the zipline
- one more just around the corner from that room
- one in the secret shop and one by the bridge buff
The Bell Tower's four 5-minute crates

grind The reason Hidden King's green lane is thin near the lane is the Bell Tower (Chinatown / Bell Tower on the minimap). Four Tough Crates sit up top. Like the Sunken Plaza mist, the video says they spawn at 5 minutes instead of 3. The wiki has no separate Bell Tower timer, so that figure is the video's. Four guaranteed drops in one spot is the best single stop on this lane once the 5-minute mark passes.
Hidden King blue lane

Hidden King's blue lane is close to Archmother's. Straight away there's a crate up to the left, another up above (the frame shows its health bar over the street, labelled Broadway / Downtown) and one down low. The building crate from the other blue lane is missing here. Instead there's the corner crate covered in the yellow lane section above, plus one more in a corner of this lane. Unlike Archmother's blue lane, there's no crate inside the Sinner's Sacrifice room here; the video shows the one for that area just outside it, plus one last crate nearby.
Mid boxes above the Mid-Boss pit at 10 minutes

setup The biggest single cluster is in the middle of the map. The video counts six Tough Crates in the room above the Mid-Boss pit and two more down in mid, eight in total. The wiki agrees on the location and the timer: crates in the room below Times Square, directly above the Mid-Boss pit, first spawn at 10 minutes. After that they respawn on the normal 3-minute timer.
Eight guaranteed Tough Crate drops is worth planning around. Have someone near mid at 10:00, and remember the area also draws fights over the Mid-Boss.
Spawn timers, respawn time and crate routes

These are the timers to keep in your head, with the source for each:
| Where | First spawn | Respawn | Source |
|---|---|---|---|
| Most crates (lanes, Theater, rooftops) | 3:00 | 3 min after breaking | Wiki |
| Tunnels / underground | 5:00 | 5 min | Wiki |
| Sunken Plaza mist (4 crates) | 5:00 | Not stated | Video only |
| Bell Tower (4 crates) | 5:00 | Not stated | Video only |
| Room above the Mid-Boss pit (Mid / Pit) | 10:00 | 3 min | Wiki |
Two rules from the wiki change how you route. First, the crate respawn time is delayed if the souls are left on the ground past the normal respawn window. Pick up what you break, or that spot stays empty longer. Second, the wiki says respawns are "usually" 3 minutes and can occasionally be delayed, so don't plan to the exact second.
skip Avoid long detours to lone crates early in lane, like the one next to Archmother's yellow spawn or the Theater crate near mid. The creator himself only grabs those when he's already passing. Good crate routes chain several boxes off a zipline or a trip back from base: the Theater loop, the York / Factory hallway loop, and the Hidden King green zipline pair.
Are these locations still current after the Oct 14 patch?

The video went up on October 6, 2026, a week after City Never Sleeps (September 29), the update that added Tough Crates. At least one other creator has claimed that heavy crate spawns were changed after launch. As of this guide's check (October 19, 2026), the wiki's patch notes don't back that up. The Crate page's update history has no crate change after the September 29 entry that added Tough Crates. The patches since then (September 30 through October 16, including the October 14 minor update) only changed heroes, items and Street Brawl. None of them mention crates or breakables.
So the locations shown here are the newest list we could verify. The creator also says he may have missed a few on a map this big. If you find a crate that isn't listed, it's more likely a gap in the walkthrough than a new spawn.
How this guide was fact-checked
- From the wiki (deadlock.wiki, checked October 19, 2026): the name Tough Crate and what it looks like; that it needs a Heavy Melee; soul values (46 base, +4 per minute, 100% drop, against 23, +2 per minute, 60% for regular crates); the 3-minute standard spawn and respawn; the 5-minute Tunnel timer (changed September 16, 2026); the 10-minute spawn above the Mid-Boss pit; the respawn delay when souls are left uncollected; the Puddle Punch exception; Heavy Melee timing and cooldowns; Sinner's Sacrifice first spawning at 8 minutes; and the patch history from September 29 to October 16, 2026.
- From the video (Ryezor, "Every NEW Heavy Crate Location in Deadlock (City Never Sleeps)", uploaded October 6, 2026): every individual crate location, the 73-crate total from the video description, the creator's routes, and the 5-minute timers for the Sunken Plaza mist and the Bell Tower. The wiki has no Tough Crate location map, so locations rely on what the video shows on screen. Area names come from the minimap labels in the frames.
- Corrections and clarifications: the video calls them heavy crates. The wiki name is Tough Crate, and this guide uses both. The video gives no timer for the two underground crates; the wiki's Tunnel timer (5 minutes, 5-minute respawn) is added here. The mist and Bell Tower 5-minute timers aren't on the wiki, so they're credited to the video. The note that spawns changed after launch isn't supported by any wiki patch note up to October 16.
- Not double-counted: the transcript doesn't give per-lane totals, and the creator admits he may have missed some. So this guide repeats the video's 73 total but doesn't invent a per-lane count.
What this guide doesn't answer
- Buff Containers (golden statues). They appear next to several crates in the screenshots but drop stat buffs, not just souls. That's a separate topic.
- Regular crate locations. The wiki counts 518 crates of all kinds on the map. Mapping every small box isn't useful for routing.
- Haunts and full jungle routes. Haunt camps, their timers and a complete soul farming route are covered in separate guides. This page only covers where the Tough Crates are.
- Exact soul value at a given minute. The wiki gives a base value and a per-minute gain but no worked table, so we don't publish minute-by-minute numbers.
- Healing Snacks and other September 29 additions. They're new breakables or pickups too, but the video doesn't show them.
Frequently asked
Where are the heavy crates in Deadlock?
Heavy crates (the wiki calls them Tough Crates) are on every lane of the City Never Sleeps map. Each green and yellow lane has two next to the bridge, one at the side shop and one by the bridge buff, and some have one at the secret shop. The biggest clusters are inside Archmother's Theater, four in the Sunken Plaza mist, four at the Chinatown Bell Tower, and eight around the Mid-Boss pit. The source video counts 73 in total.
How do you break Tough Crates in Deadlock?
Only a Heavy Melee breaks them: hold the melee key (Q by default) to charge the punch. Shooting or dashing through a Tough Crate doesn't work like it does on regular crates. A Heavy Melee has a 1 second cooldown when it hits and 1.3 seconds when it misses, costs no stamina and works in the air. The wiki notes that Puddle Punch's heavy melee upgrade can't destroy them.
When do heavy crates spawn and respawn in Deadlock?
Most crates first spawn at 3:00 and respawn about 3 minutes after you break them. Crates in the underground Tunnels spawn at 5:00 and respawn every 5 minutes. The crates above the Mid-Boss pit spawn at 10:00. The source video says the four Sunken Plaza mist crates and the four Bell Tower crates spawn at 5:00. If you leave the souls on the ground, the respawn is delayed.
How many souls does a Tough Crate give in Deadlock?
According to the wiki, a Tough Crate is worth 46 souls base plus 4 per minute of game time, and it always drops souls. A regular crate gives 23 base plus 2 per minute and only drops souls 60% of the time. Scaling starts at minute 0, so the first Tough Crate you punch at 3:00 is already worth more than its base value.
Did the Oct 14 patch change heavy crate locations in Deadlock?
No change to crates was documented as of October 19, 2026. The wiki's Crate update history has nothing after September 29, 2026, when City Never Sleeps added Tough Crates. The patches from September 30 to October 16, including the October 14 update, only changed heroes, items and Street Brawl. So the October 6 locations still match the newest patch notes.
Read next
Deadlock Map Guide: Lanes, Districts & New Locations
A tour of Deadlock's reworked City Never Sleeps map: the nine locations on the York, Broadway and Greenwich lanes, the Theater, Chinatown, Haunted Lot and Plaza districts, and how the Bell Tower and Sunken Plaza jackpots work. Ends with a callouts cheat sheet.
Deadlock Haunts Guide: All Jungle Camps & Sinner's Sacrifice
Every Haunt family from Deadlock's City Never Sleeps jungle rework: where it lives, which special attack to dodge, and how camp tiers set souls and respawn timers. Also covers the new fast red-light jackpot on Sinner's Sacrifice machines.
Deadlock Vents Guide: Steam Vents, Tunnel Vents & Jump Pads
Deadlock's three kinds of vent explained for the City Never Sleeps map: Steam Vents that hide you and give light regen, Tunnel Vents only four heroes can use, and Jump Pads. Covers what reveals you, combat lockouts and how to build rotation routes around them.
Deadlock Mid Boss Guide: Rejuvenator, Timing & Steals
A deeper Deadlock Mid Boss guide: current stats and rewards, how the Rejuvenator crystal and its 3-minute credits work, when to take the boss, and the punch-and-parry pattern for stealing or securing it.