
Avoiding common mistakes in Manor Lords makes your settlement run smoother, grow faster, and stay ready for late-game challenges. You’ll be able to keep logistics efficient, manage reserves, set up productive farms, balance wood production, and support population growth — all with practical steps and numbers you can check off as you go.
Quick answer
| What | Answer |
|---|---|
| Market stalls for first 15 houses | 3 stalls |
| Reserve target | 12 months |
| Ox cooldown | 30 days |
| Approval for immigration | 50% |
| Families per month at 75+ approval | 2 families |
| One family per month range | 50 to 74 approval |
Set up storage and markets to reduce walking time
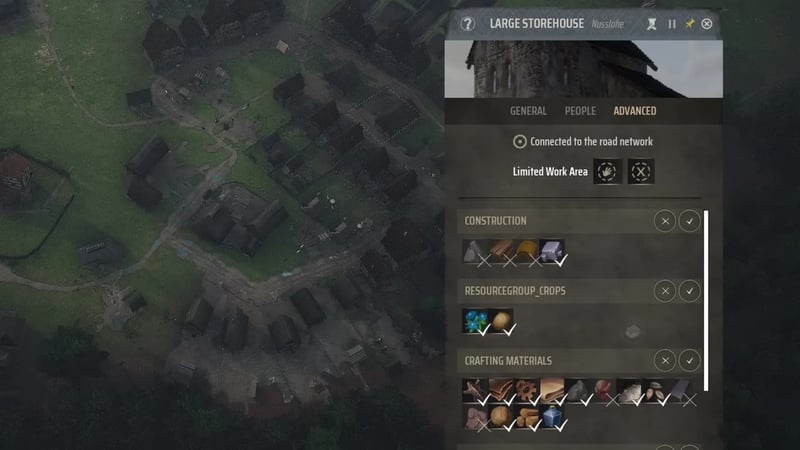
Keeping worker travel short prevents bottlenecks in every supply chain. Storage buildings — Storehouse and Granary — let workers use hand carts to move up to ten items at once, vastly increasing efficiency compared to production buildings where workers carry one item at a time.
- Workers won’t pull items across town for no reason 1:00
- Reduces walking time and speeds up supply 0:30
- Stalls pull food directly from granaries 1:28
- Cut travel and improve family approval 1:28


Stock the right number of market stalls
Managing market stalls ensures every family gets the resources they need during monthly distribution. Stall inventory is capped according to the number of burgage plots (houses); goods are delivered to houses without families visiting the stalls. When supplies run out, houses closest to the stalls get priority.
| Housing count | Stall count recommendation | Notes |
|---|---|---|
| First 15 houses | 3 stalls | Food, clothing, and firewood stalls should be filled first |
| Next 25 houses | +3 stalls | Add per 25 houses — aim for 9–12 stalls at 75 houses |
| Per stall storage | 50 space | Bottlenecks usually happen at food and clothing stalls due to item variety |
Upgrade the houses nearest to the market stalls first. If stock is tight, these homes receive goods sooner.

Keep enough reserves before you expand
Reserve management is critical before expanding population or new production lines. Sudden increases in population or demand can turn a six-month buffer into less than three months, triggering shortages across food, firewood, clothing, and ale.
Aim for at least 12 months of reserves across all necessities to protect your settlement from cascading shortages. This cushion is especially valuable when managing multiple towns — if you get distracted and neglect a secondary settlement for several months, the extra buffer buys you time to fix problems.

Add oxen and hitching posts before the workload piles up
Timber transport is a common bottleneck, as logging, building, and plank production often compete for oxen. Each oxen is critical for keeping construction and industry moving.
- Each post costs one log 5:22
- Order proactively to avoid long waits 5:22
- Each farmhouse needs its own ox and hitching post when using the perk 5:22

Oxen price may differ — Oxen are listed in-game at 20 regional wealth per order. Older guides may quote gold instead; always confirm the currency before purchasing.
Split fields so farms finish before the season changes
Farming efficiency relies on having the right workers, oxen, and field layout. If fields are too large, planting or harvest may fail before the season changes, wiping out crops instantly.
- Late start means zero yield for the year 5:45
- Unharvested crops are destroyed by rotation 6:40
- Workers complete small sections for partial yield even if full field cannot finish 6:40
- Workers and oxen can simultaneously plow different plots 7:18

Rest troops and use spearwalls correctly
Military effectiveness depends on stamina and proper formation. Militia units with zero stamina have almost no attack or defense; rallying or moving troops causes them to sprint, draining stamina rapidly.
- Stamina is a multiplier for all combat stats 7:43
- Spearmen impale ability reflects charge damage; bonus applies only when not moving 8:17

Move wood production or grow new trees instead of micromanaging
As nearby trees disappear, wood buildings become less efficient. You can move production structures for free with the four-arrow button, or set up a Forester Hut to regrow trees long-term.
- Connect new locations to a road to enable wheelbarrows 8:47
- Items can be destroyed in transit by weather 9:16
- Foresters regrow trees except during winter; pull workers in winter 9:16
- Camp inventory is linked across all camps for backup storage 9:44

Keep housing ready so population can grow
Approval rating alone will never grow your town if you don’t have spare housing. Immigration arrives slowly, bottlenecked by approval level and available homes:
- At 50–74% approval, expect one family per month if empty houses exist.
- At 75%+ approval, expect two families per month.
- Keep two to three empty houses for steady growth at lower approval; use a bigger cushion for higher approval.
- Build houses in batches of five or more — the game packs them tightly, letting you fit more burgage plots into a given area.
- If your target is 500 population, at one family per month you’ll need roughly 62 months minimum. Building homes only as needed doubles that time.

Import scarce goods when local production is inefficient
Differences in regional resources mean you’ll often be short on materials or products your settlement cannot easily supply. Each region starts with two rich resources, and perks can make one infinite — everything else is limited.
| Import strategy | When to use | Example profit |
|---|---|---|
| Import base materials and craft locally | Labor is idle, regional wealth is limited | Making helmets from imported ore saves 3 gold/helmet with the perk, breaks even after about 27 helmets |
| Import finished goods | Labor is scarce, regional wealth is available | Costs more gold upfront, but saves management time when resources are bottlenecked |
One family is worth about 40 gold per month in production, and if your village makes about 2,000 gold per month with 50 families, factor labor efficiency into import decisions.

Also worth knowing
- Field size uses “morgans” as a measurement. In practice, one ox can plow about one morgan in a morning, making field splitting easier to reason about; split fields accordingly when assigning oxen.
- Logging camps work as movable storage. You can build several and rotate them, or duplicate, to avoid relying on one camp; their inventories are linked, so timber bottlenecks recover faster.
- Farm plot size is adjustable. Use the plot-size controls (mouse wheel) so a large blueprint doesn’t force you to build five-plus houses. You can build fewer or more per plot.
- Early harvesting avoids fertility loss. If crops mature before September, harvest early to prevent further fertility decrease and wasted labor.
Frequently asked
How many market stalls do I need early on in Manor Lords?
Three stalls are enough for the first 15 houses. After that, add about three more stalls for every 25 houses, with roughly 9 to 12 stalls for 75 houses. Food and clothing stalls usually become the bottleneck because they carry multiple item types but have limited storage.
How many months of reserves should I keep?
A comfortable target is at least 12 months of reserves. That cushion helps absorb sudden population growth or a bad season without immediately causing shortages of food, firewood, clothing, or ale. If you are managing more than one settlement, the extra buffer is even more valuable.
When does population start to grow?
Population growth starts once approval reaches 50% or higher and there is spare housing available. From 50% to 74% approval, one family moves in per month. At 75% or higher, two families move in per month.
What should I do if my farms are too large to harvest in time?
Split the field into smaller plots while keeping the same total area. Smaller plots let workers and oxen finish individual sections before the season changes, so you still get some yield even if the whole field cannot be completed. Large single fields are much more likely to waste a full year.
Read next
Manor Lords Perfect Start and Historical City Guide
Build a self-sustaining early settlement that can survive poor fertility, grow food variety, and scale into a Tier 4 town. This plan focuses on historical burgage layouts, trade income, livestock, and the production chain needed to keep upgrades moving.
Manor Lords Mega City Start Guide
This guide plans the opening phase of a large settlement in Manor Lords, from stabilizing food and fuel to unlocking church access, trade, and industrial production. It is aimed at players who want a practical early-to-mid game setup for a sprawling city on the Wide Valley map.
Manor Lords Kargweiger Mega Farm Guide
A planning guide for turning a new region into a large farming settlement with workable early survival, modular farm layouts, and later food-processing infrastructure. It is aimed at players who want a practical build path for a fertile region that can actually keep pace with harvest windows and population growth.
Manor Lords Hardest Achievement Guide
A structured route for surviving the hardest achievement run, from the first settlement setup to the final campaign push. It focuses on efficient early economy, approval management, trade, and the military steps needed to clear bands of enemies and claim territory.