
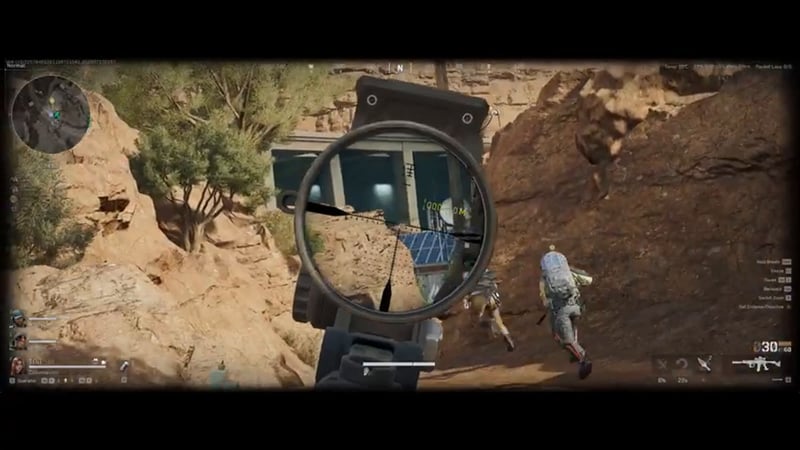
🎯 The core idea
Delta Force Operations currently has three difficulty tiers — easy, normal and hard — and the jump from easy to normal is a genuinely sharp difficulty spike, demotivating enough that plenty of players quietly stay on easy rather than push through it. This covers what actually changes when you move up: gear and ammo investment outside the raid, learning spawns and sound, building a balanced team, getting over gear fear, and the fight habits (positioning, full kills, knowing when to leave) that separate players who survive normal from players who bounce off it.
- free costs nothing
- cheap small cost
- setup needs preparation
- grind pays off slowly
- skip the thing to stop doing
Quick answer: Normal drops Easy's gear cap and minimum requirement, raises the ammo baseline to purple (blue won't cut it), and removes the ammo-restriction safety net Easy has. Move up once you can read spawns, bring a balanced squad (at least one Recon), and you're ready to accept occasional gear loss rather than treating your stash as a museum piece.
Easy vs Normal at a glance
| Easy | Normal | |
|---|---|---|
| Gear requirement | None (plus a gear cap) | No minimum, no cap |
| Ammo restriction | Capped/restricted | None - bring what you can afford |
| Armor/ammo baseline | Blue-tier is viable | Purple is the baseline; blue generally falls short |
| Best used for | Learning loot routes and map layout | Applying that knowledge under real PvP pressure |
Hard mode isn't in this table. As the guide's own "What this guide doesn't cover" section explains, no current instructional hard-mode source exists in this catalogue's material - recent hard-mode content is challenge/highlight gameplay rather than a structured breakdown, so a Hard column here would be invented rather than verified.
You don't actually have to play normal or hard
The most important piece of advice in this source isn't a mechanical tip at all: if the experience of switching from easy to normal or hard mode takes away from your enjoyment of the game, staying on easy is completely fine. This guide covers how to make that transition easier if you want it, not a case for why you should.
Changes outside the raid: gear, ammo and prep

Learning the map, sound and team composition

Learning preset spawns is the single most important map-knowledge skill for the transition. Running straight to the highest-loot area from your own spawn is a common mistake — normal-mode opponents know the spawns too, so that instinct puts you at an immediate disadvantage rather than an advantage. Use spawn knowledge to anticipate where fights are likely to happen instead.

Sound is a core information source in normal, and it should directly influence your operator choices: always bring at least one recon operator so you can act on what you hear rather than just noting it. A team of three aggressive assault operators gives you no information, and three supports gives you no offensive potential — balance the comp around actually using the sound and map information you're gathering.
Don't avoid PvP, and get over gear fear
Purely looting and avoiding fights won't help you improve in normal, since you'll eventually get forced into a fight regardless and have no experience for it. If a map offers both easy and normal difficulty options, use easy specifically to learn loot routes, then bring that map knowledge into normal fights rather than avoiding them there too.

Gear fear is real and expected — losing gear, sometimes tens of millions in a single bad run, is part of the transition. The fix isn't avoiding the loss, it's timing it: bring better gear into raids when you're feeling confident, not out of frustration after a bad run, and don't let a stash become a museum of gear you're too afraid to actually use.
Winning actual fights: positioning over aggression

Slowing down matters, but going too slow is its own mistake — the goal is being decisive about which pace you're playing at and committing to it with your team, since a mismatched team (one player pushing fast while two hold slow) loses regardless of who's "right." Positioning is where the earlier prep work (gun range knowledge, spawn awareness, sound reading) actually pays off: putting yourself 2 meters from an enemy with a sniper rifle is a positioning failure, not bad luck. Holding a static angle is also a losing habit — jiggle-peeking and taking unanticipated angles is what separates players who win repeated fights from players who get their head taken the moment they commit to one lean.

Two under-communicated habits from this source: prioritize full kills over downs whenever it's safe to do so (a downed enemy has a much shorter window to be revived than a fully dead one takes to lose entirely, and a confirmed body is a fixed point you can cover — a crawling survivor isn't), and don't draw fights out past a few minutes. A long fight almost guarantees a third party arrives, and that fresh team chooses when to engage while you're already low on ammo and meds — the default assumption in any fight running past five minutes should be that someone else is now inbound.

Reviewing a raid afterward with this decision-making lens -- was the loadout right, was the positioning informed, was the exit timed well -- is what turns a rough session into actual progress rather than just repetition.
Know when to leave, and when not to shoot

Content creators playing at a pinnacle skill level create a "clear the whole lobby" instinct that isn't the right model to copy directly. On maps where extraction doesn't require winning every remaining fight, taking your kills, spending your meds, and leaving with what you've got beats pushing for one more engagement you don't need. The same patience applies before a fight starts: watching two other teams fight it out and waiting for armor to break or a res attempt to begin, rather than jumping in immediately, is a legitimate and frequently-used tactic — including solo.
What this guide doesn't cover: hard mode
This guide is specifically about the easy-to-normal transition rather than normal-to-hard. No current instructional hard-mode explainer exists in this catalogue's source material — recent hard-mode content is challenge or highlight-reel gameplay rather than a structured breakdown, and older explainers predate several difficulty and loot rebalances since. Hard mode remains a genuine, unfilled gap rather than something this guide papers over.
How this guide was fact-checked
This guide is sourced from Consmaster's "Moving From EASY to NORMAL Difficulty Delta Force Operations" (16:35, published 2026-07-18, 7K views) — recent enough that the age-related caution applied to older content in this catalogue doesn't apply here. Every tip is presented as this source's own experienced-player advice rather than an official game mechanic list, and is reported as such; mechanical claims that read as game facts rather than strategy opinions (the armor/ammo tier baseline shift between easy and normal, the existence of RIP ammunition, hearing-range helmet attributes) match this catalogue's own beginner and consumables guides.
What this guide doesn't answer
Beyond the hard-mode gap noted above, this guide doesn't give exact loot or reward numbers by difficulty tier, since the source frames its advice around decision-making and habits rather than a stat comparison table. It also doesn't cover specific map callouts or spawn locations in detail — the source references its own separate Space City spawn guide for that level of specificity rather than listing spawns here. Finally, the fight-technique advice (jiggle-peeking, pacing, full kills) is general positioning philosophy rather than gun-specific or map-specific tactics, and is presented that way rather than as a substitute for this catalogue's own weapon-build and map guides.
Read next
- New to Delta Force entirely? Start with the Beginner Guide.
- For the habits that keep you alive once you're in Normal, see the Solo Operations Guide.
- If a bad run in Normal costs you everything, the Extraction Strategy & Survival Guide covers how to not lose it all at once.
Frequently asked
Do I have to play normal or hard mode in Delta Force?
No. If switching to normal or hard takes away from your enjoyment, staying on easy is completely fine - this guide covers how to make the transition easier if you want it, not a case for why you should.
What gear should I bring into normal difficulty in Delta Force?
Purple-tier armor and ammo as your baseline - blue generally won't cut it any more. Normal also drops easy's gear cap and minimum requirement, and removes its ammo restriction, so bringing the bare minimum is a losing strategy unless you're specifically running a no-risk loot route.
How do you deal with gear fear in Delta Force?
Accept that losing gear, sometimes tens of millions in a single bad run, is part of the transition. The fix is timing, not avoidance: bring better gear in when you're feeling confident, not out of frustration after a bad run, and don't let your stash become a museum of gear you're too afraid to use.
What's the biggest mistake players make in normal-mode fights?
Rushing straight to the highest-loot area from spawn - normal-mode opponents know the spawns too, so that instinct puts you at an immediate disadvantage instead of an advantage. Use spawn knowledge to anticipate where fights will happen rather than to beeline into one.
Does this guide cover hard mode in Delta Force?
No. This guide is specifically about the easy-to-normal transition. No current instructional hard-mode breakdown exists in this catalogue's source material - recent hard-mode content is challenge or highlight-reel gameplay rather than a structured explainer, so that gap is disclosed rather than papered over with invented detail.
Read next
Delta Force Season 11 Battle Pass: Rewards & Merit Cards
What's in Season 10's battle pass (Tempest at tier 80, CI-19 at tier one, N-Two free at tier 15, the Mandelbrick preview) plus how merit-card XP boosts actually work for players trying to level up faster.
Delta Force Gizmo Guide: Engineer Abilities & How to Play
Gizmo's full kit breakdown -- Firewall passive, Smoke Mine, Crawler Nest and the T.I.M. netting ultimate -- plus which maps and playstyles let his chokepoint-denial kit actually shine.
Delta Force Ranked & Ranks Explained: Merit Points, Marshal
Delta Force's Ranked mode is a toggle on ordinary Warfare and Operations matches, not a separate queue, and it tracks Merit Points rather than wins. Full breakdown of the rank ladder, Marshal, Warfare vs Operations scoring, and the fastest way to climb — with an outdated tier claim corrected against current data.
Delta Force Assault Guide: Vyron, Nox & D-Wolf (S11)
Assault is Delta Force's all-in-one entry-fragger class, and most players don't use its full gadget pool. Full breakdown of the shared class gadgets, D-Wolf, Vyron and Nox's individual abilities, and the best rifles to run — with a cross-check against Season 10 balance changes.