
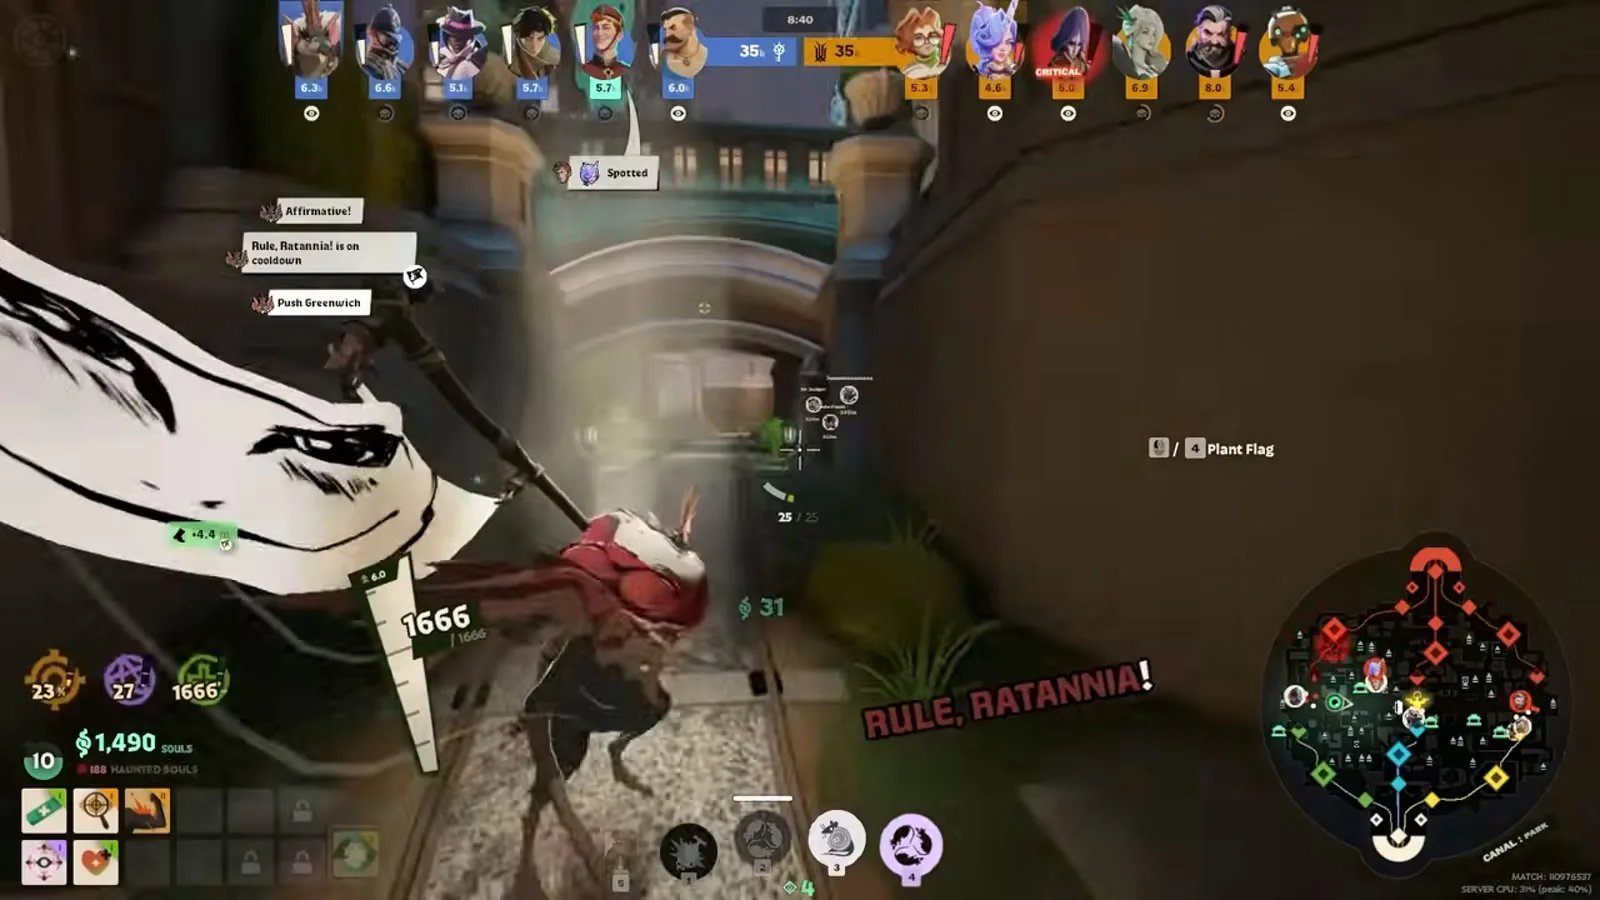
🎯 The core idea
Rat King is a gun-focused bruiser who wins by staying alive in the middle of a fight. Rat Swarm shreds bullet resist for your whole team, Royal Pestments turns enemy bullets back on them, and Rule, Ratannia! can decide a Rift or Mid-Boss fight by itself. Build gun damage plus health, not spirit, and save your ultimate for objectives.
- free costs nothing
- cheap small cost
- setup needs preparation
- grind pays off slowly
- skip the thing to stop doing
Who Rat King is and what his role looks like

Rat King joined Deadlock on October 2, 2026. He was the first of the six heroes in the City Never Sleeps rollout, followed by Baba, Solomon, Deadman Danny and Violet, with Nurse Harrow listed on the wiki for October 20. His kit got one balance pass on October 5, 2026. The video this deadlock rat king guide is based on (Daniway, uploaded October 7) came out after that patch, and its numbers match the current wiki. The wiki's update history lists no Rat King changes after October 5, so everything below is current as of October 19, 2026.
The video calls him a frontliner and bruiser, and that is a fair way to play him. The wiki doesn't give him an official role label. Every part of his kit either deals bullet damage, lowers enemy bullet resist, or protects him from bullets. Think of him as a tough gun hero who wants to be close to the enemy, not a pure tank who only absorbs damage.
His base stats from the wiki:
| Stat | Value |
|---|---|
| Health | 800 (+50 per boon) |
| Health regen | 2 |
| Move speed | 6.8 m/s |
| Stamina | 3 |
| Spirit power | 0 (+1.1 per boon) |
There's no official deadlock rat king tier ranking from Valve. Community tier lists put new heroes in different places almost every week, so this guide is about how to play him well rather than where he ranks.
Sovereign's Decree and the tunnel network

His gun, Sovereign's Decree, is a rapid-fire spreadshot. The wiki confirms the video's numbers: each shot fires 2 pellets of 6 damage at 5 shots per second, which works out to 60 damage per second, with a 24-round magazine and a 2.8 second reload. One pellet always goes exactly where you aim and the other spreads. Damage falloff starts at 20 m and ends at 50 m, so fight up close.
His innate ability is moving through vents. Walk up to a tunnel vent and crouch (CTRL by default) to go underground, just like Rem. The wiki's tunnel page confirms what the video says:
- You get a 70% move speed boost in the tunnels. Sprint speed isn't multiplied.
- You can't enter while carrying the Soul Urn.
- You can't enter while in combat, which means dealing or taking damage in the last 4 seconds. The video leaves out one useful detail from the wiki: damage to your barrier doesn't count. If Royal Pestments soaks a hit, you can still drop into a vent.
- There's a short delay when you enter, and you can't slide into a vent.
free Use the tunnels to switch lanes, break boxes, run from a lost fight, or flank from somewhere the enemy isn't watching. The wiki also notes he can double jump higher than other heroes.
Scrap Grenade: zone damage that scales with your gun

Scrap Grenade throws a ball of scrap that explodes several times. Each explosion deals bullet damage and slows. Current wiki values:
| Scrap Grenade | Value |
|---|---|
| Cooldown | 26s |
| Detonations | 3 |
| Damage per detonation | 70 (weapon damage scaling x0.6) |
| Detonation radius | 8 m |
| Slow | 20% for 4s |
| Final big detonation slow | 40% for 4s |
The last explosion has a longer fuse, a bigger radius and more damage. The wiki doesn't list the exact big detonation damage or radius right now, so this guide doesn't give a number for it. The October 5 patch raised the damage per detonation from 65 to 70. The grenade bounces toward enemies within about 50 m.
How to use it:
- Throw it into tight spaces where enemies can't easily leave the area. The video's main example is the Mid-Boss pit while teams fight over the Rejuvenator.
- Since it scales with weapon damage, every gun item you buy makes it hit harder. The wiki adds that it also counts for conditional gun items: Close Quarters and Point Blank apply if the target is within 15 m of you when it explodes, Long Range and Sharpshooter beyond 15 m, and Opening Rounds if the target is above 50% health.
- skip Don't throw it at the feet of a good player standing in the open. Anyone can melee the grenade to knock it away. Throw it when they're already committed or stuck in a corner, and you can melee it yourself to send it further.
Rat Swarm: bullet resist shred for the whole team

Rat Swarm sends out rats that jump onto enemies. Each rat bites for 8 spirit damage every second, and each bite lowers the target's bullet resist by 1% for 4 seconds. A target can carry up to 5 rats, and the more rats are on them, the faster the bites come. Every bite refreshes the debuff, even though the on-screen timer doesn't show it.
| Rat Swarm | Value |
|---|---|
| Cast range | 50 m |
| Cooldown | 24s (cut from 28s on Oct 5) |
| Damage per bite | 8 spirit |
| Bullet resist per bite | -1% for 4s |
| Max rats on one target | 5 |
free The shred helps every gun hero on your team, not just you. At 50 m range it's your safest poke in lane, and because the rats hit every trooper in a line, it also clears waves from the side. The wiki adds two aiming tips: aiming upward makes the swarm wider, and looking straight up sends the rats behind you.
Enemies can shake a rat off by dashing on the ground or in the air. That's still good for you, because every dash spent on rats is stamina they can't use to dodge your grenade or escape your team. Send rats just before you go in, or at someone who has already used their stamina.
Royal Pestments: the armor that sends bullets back

Royal Pestments puts scrap armor on him for 6 seconds. The armor gives a barrier equal to 15% of his max health, and while it holds, each bullet that hits him has a 15% chance to bounce back at the shooter. At level 1 that's a 120-point barrier (15% of 800). It grows with every boon and every health item.
| Royal Pestments | Value |
|---|---|
| Duration | 6s |
| Cooldown | 22s |
| Barrier | 15% of max health |
| Bullet return chance | 15% |
Facts from the wiki that matter in fights:
- The barrier doesn't benefit from resists. It only scales with max health, so buy health, not bullet resist, to make it bigger.
- Unlike other barriers, it also blocks pure damage.
- Spellbreaker and Witchmail don't trigger while it's up. Return Fire stacks with it separately, so both can reflect the same bullet.
- An enemy Rat King's Scrap Grenade and ultimate damage can't be reflected.
setup Turn it on as you start a fight, not as you run away. The reflect only matters while they're shooting you. In lane it's what lets you win trades: wait for it to come off cooldown, then step forward.
Rule, Ratannia! and why it wins team fights

Rule, Ratannia! has two parts. First he charges up and carries the banner of Ratannia. While allies are near it they get bonus move speed, immunity to slows and reduced incoming damage. Then he slams the banner into the ground: the sewers erupt, dealing bullet damage, knocking up and slowing every enemy in the area, and rats come out that apply Rat Swarm to anyone they hit.
| Rule, Ratannia! | Value |
|---|---|
| Cooldown | 160s |
| Radius | 20 m |
| Banner aura | +3 m/s move speed, 15% damage reduction, slow immunity |
| Charge time (carrying the banner) | 10s |
| Slam damage | 200 bullet (scaling x1.2) |
| Slam slow | 40% |
| Flag duration after the slam | 12s |
The October 5 patch made his ultimate weaker: cooldown went from 130s to 160s, damage reduction from 20% to 15%, radius from 24 m to 20 m, and charge time from 12s to 10s. Its move speed bonus also stopped scaling with spirit. The video already uses the new values.
free You can carry the banner for up to 10 seconds before slamming it, so you can use it to rotate across the map and bring teammates along. With the speed and slow immunity, it also works for escaping. The wiki adds some rules the video skips:
- The slam damage and knockup only hit enemies in your line of sight when you slam. Don't slam around a corner.
- The speed and slow auras go through walls.
- If you get stunned while carrying the flag, the ability is refunded and you can activate it again.
- You can use items, jump and wall-jump while carrying it.
Rat King ability upgrades, tier by tier

Here are all twelve rat king ability upgrades, checked against the wiki. Tier costs are 1, 2 and 5 ability points.
| Ability | Tier 1 (1 pt) | Tier 2 (2 pts) | Tier 3 (5 pts) |
|---|---|---|---|
| Scrap Grenade | -8s cooldown (26s to 18s) | +70 damage per detonation | Adds an extra, bigger final detonation |
| Rat Swarm | +1 charge | Bigger swarm, +4s debuff duration | +8 damage and -1% bullet resist per bite |
| Royal Pestments | +4s duration | -8s cooldown, +15% bullet return chance | Caps all damage taken at 250 per hit, +10% max health as barrier |
| Rule, Ratannia! | +2 m/s move speed | +5s flag duration, +8 m radius | +150 damage, +10% damage reduction |
With all three upgrades, Rat Swarm bites twice as hard and shreds 2% per bite, Royal Pestments gives a 30% return chance on a 14s cooldown, and Rule, Ratannia! slams for 350 while your team takes 25% less damage. The Royal Pestments tier 3 cap means no single hit can deal more than 250 damage while the armor holds, which makes him very hard for burst heroes to kill.
The video says that at max level with Transcendent Cooldown the ultimate is on a 120s cooldown. That checks out: Transcendent Cooldown gives 25% ability cooldown reduction, and 25% off 160s is 120s.
Rat King skill order for lane and the first Rift

The video's rat king skill order goes like this.
Unlock order: Rat Swarm first for safe long-range poke, then Royal Pestments, then Scrap Grenade, then Rule, Ratannia!.
Upgrade order:
- Royal Pestments tier 1 and tier 2: longer armor and a shorter cooldown make trading in lane much easier.
- Scrap Grenade tier 1 for more frequent poke.
- All three Rule, Ratannia! upgrades. The speed, flag duration, radius and damage reduction carry you through the first Rift fight.
- Royal Pestments tier 3 for the 250 damage cap.
- Rat Swarm tier 1 and tier 2 for the extra charge and the longer shred.
- Scrap Grenade tier 2 and tier 3.
- Rat Swarm tier 3 last.
grind This is one creator's order, not an official one. It makes sense because it powers up the ultimate early, before the Rift and Mid-Boss fights. If your lane is too dangerous to stay in, taking Rat Swarm tier 1 earlier for a second charge is a reasonable change.
Rat King laning: poke first, fight once the armor is upgraded

The video is direct about this: he is weaker than most heroes in lane. Rat King laning comes down to three things:
- free Poke from range with rats and the grenade, and use both to clear waves in hard lanes.
- skip Don't go all-in before Royal Pestments has points in it. Most lanes will punish you hard if you do.
- setup When the enemy pushes forward, either back off or, if your armor is ready, turn and fight. The barrier absorbs a lot of a parried heavy melee and makes most trades go your way.
After lane he wants a lot of farm, since souls turn straight into health and damage. Use the vents to clear boxes and move between farm spots fast. Monster Rounds and its upgrade Cultist Sacrifice (see the items section) help you take camps faster.
Rat King tips for Rifts, Mid-Boss and pushing

Rule, Ratannia! is your objective tool. Rat King tips for the mid game:
- Bring the banner to every Unstable Rift and Mid-Boss fight you can. A team with the banner has speed, slow immunity and 15% to 25% damage reduction, while the other team gets knocked up, slowed and shredded.
- Use the speed while carrying the banner to arrive late and still make the fight.
- Slam on Walkers too. The video says a well-fed Rat King with his ultimate can tear down a large part of the enemy base.
- The grenade is at its best in the Mid-Boss pit, where enemies have little room to dodge.
The video recommends picking Sinclair against a Rat King team. That's the creator's opinion, not a wiki fact. The reasoning: Sinclair's ultimate, Audience Participation, copies an enemy's ultimate, so a copied Ratannia banner takes away your edge at objectives.
How to beat him: the Rat King counter guide

If you're fighting against him, this is the best rat king counter play based on the video plus the wiki's ability notes:
- skip Don't shoot him while Royal Pestments is up. Every bullet has a 15% chance (30% once upgraded) to come back at you. Shoot someone squishier and come back when the armor is down. The base cooldown is 22s.
- Don't focus him as your only target late in the game. With lots of health and a large barrier he soaks damage while his team wins the fight. The video says teams that do this have usually already lost.
- Melee the Scrap Grenade away, and dash to shake rats off early.
- Spread out when you see him carrying the banner. A team-wide knockup followed by another ultimate can wipe your team. The slam only hits enemies in his line of sight, so breaking line of sight works.
- Don't count on a stun to waste his ultimate. The wiki says stunning him while he carries the flag refunds the ability, so he can start it again right away. A stun only buys your team time.
- Pure damage doesn't get around the armor. Unlike other barriers, Royal Pestments blocks pure damage too.
Best Rat King build in Deadlock: items by phase

The video's main rule for the best rat king build in deadlock: don't build spirit. Go for gun damage, health and some cooldown reduction. Because Royal Pestments scales with max health, every health item also makes your barrier bigger. Corrupted items were removed from the game on October 2, 2026, so only the normal item versions apply. Stats below are from the wiki.
| Phase | Item | Cost | What it does for Rat King |
|---|---|---|---|
| Early | High-Velocity Rounds | 800 | +8% weapon damage, faster bullets |
| Early | Monster Rounds | 800 | +25% weapon damage and bullet resist vs NPCs, +1 out of combat regen |
| Early | Sprint Boots | 800 | +2 m/s sprint speed, +2 out of combat regen |
| Early | Swift Striker | 1,600 | +20% fire rate. The video says this is optional, but the gun feels weak late without it |
| Early to mid | Cultist Sacrifice | 3,200 | Eat an enemy NPC for 170% bonus souls and a long weapon damage and health buff |
| Mid | Ballistic Enchantment | 3,200 | Imbue an ability: +20% weapon damage per unique hero hit for 20s, +22% ability range |
| Mid | Berserker | 3,200 | +7% weapon damage per 120 damage taken (10 stacks), +8% bullet resist |
| Mid | Superior Cooldown | 3,200 | +20% ability cooldown reduction for your ultimate and armor |
| Mid | Fortitude | 3,200 | +375 health, regen when out of combat, +1.5 m/s move speed above 75% health |
| Late | Siphon Bullets | 6,400 | +15% weapon damage, steals max health from enemies with bullets |
| Late | Colossus | 6,400 | +25% base health (a bigger barrier) and +15% weapon damage |
| Late | Transcendent Cooldown | 6,400 | 25% ability cooldown reduction, ultimate down to 120s |
The video puts Ballistic Enchantment on Rat Swarm. Its claim is that the rats coming out of your ultimate also apply Rat Swarm, so the buff triggers from two abilities. The wiki confirms that ultimate rats apply Rat Swarm. It doesn't say whether that counts as a hit for Ballistic Enchantment, so treat this as the creator's tested advice. Berserker is easy to stack because Royal Pestments keeps you alive while you take hits. Fortitude works well because vents let you get out of combat and start regenerating quickly.
The Rat King late game build and what changes

grind The rat king late game build is about stacking max health and keeping your two best abilities, the armor and the banner, available as often as possible. Siphon Bullets steals health from enemies, which also makes your barrier bigger. Colossus adds 25% base health on top. Upgrading Superior Cooldown into Transcendent Cooldown brings Rule, Ratannia! down to 120s.
At this point he plays like this: banner in, armor up, rats and grenade on the backline, and keep shooting. Most of the enemy team should be shooting at someone else.
The rat king build for City Never Sleeps is still new. The hero is about two and a half weeks old, and builds will change with patches. The video suggests checking the in-game build browser for newer community builds, and that's the sensible next step once you know why each item above fits. For a rat king build in October 2026, the only balance patch so far is the October 5 one covered above.
How this guide was fact-checked
- Video source: Daniway's Rat King guide, uploaded October 7, 2026, after the October 5 Rat King balance patch and after the September 29 City Never Sleeps map rework. Frames in this guide are from that video.
- Checked against deadlock.wiki: Rat King's base stats, weapon (60 DPS, 2 x 6 damage pellets, 24 ammo, 20 m to 50 m falloff), every ability value and all twelve upgrades, the October 5, 2026 update history, the tunnel rules (70% speed, 4s combat lockout, no Soul Urn), the ability notes on reflection, line of sight and stun refund, and every item's cost and stats listed in the build table. The wiki's patch list shows no Rat King changes after October 5 (the October 14 patch only changed Baba, Deadman Danny and Radiant Regeneration).
- Matches the video: every ability number the video gives matches the current wiki.
- Corrections and clarifications: the auto-captions mangle several names. The correct spellings are Royal Pestments, Rat Swarm, Rule, Ratannia! and Cultist Sacrifice. The "run with the banner for 10 seconds" in the video is the 10s charge time. The flag stays for 12s after the slam, which the video doesn't mention. The 120s ultimate cooldown with Transcendent Cooldown was checked with the wiki's 25% cooldown reduction value.
- Not on the wiki: the exact damage and radius of the big final grenade detonation (the wiki currently shows no values), whether ultimate rats trigger Ballistic Enchantment, the skill order, the item choices and the Sinclair pick. These come from the video and are labeled that way.
What this guide doesn't answer
- Exact win rates or a tier placement. He's only been out a little over two weeks and community stats shift every week, so any number would be outdated quickly.
- Matchups against each of the other new heroes. Solomon, Deadman Danny, Violet and Nurse Harrow all arrived after the video, so it doesn't test him against them.
- Street Brawl. The wiki says his abilities aren't changed in that mode, and its random item draft doesn't follow a normal shop build.
- Enhanced item versions. The wiki lists Enhanced stats for many items, but this guide uses the standard shop values the video builds around.
- Lore and voice lines. Not useful for gameplay. The wiki's Rat King page covers them.
Frequently asked
What is the best Rat King build in Deadlock?
Build gun damage and health, not spirit. Start with High-Velocity Rounds, Monster Rounds, Sprint Boots and Swift Striker, then go Cultist Sacrifice, Ballistic Enchantment on Rat Swarm, Berserker, Superior Cooldown and Fortitude. Late game, add Siphon Bullets, Colossus and Transcendent Cooldown. His Royal Pestments barrier is 15% of max health, so every health item also makes the barrier bigger.
What is the Rat King skill order?
Unlock Rat Swarm first, then Royal Pestments, Scrap Grenade and Rule, Ratannia!. Put your first points into Royal Pestments tiers 1 and 2, then Scrap Grenade tier 1, then all three ultimate upgrades. Next comes Royal Pestments tier 3 for the 250 damage cap, then Rat Swarm tiers 1 and 2, Scrap Grenade tiers 2 and 3, and Rat Swarm tier 3 last.
How do you counter Rat King in Deadlock?
Don't shoot him while Royal Pestments is up: each bullet has a 15% chance (30% when upgraded) to bounce back at you. Shoot squishier targets until the armor drops (22s base cooldown). Melee his Scrap Grenade away, dash to shake off rats, and spread out or break line of sight when he carries his banner, since the slam only hits enemies he can see.
What does Rat King's ultimate Rule, Ratannia! do?
He carries a banner for up to 10 seconds that gives nearby allies bonus move speed, slow immunity and 15% damage reduction in a 20 m radius. Then he slams it down for 200 bullet damage, a knockup and a 40% slow, and rats come out that apply Rat Swarm. Since the October 5, 2026 patch it has a 160 second cooldown, or 120 seconds with Transcendent Cooldown.
Can Rat King use the tunnels in Deadlock?
Yes. Crouch next to a tunnel vent to enter, just like Rem. Inside the tunnels you get a 70% move speed boost. You can't enter while carrying the Soul Urn or if you dealt or took damage in the last 4 seconds, but damage that only hits your Royal Pestments barrier doesn't count, so you can still escape through a vent.
Read next
Deadlock Nurse Harrow Guide: Build, Abilities & Tips
A launch guide to Nurse Harrow, Deadlock's first left-click healer: what Leech Therapy, Wretched Vapors, Healing Needles and Lurking Terrors do with wiki-checked numbers, plus the support item build, skill order, laning plan and counters.
Deadlock Viscous Guide: Build, Abilities & Tips (Oct 2026)
A wiki-checked Viscous guide for Deadlock's City Never Sleeps patch: every ability and upgrade, the Splatter-first skill order, a damage-support item build by phase, the Time Waster and Puddle Punch melee builds, and how to beat Viscous.
Deadlock Warden Guide: Build, Abilities & Tips (Oct 2026)
A wiki-checked Warden guide for Deadlock's City Never Sleeps patch: every ability and upgrade, a skill order, the gun-and-ultimate item build by phase, the flask, Slowing Hex and Binding Word lockdown combo, and how to counter Warden.
Deadlock Ivy Guide: Build, Abilities & Counters (Oct 2026)
A current Ivy guide for Deadlock: what Entangling Thorns, Kudzu Connection, Stone Form and Air Drop do after the September 2026 patches, a support build by phase, combos for teamfights and how to counter her.